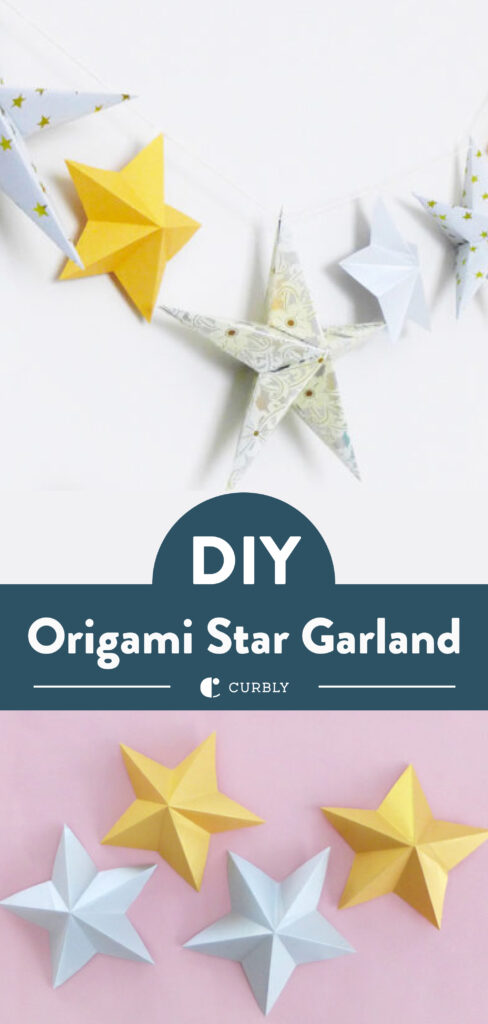
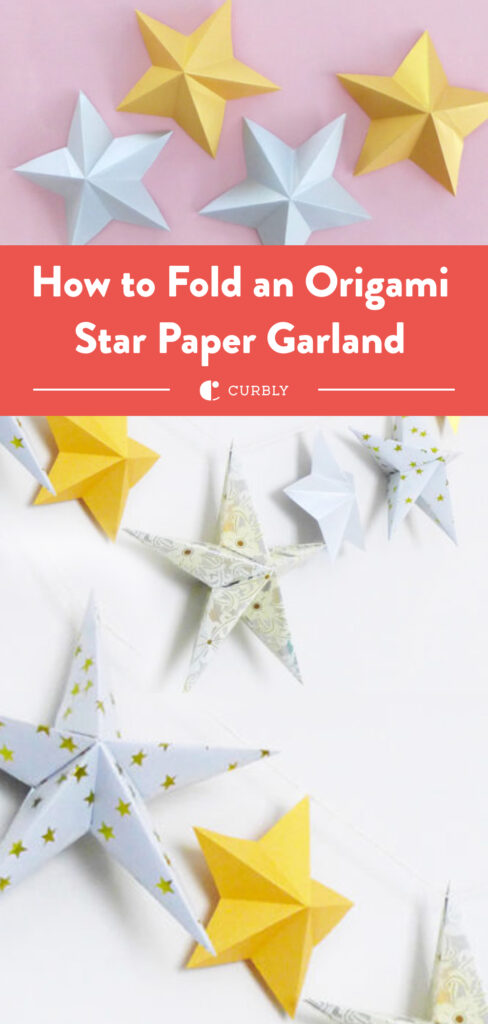
Today we’re talking about how to fold an origami star. Once you get it down, it’s easy to see how this technique can extend to any number of inspiring decor ideas.
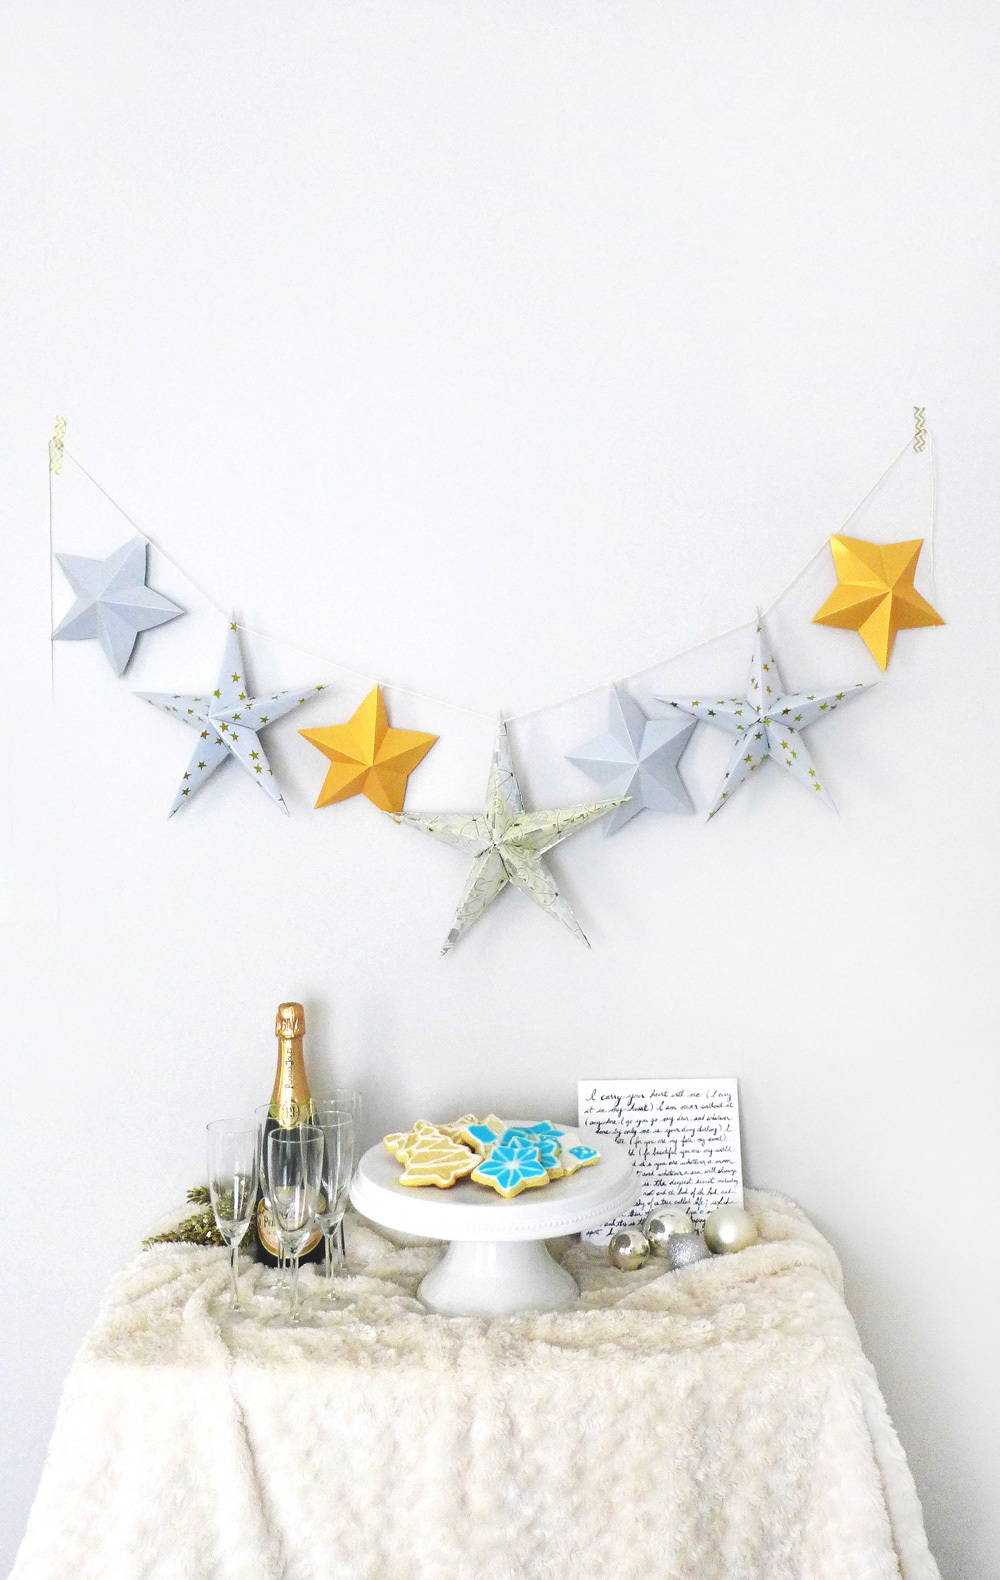
My favorite aspect of the holiday season is most certainly the decorating. It puts a festive spirit in your heart and a big smile on your face – the perfect recipe for holiday cheer.
And while holiday decor can mean a variety of different things to different people, I think we can all agree that the best holiday decorations are both beautiful and inexpensive! This is Linda from A Sweet Afternoon here to show you how to make an easy, origami star inspired paper star garland that’s as festive as can be, and that you can make with any paper you have and just a few basic craft items. By the end of this, you’ll know how to make two different types of origami folded stars for all your decorating needs!
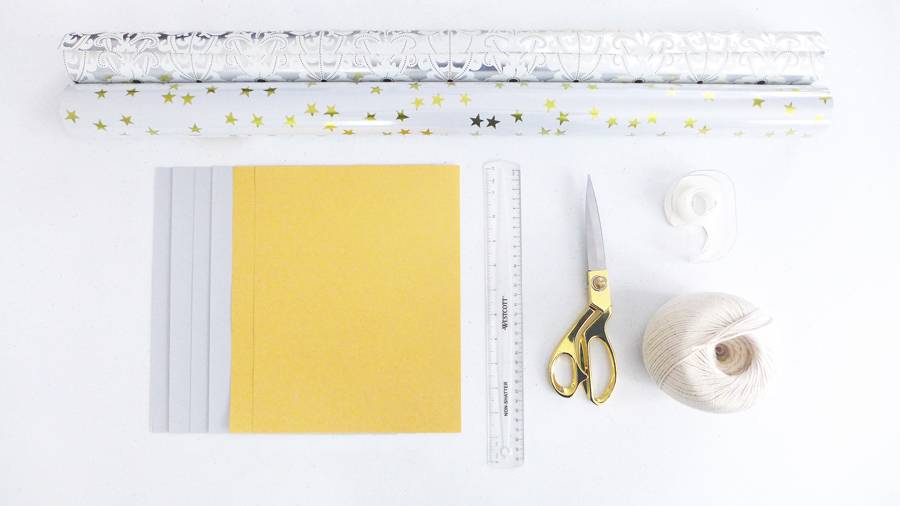
Materials
- Wrapping paper and/or silver and gold decorative paper of your choice
- Tape
- Scissors
- String
How to fold an origami star (first style)
1. Lay out a square of your paper of choice. I started with a 7” square of a pretty patterned wrapping paper to make my largest star.
2. Rotate your square 90 degrees so that it’s a diamond. Fold your paper half with the nicer pattern facing outward (if applicable), and then open it back to a diamond shape.
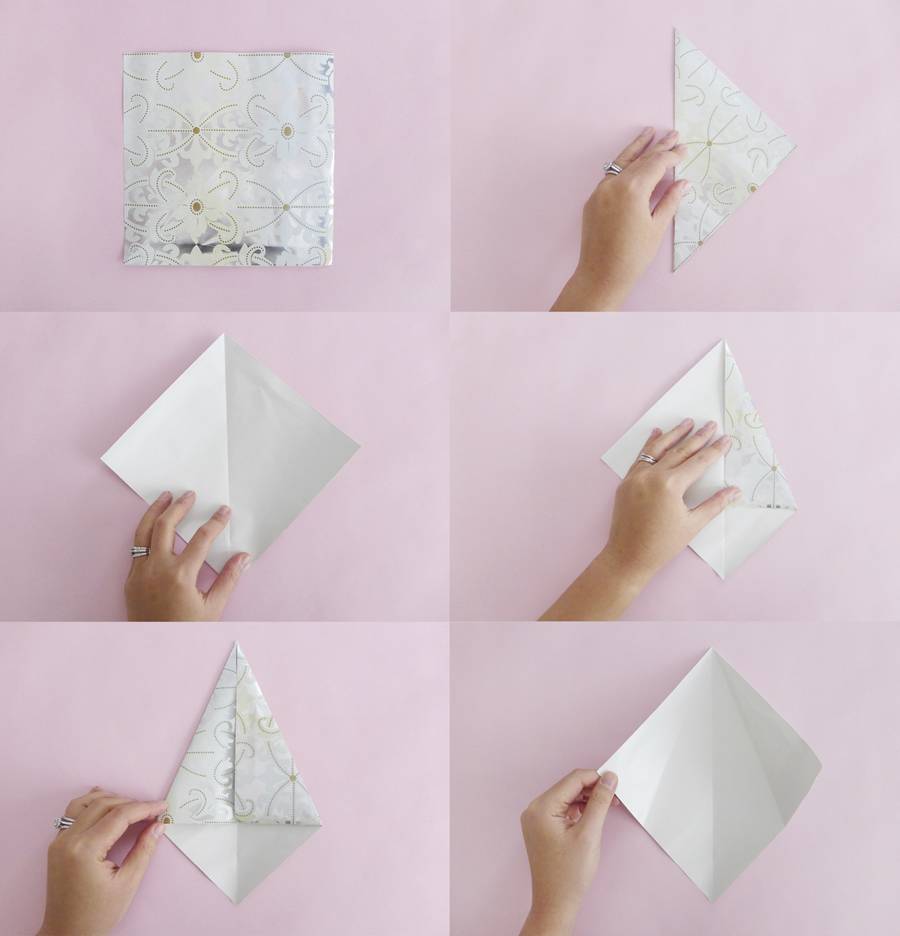
3. On both the right and left sides of your diamond, fold the flap inward to the center crease. Open it back up again to a diamond shape.
4. Using the bottom corner of your leftmost crease as the target, fold the bottom right half of your diamond inwards to that point and make a straight crease. This should result in a large rectangle flap.
5. Take the top right corner of the long rectangular flap and fold downwards onto itself. There should be a crease in the rectangular flap right where my hand is in the example photo that will guide this fold to the proper placement.
6. Close the left flap of the diamond. Now fold the entire paper along the middle crease. It should now somewhat resemble a paper airplane (but it’s not!)
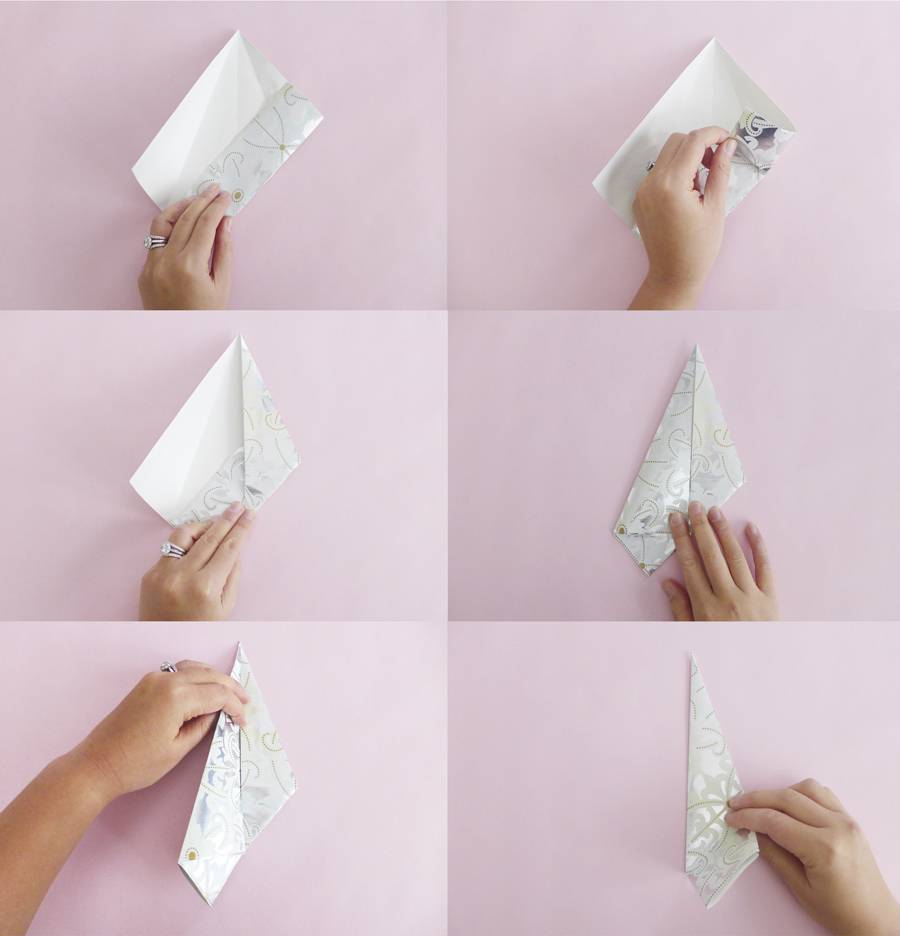
7. Take the bottom left flap and fold it upwards so that the line underneath lines up with your main center crease.
8. You should now see a small triangular flap hanging out on the left. Fold this piece inward.
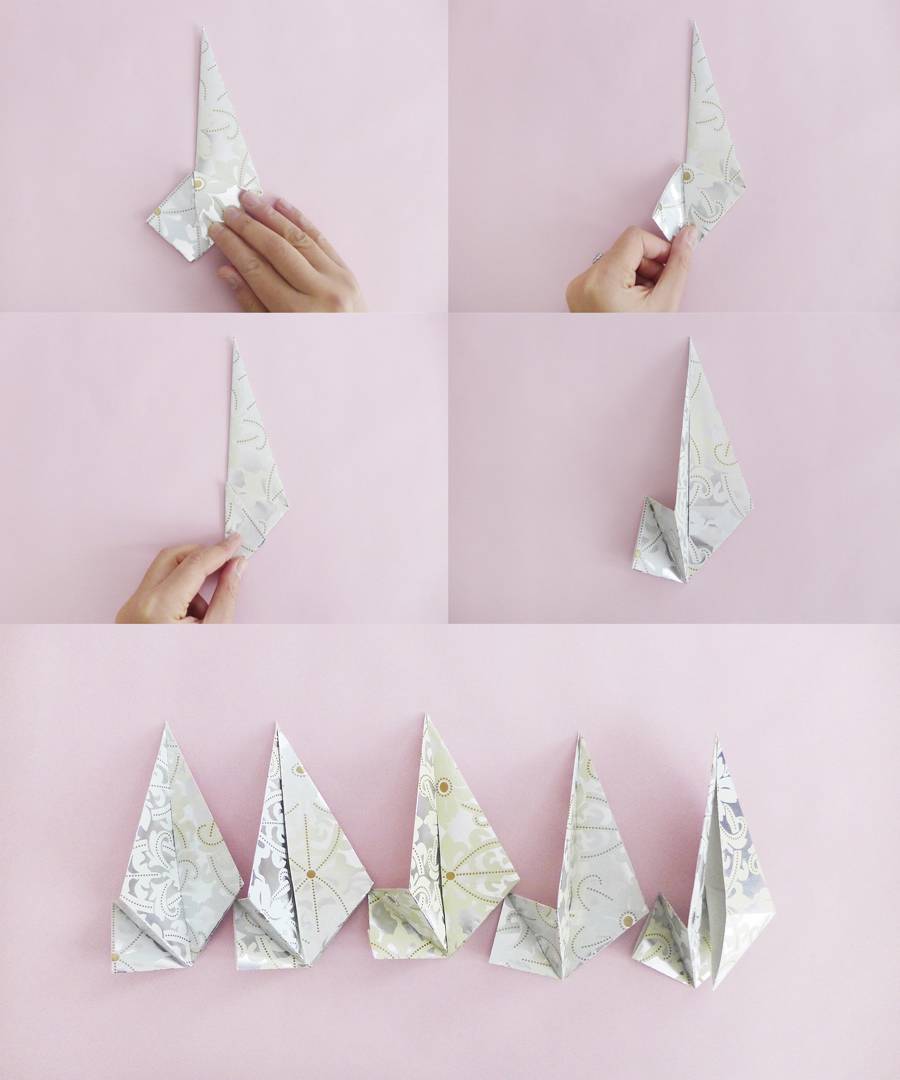
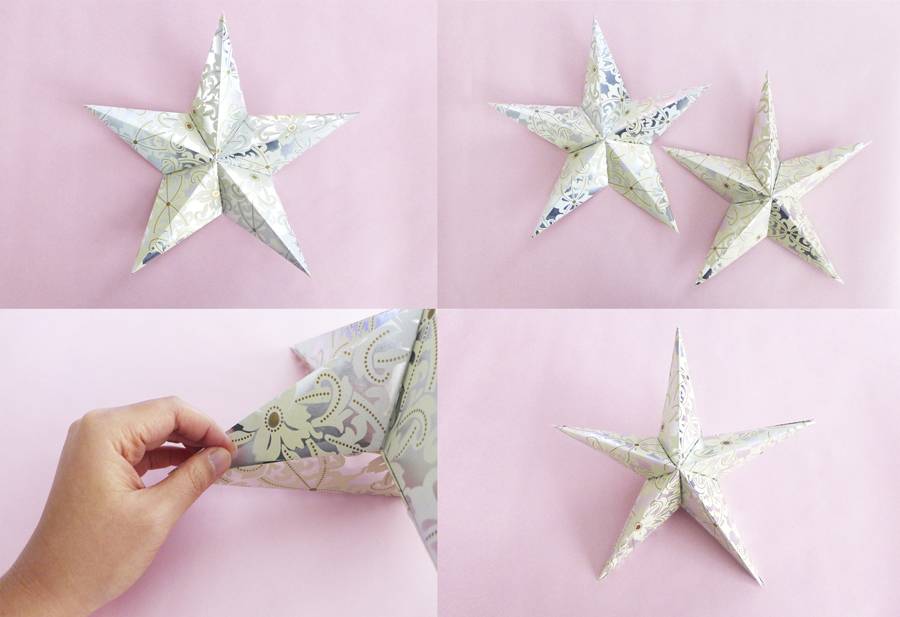
10. To attach the points to each other, take two folded points and lay them next to each other perpendicularly. You should find a flap on the inner right-side of your left folded point that opens from the bottom – slide your right folded point under this flap and tuck the small triangular flap into it (it’s easier to understand this visually, so check out the pictured steps!).
11. Repeat this with the rest of your folded points until you complete your star.
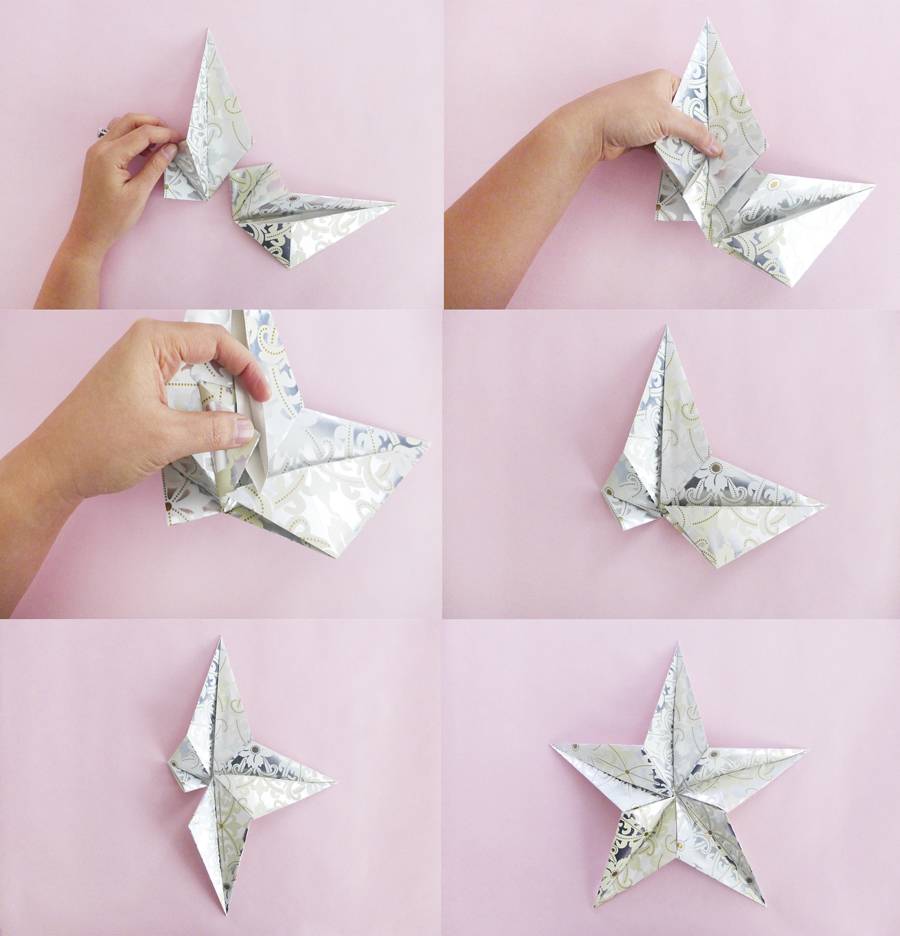
Your star is complete!
If your paper is sturdy, then you’re all finished here. But if you’re like me and used thin wrapping paper, or if you’d like your star to be 3-D, then you’ll need to reinforce your star. To do this, make a second identical star and secure them together with tape.
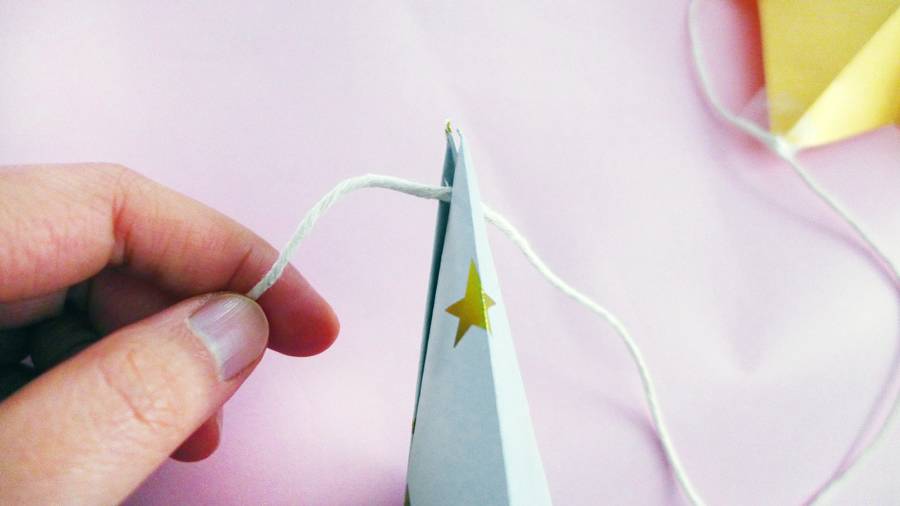
When attaching your star to your string for your garland, thread your string through the top opening between the front and back star and tape the top closed.
And that’s how you make your origami star! Make as many of these stars as you need to fill your garland. I made one of this size (which started with 7” square piece of paper) and two additional stars with 6” squares. I filled the rest of my garland with the second type of folded paper star that is even easier to make – learn how to make it below!
How to Fold an Origami Star (second style)
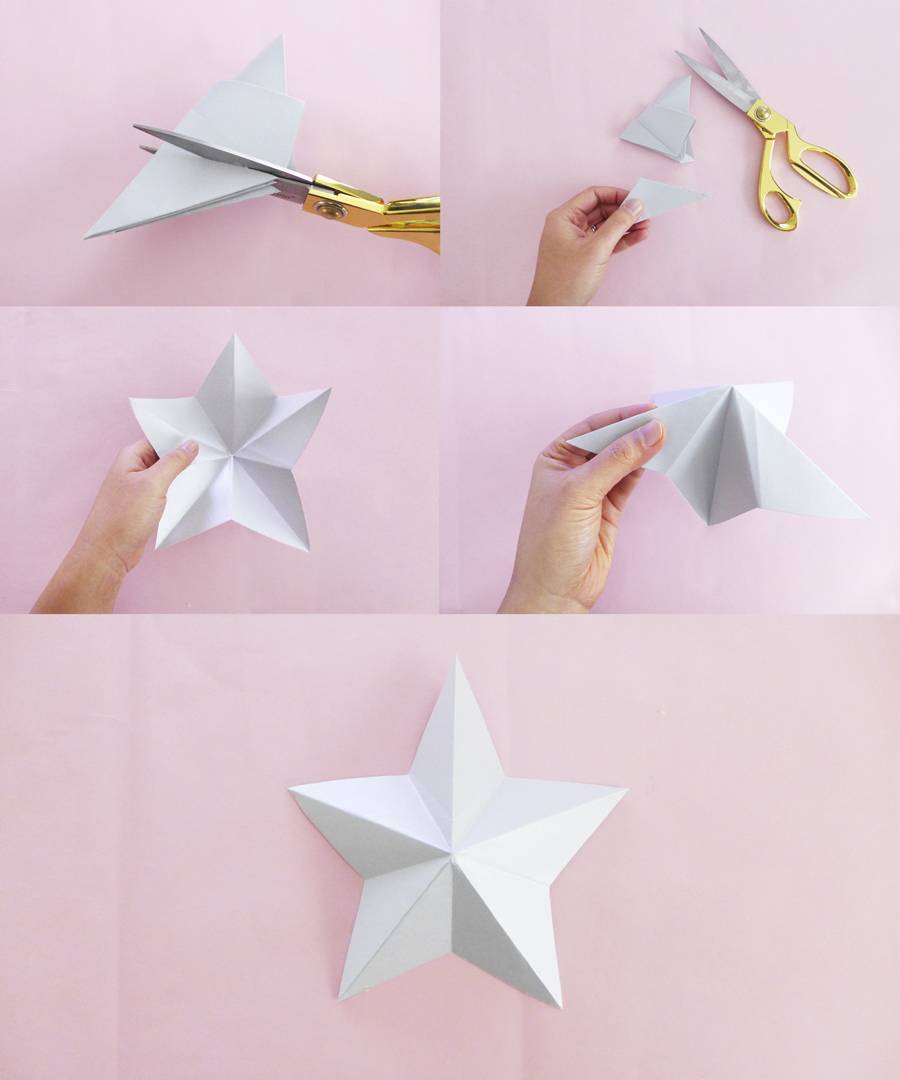
1. Lay down a square of your paper of choice. I used an 8.5” square this time, since that was the width of the paper I used. Keep your scissors handy, as you’ll need it at the end of these few steps.
2. Fold your paper lengthwise in half to make a rectangle.
3. Take the bottom right corner of your rectangle and fold it upwards to make an even triangular section. Make this crease lightly, as it won’t be a crease that you’ll want to be visible at the end.
4. Open the fold you just made and do the same with the top right corner, also making this crease lightly. Open this fold so that you’re back to your rectangular piece.
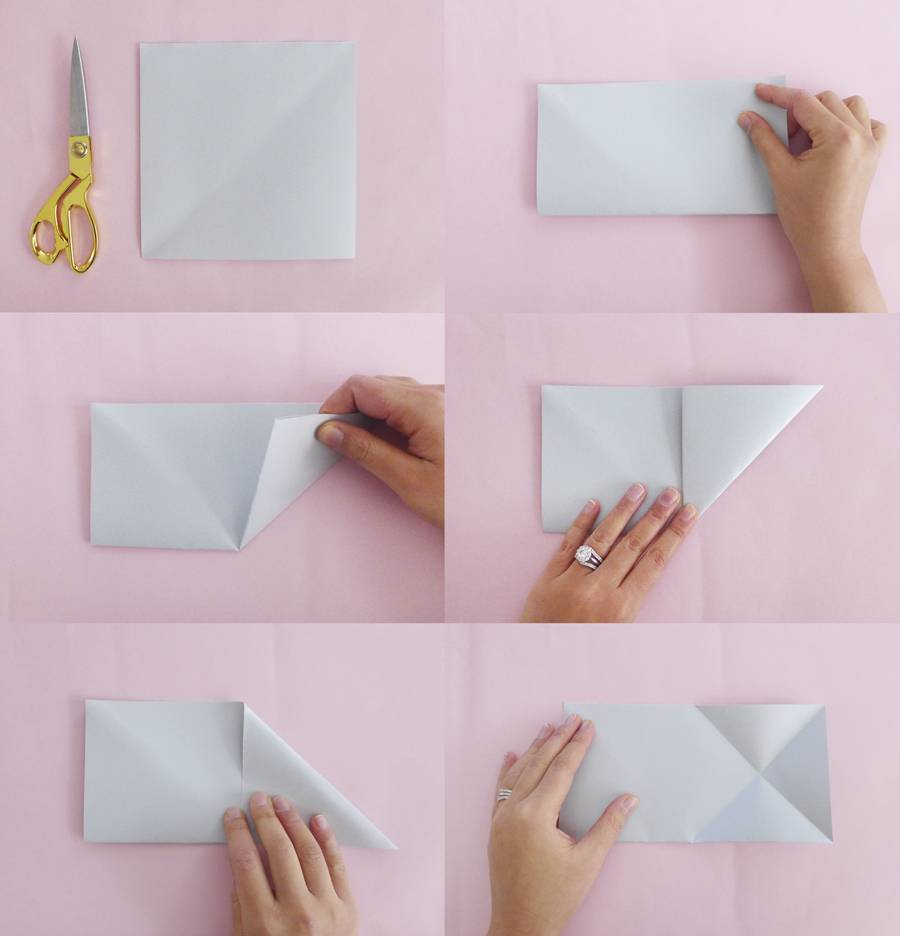
5. Take the left section of your rectangle and fold it diagonally over to right section, making it so the bottom left corner meets the intersection of your two triangular folds in the last two steps.
6. Take that left corner piece that you just folded inward and fold it to the left back onto itself.
7. Take the bottom right corner and fold it inward, so that it lines up with the middle crease you just made in the last step. You now have somewhat of a triangle with the point facing down.
8. Pick up the whole triangle and fold it in half along the center crease. The result is an even smaller triangle or little ice cream cone shape.
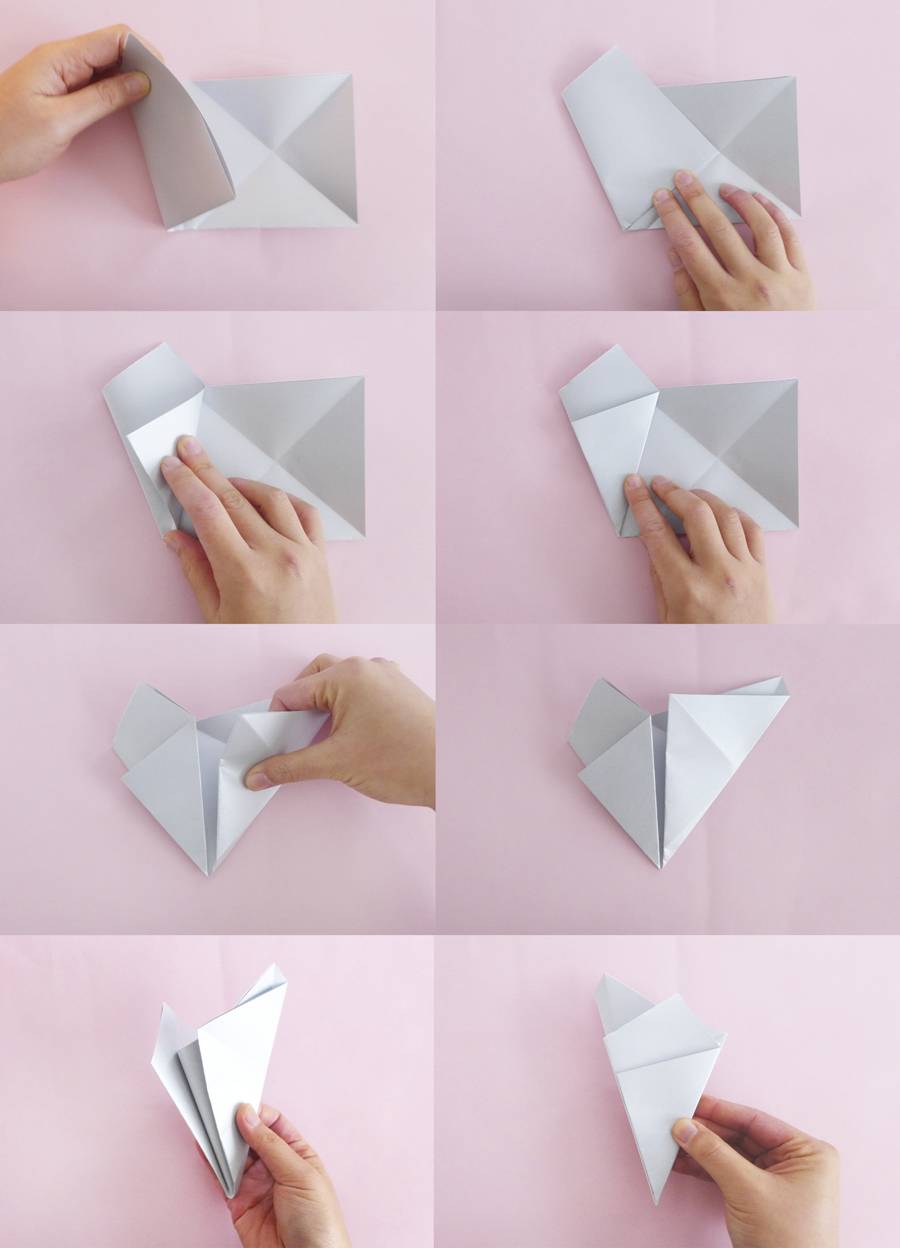
9. Using your scissors, cut diagonally from the top right (where the ice cream cone would meet the ice cream) to the left about 1” down.
10. Open up the paper and refold the creases so that all of the points of the star are pointing the same direction.
Your second star is complete! Now you know two ways to make a paper star.
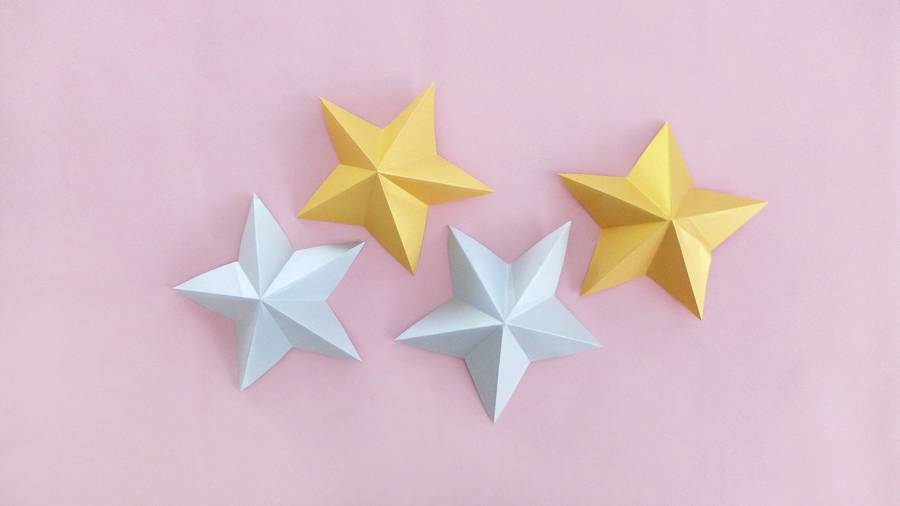
I made four of these stars in total, to go with the three stars I made earlier.
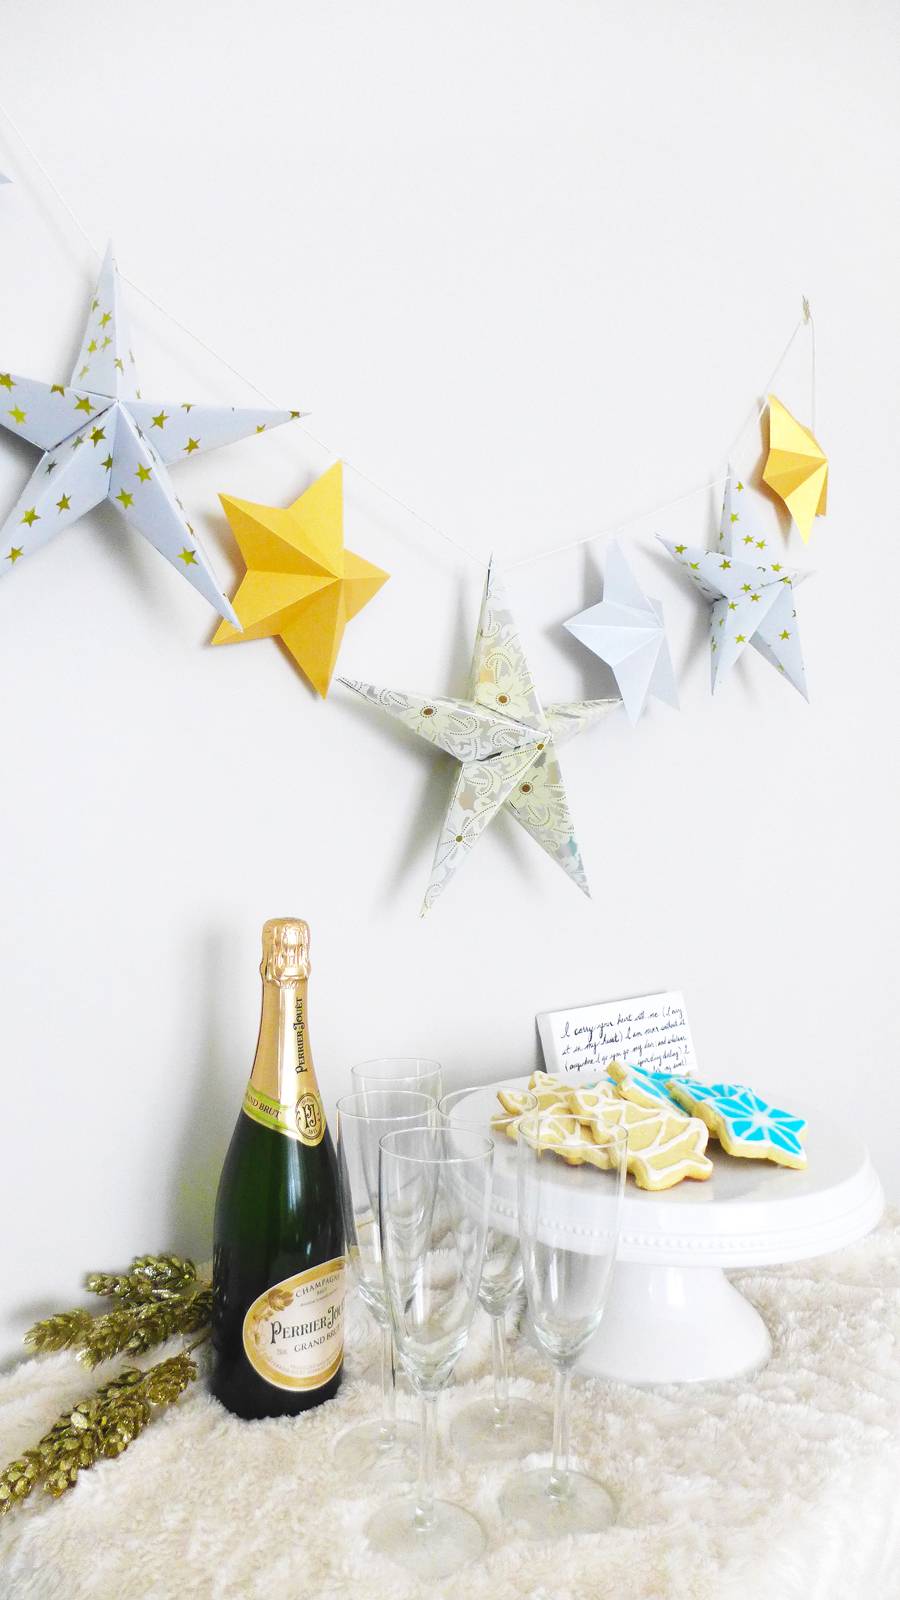
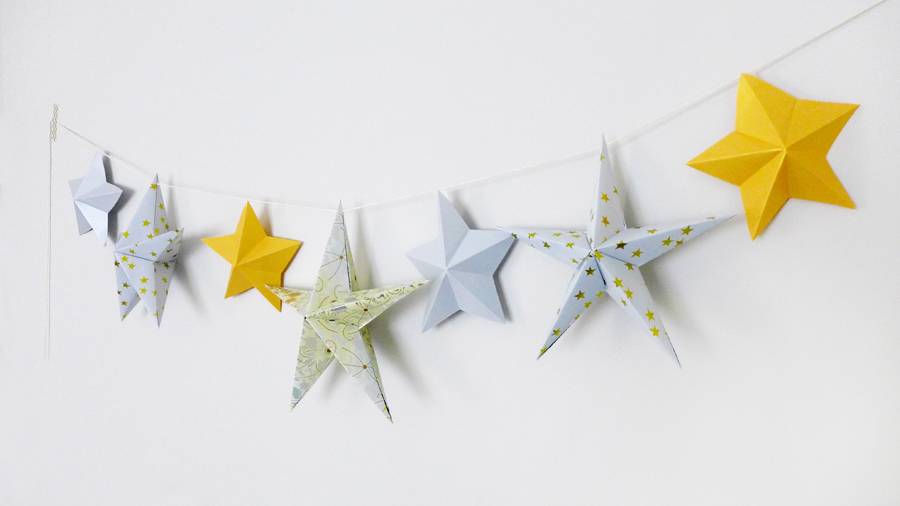
To finish your garland, all you have to do is arrange your stars along your string and fasten them with regular tape. And here’s a hanging tip: if hanging on a wall, use washi tape to hang your garland, since it’s prettier than regular tape and won’t strip the paint off your walls!
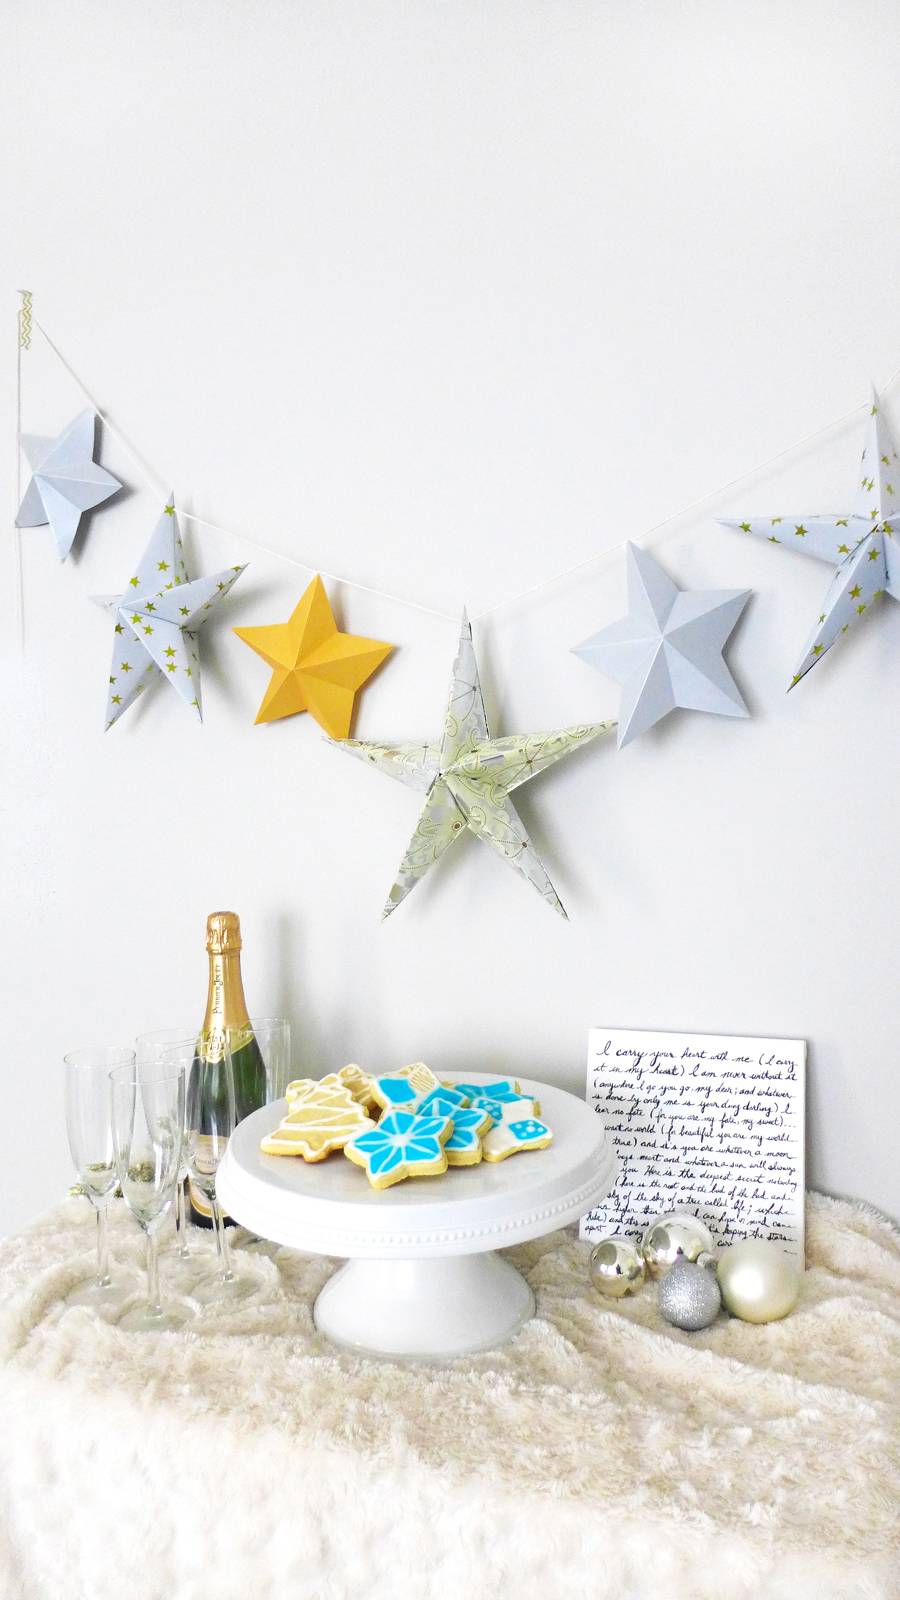
The beauty of these folded stars are that they’re perfect not only for hanging in a garland, but also for table styling and even as unique place settings for your holiday table. With these two origami techniques under your belt, the paper star possibilities are truly endless!
Can you think of any other ways to use these? Let us know in the comments!
About Linda Le Phan
Hi there! I’m Linda and I’m a DIY-obsessed Boston native who loves coffee, abstract painting and adventuring around the world. You can learn more about me and my work over at A Sweet Afternoon – a modern DIY & recipe blog where I share fun, colorful craft projects and some of my favorite simple dishes.
