Welcome to the best circular saw guide, your ultimate resource for mastering the art of this versatile tool. Whether you’re a novice or a seasoned woodworker, this guide will equip you with the knowledge and skills to unleash your creativity and tackle projects with confidence.
A healthy fear of power tools isn’t a bad thing. They’re powerful tools, after all – capable of making big holes in solid objects and ripping whole boards in half with one swift motion.
That being said, power tools are also extremely useful, and once you’ve learned how to safely and effectively operate them, they open up a world of DIY possibilities.
The best way to combat any reservations you have about operating power tools is to do your research. Arm yourself with knowledge, and you’ll be a confident tool-user in no time.
That’s where we come in. We’ve done the legwork and used the tools, and we’re here to share with you what we’ve learned. Today we’ll be exploring a must-have in the world of power tools: the circular saw.
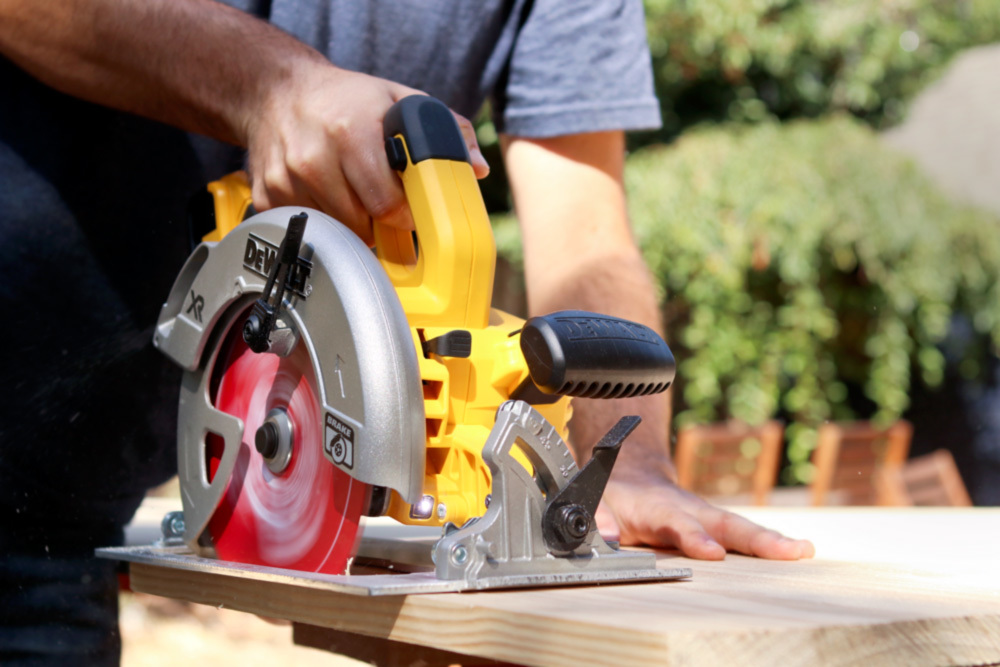
Imagine the satisfaction of transforming a pile of wood into a beautifully crafted piece of furniture or effortlessly cutting through materials to bring your DIY dreams to life. The key to unlocking this creative power lies in mastering the use of a circular saw.
This mighty tool is a game-changer for DIY enthusiasts, woodworkers, and construction professionals alike, offering precision, versatility, and efficiency like no other.
Table of Contents

Understanding the Circular Saw
What is a circular saw?
A circular saw is a powerful and versatile cutting tool that uses a round, toothed blade to make precise cuts in various materials such as wood, plastic, and metal. It is a staple tool in woodworking, construction, and DIY projects, known for its ability to make straight cuts, bevel cuts, and rip cuts with remarkable efficiency.
Why the Circular Saw?
The awesomeness of the circular saw comes down to two things: versatility and portability.
A circular saw can both rip wood (cut with the grain to create a board’s width) and crosscut wood (cut across the grain to establish length). Plus, with a small adjustment, you can make plunge cuts that don’t sever the wood into two pieces. The “circ saw” can cut wood of all sorts: dimensional construction lumber, solid hardwood stock, plywood, dense pressure-treated lumber for outdoor projects, engineered sheet goods like MDF and hardboard, and even small pieces of trim and millwork. With the right blade, it can also cut some metals, stone, brick, cement and masonry, and glass tile.
This saw can cut thick wood, like a bulky 2 x 12 board, or thin panels, only 1/8″ thick. The circular saw is a solid all-around power tool for making straight cuts in almost anything you can buy at your local home center.
Alongside a cordless drill, you’ve got a great entry-level tool kit for a variety of home improvement and creative woodworking projects.
The circular saw is also a portable tool, meaning you take the tool to the work, rather than resting the wood on the saw to make a cut.
Note: Be safe when making cuts; always find a stable, level surface to work on. And always wear your safety goggles!
Components and parts of a circular saw
To understand a circular saw, you need to know its main parts. These are the motor that spins the blade, the guard that keeps you safe, the handle for holding and controlling the saw, and the base plate that sits on the material you’re cutting.
Circular saws have an adjustable cutting depth. Some models have extra features like laser guides or dust extraction ports for a cleaner workspace.
Different types of circular saws and their uses
There are different types of circular saws available, each intended for specific cutting requirements and tasks. The most commonly used types are:
- Sidewinder or Direct-Drive Circular Saw: This type of circular saw has the motor positioned alongside the blade, making it compact and lightweight. It is suitable for most general-purpose cutting tasks and is commonly used in construction and carpentry projects.
- Worm Drive Circular Saw: With the motor situated behind the blade, worm drive saws offer more torque and power, making them ideal for heavy-duty tasks like cutting through thick lumber or dense materials. They are commonly used in framing and roofing applications.
- Trim Saw or Compact Circular Saw: These smaller circular saws are designed for precision and portability. They are great for cutting thinner materials, making quick trim cuts, or tackling projects in tight spaces.
- Cordless Circular Saw: Cordless circular saws operate on battery power, offering mobility and convenience. They are perfect for working on job sites or areas without easy access to electrical outlets.
By familiarizing yourself with the different types of circular saws and their specific purposes, you can unlock the full potential of your projects. Choosing the right tool for the job is essential for success.
Now that we have laid the foundation of understanding the circular saw, we can proceed to explore the vital aspect of safety precautions, ensuring that you can operate this powerful tool with confidence and peace of mind.
Safety Precautions
Prioritizing safety is crucial when working with circular saws. This powerful tool demands respect and careful adherence to safety precautions to prevent potential accidents or injuries. By implementing safety measures, you can ensure the safety of yourself and others.
Personal protective equipment (PPE) requirements
When using a circular saw, it’s important to stay safe. Wear safety gear like goggles, ear protection, and a dust mask. Wear snug clothes and non-slip shoes, and consider gloves for better grip and protection.
Safe work environment and setup
To use a circular saw safely, you need to have a clear and organized work area. Remove anything that could cause you to trip or get in the way. Make sure you have enough light to see well. Also, have a strong workbench or sawhorses to cut materials on.
Handling and storing the circular saw safely
To use a circular saw safely, keep your hands away from the blade and grip it properly. Never carry the saw with your finger on the trigger, and don’t leave it running or plugged in when you’re not using it. Afterward, disconnect the power, clean any debris, and store it in a dry and secure place. Consider using a case or wall-mounted rack for storage.
Additional safety precautions
To stay safe while using a saw, don’t start cutting until the blade is fully spinning. Stand to the side of the blade and keep a strong grip on the saw with both hands. Avoid making difficult cuts that could affect your balance and don’t reach over the saw.
It is crucial to familiarize yourself with the specific safety guidelines outlined in the manufacturer’s instructions for your particular circular saw model. These guidelines may include recommendations for guide rails, anti-kickback devices, and other safety features that should be utilized.
Prioritizing safety is the key to unleashing the full potential of your circular saw. By taking the necessary precautions and proceeding with care, you can create with confidence and reduce the chances of accidents, leading to a fulfilling and safe woodworking experience.
Now that we’ve covered safety let’s move on to the exciting part – getting started with a circular saw!
Things To Know
Before we get into how to use the circular saw, let’s talk about its features, basic principles, and some rules-of-thumb.
Adjustable Angle
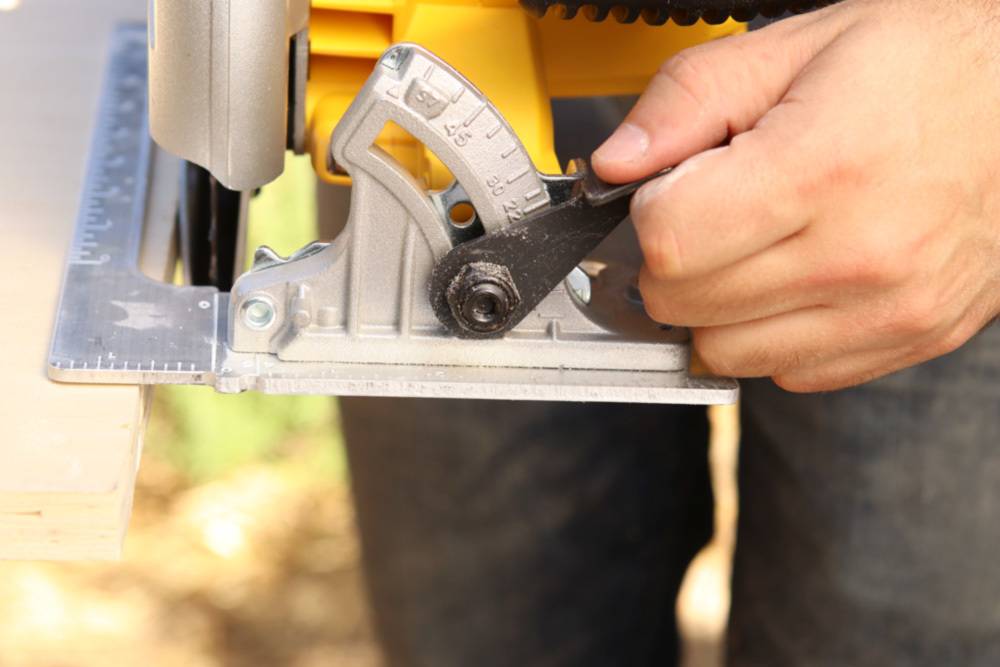
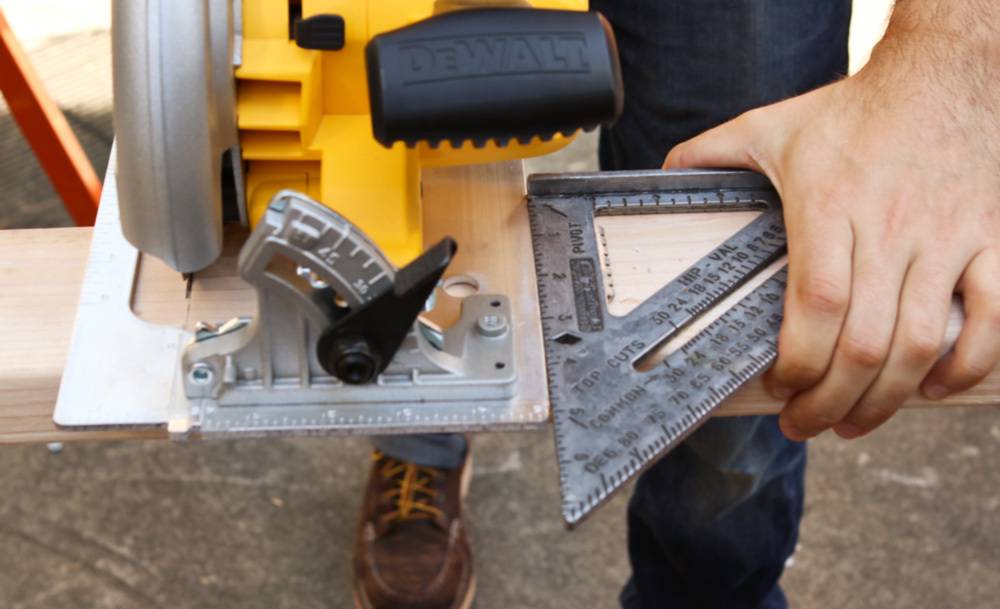
The whole circular saw’s blade assembly, guard, and motor housing sits on an adjustable shoe or base plate. This allows you to make angled cuts (also known as beveled cuts), opening up lots of creative potential.
You can adjust the angle of the cut with the plate tilt lever (shown above), located in front of the motor along a protractor-like scale, which can help you dial in your bevel angle.
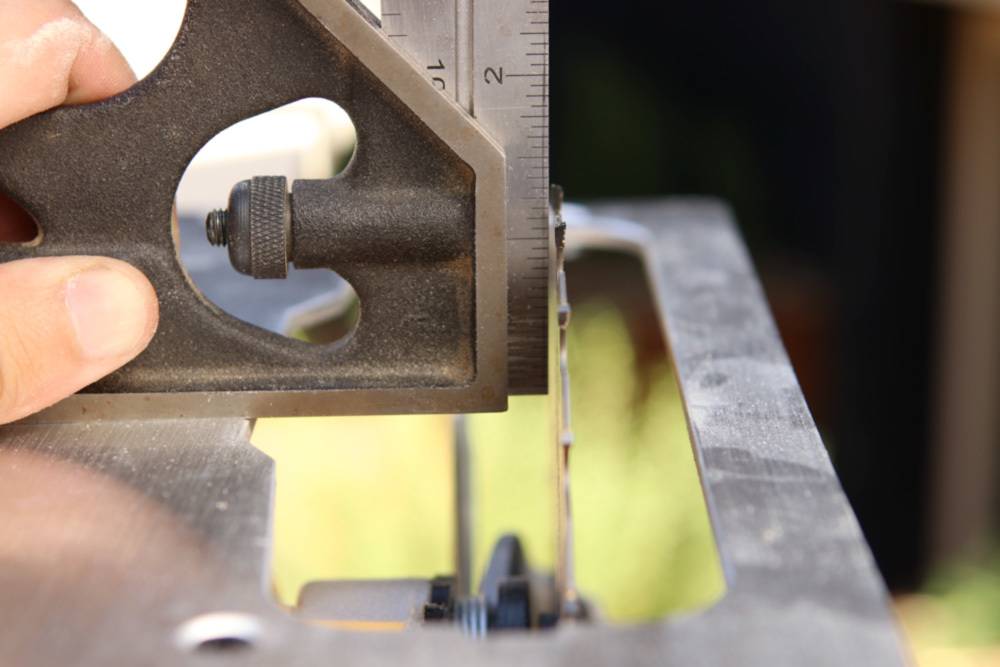
Make sure your saw blade is aligned correctly when you get it, and check it regularly to adjust as necessary. Remember that the measurement on the saw may not be exact, so a 0° reading doesn’t always mean the blade is perfectly straight. Checking and adjusting the angle only takes a few seconds.
The Blade
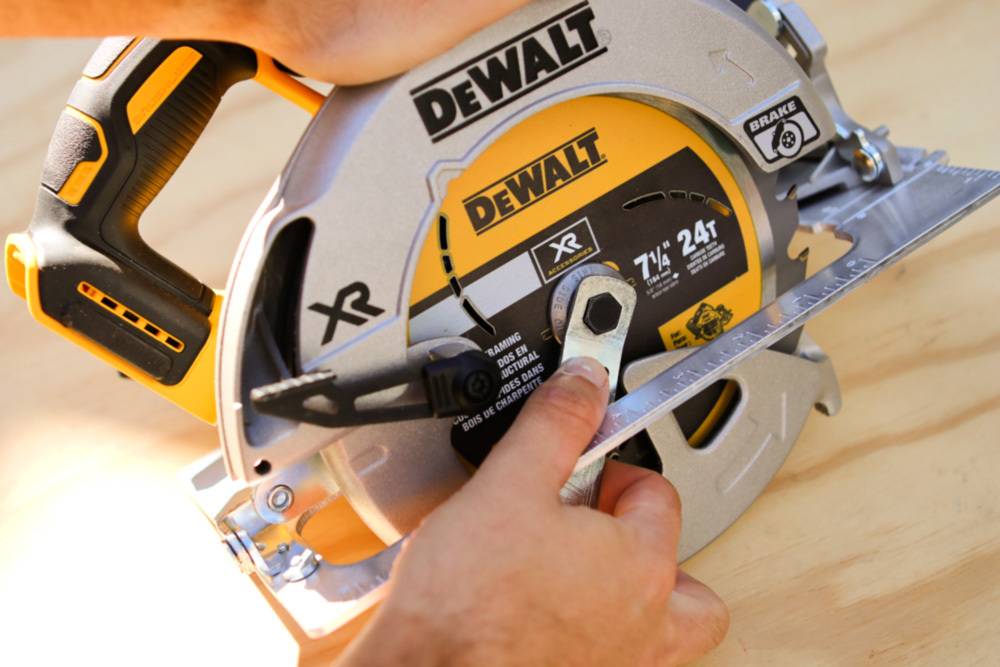
The stock blade that comes with your saw is designed for coarse work, such as cutting 2×4 framing lumber to length. This is a cut that will live behind drywall, siding, etc., and no one will ever see it, so it can be rather ragged and splinter-y.
If you want to make clean cuts with your saw, try using an upgraded blade. You can purchase these blades at stores like The Home Depot, which cost between $7-20. You can easily switch the blade using the included wrench and rotation lock button.

There is access to a range of blades specifically designed to cut through different materials, including wood, masonry, stone, and metal. To ensure your safety, it’s important to do your research and determine which materials can be cut safely.
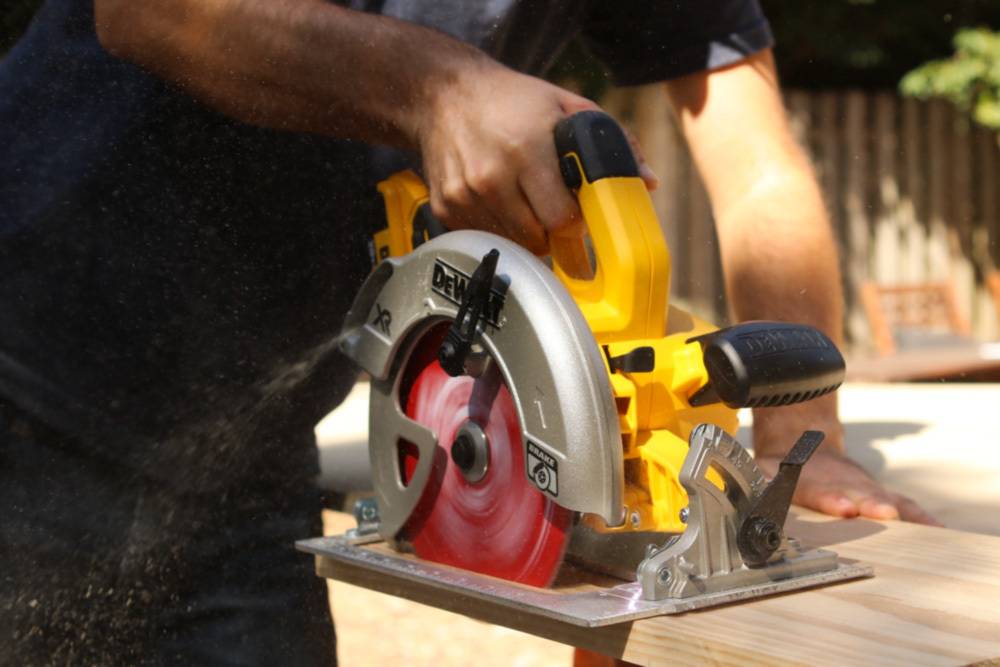
Always Support the Cut on Motor Side
The direct drive (or “sidewinder” as it’s also known) positions the motor on the left side of the blade. So, you’ll want to support the wood on the motor side as well. This allows the off cut to fall away freely, getting out of the path of the blade as soon as possible. If you need to cut the opposite end, either flip the board or just turn around and approach the wood from the other side
In fact, you don’t want to support the wood on both sides, even if it’s possible to do so! This can cause the wood to bind around the blade, pinching it and perhaps making the saw kickback. This is unsafe, scary, and ruins the cut.
When taking on a significant project, like cutting a large piece of plywood, it’s important to have the right tools and techniques in place. By using sawhorses on both sides and adding sacrificial 2 x 4s to span the gap, you can make a precise cut without compromising the stability of the object. With this approach, you can achieve your goals with confidence and precision.
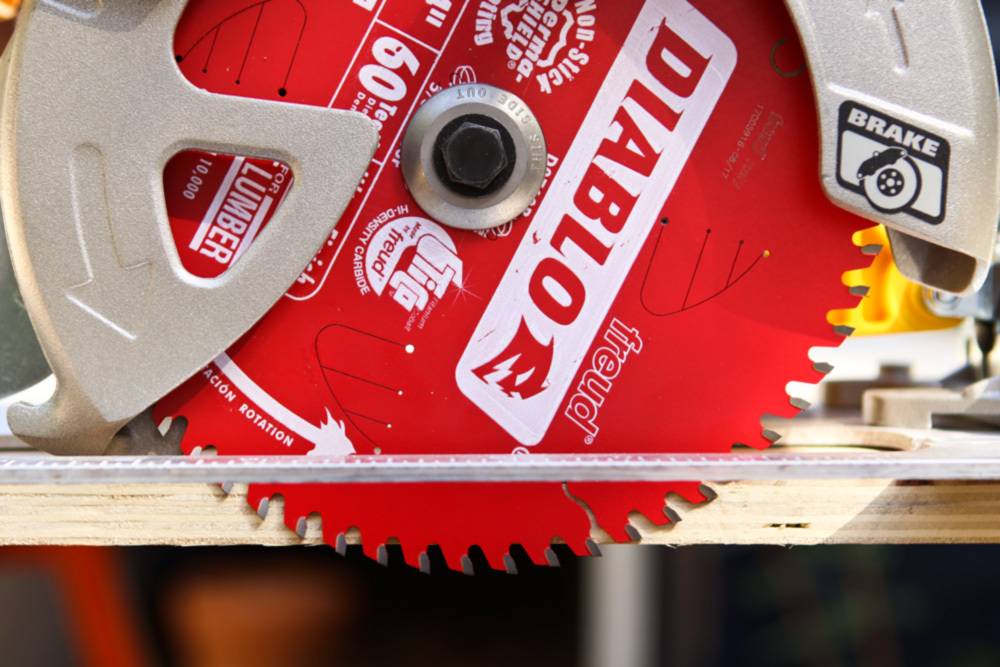
Set the Right Blade Height
The circular saw is capable of cutting depths up to 2 3/8″, which is impressive. However, in order to achieve a high-quality cut and minimize the risk of kickback, it is important to adjust the cut depth according to the material being cut.
For good cutting, adjust the blade so it only sticks out 1/4 to 1/2 inches below the material. The space between the teeth, called the gullet, should just touch the wood at six o’clock.
Basic Techniques for Using a Circular Saw
Now that you’re equipped with the necessary safety knowledge, it’s time to delve into the basic techniques for using a circular saw. These fundamental skills will serve as the building blocks for your woodworking endeavors, enabling you to make precise and accurate cuts.
Making straight cuts
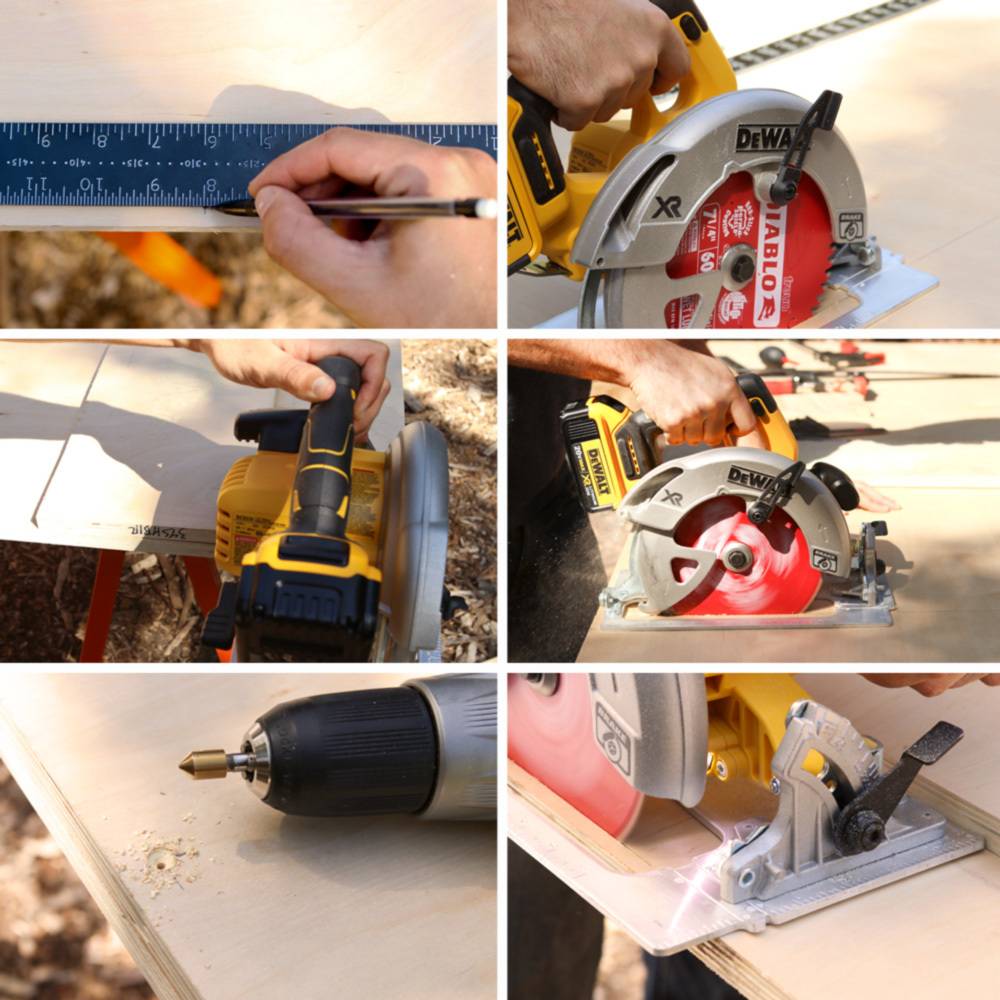
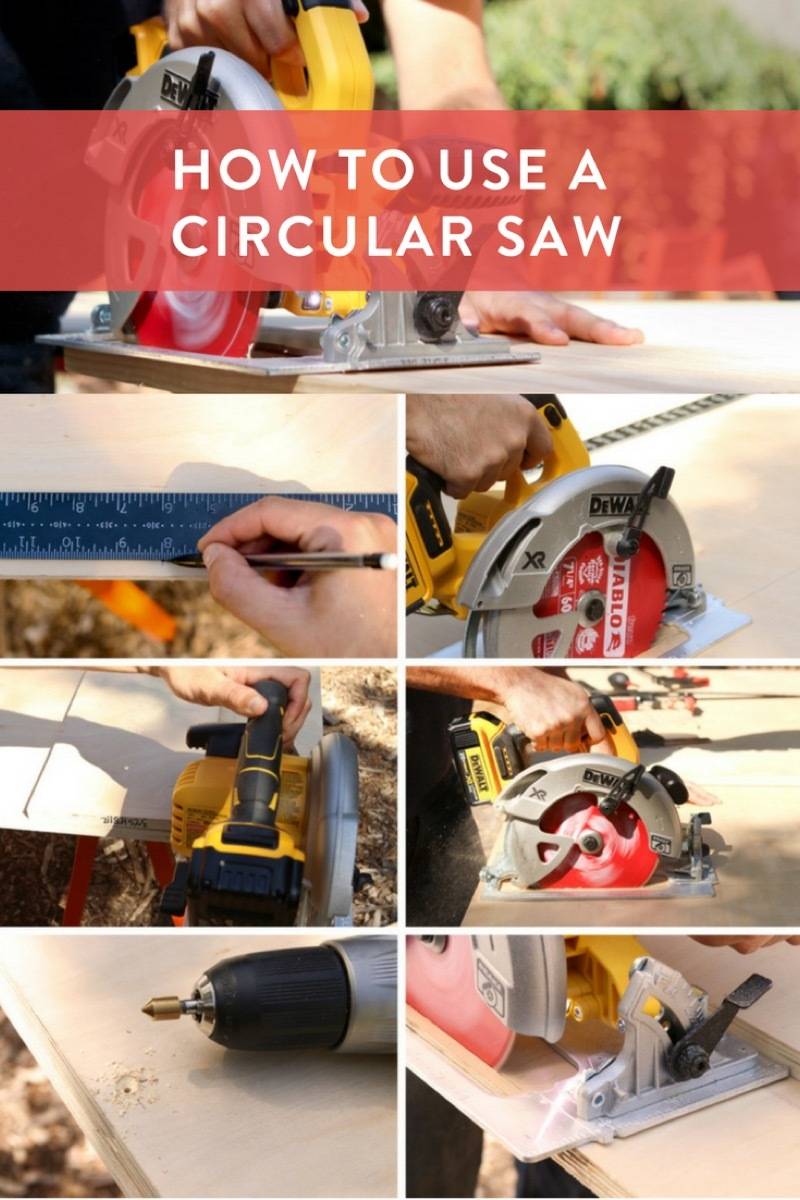
- Measure and mark: Begin by measuring and marking the material with a pencil or a straight edge to indicate the desired cut line. Double-check your measurements for accuracy.
- Set the cutting depth: Adjust the cutting depth of the circular saw to match the thickness of the material. Use the depth adjustment lever or knob located on the saw.
- Align the saw: Position the circular saw so that the blade aligns with the cut line. Hold the saw firmly with both hands, ensuring a stable grip.
- Start the cut: With the blade clear of the material, activate the saw and let it reach full speed. Then, gently lower the blade onto the material, keeping it aligned with the cut line.
- Maintain control: Slowly guide the saw along the cut line, applying consistent pressure and keeping the saw level. Then, allow the saw to do the work, avoiding excessive force.
- Complete the cut: Once you’ve reached the end of the cut, release the trigger and wait for the blade to come to a complete stop before lifting the saw.
Crosscuts and miters
- Mark the cut: Use a measuring tape, square, or miter gauge to mark the desired length or angle for your crosscut or miter cut. Double-check your measurements.
- Set the bevel angle: If you need to make a miter cut, adjust the bevel angle of the circular saw accordingly. Refer to the saw’s manual for instructions on adjusting the bevel.
- Secure the material: Use clamps or other securing methods to keep it in place and prevent it from shifting during the cut.
- Align the saw: Position the circular saw with the blade aligned with the cut line or the marked angle. Ensure the bevel angle is set correctly if making a miter cut.
- Start the cut: Activate the saw and let it reach full speed. Then, slowly lower the blade onto the material, aligning it with the cut line or the marked angle.
- Guide the saw: Carefully guide the saw along the cut line or the marked angle, maintaining control and ensuring a smooth and accurate cut.
Rip cuts and bevel cuts
- Measure and mark: Measure and mark the width of the desired rip cut or the angle of the bevel cut on the material.
- Set the cutting width or bevel angle: Adjust the circular saw’s cutting width or bevel angle to match the measurements. Refer to the saw’s manual for instructions on adjusting the width or angle.
- Secure the material: Use clamps or other securing methods to stabilize the material and prevent it from moving during the cut.
- Align the saw: Position the circular saw with the blade aligned with the marked cut line or angle.
- Start the cut: Activate the saw and let it reach full speed. Gently lower the blade onto the material, aligning it with the marked cut line or angle.
- Guide the saw: Guide the saw steadily along the cut line or angle, maintaining control and ensuring a smooth and precise cut.
Cutting different materials
Different materials require different techniques when using a circular saw. For example:
- Cutting plywood: Use a fine-toothed blade to minimize splintering. Support the plywood with sawhorses or a stable surface to prevent sagging and ensure clean cuts.
- Cutting laminate or melamine: Place masking tape on the cut line to minimize chipping. Use a blade with fine teeth or a specialized laminate-cutting blade.
- Cutting metal: Use a carbide-tipped or abrasive blade specifically designed for metal cutting. Apply cutting fluid or lubricant to keep the blade cool and extend its lifespan.
Remember to adjust the cutting speed and technique based on the material you are working with to achieve the best results.
Through mastering these essential techniques, you can gain the confidence to tackle a variety of cutting tasks using your circular saw. With consistent practice, you’ll be able to boost your abilities and unlock your full creative potential. Let’s explore some advanced techniques that can take your circular saw skills to new heights!
Advanced Techniques and Tips
Congratulations on mastering the basics of circular saw operation! It’s time to step up your game and unlock the potential of your woodworking skills. By learning advanced techniques and tips, you’ll be able to tackle even the most complex cuts and expand your creative horizons.
Creating Dado Cuts
Grooves or channels made across the grain of wood are referred to as dado cuts. These cuts are often used for joinery purposes or to create slots for shelves or panels. If you’d like to make dado cuts using a circular saw, here’s how:
- Mark the dado location: Measure and mark the desired location of the dado cut on the workpiece.
- Set the cutting depth: Adjust the cutting depth of the circular saw to match the width and depth of the dado cut. It is recommended to make multiple passes, gradually increasing the depth with each pass.
- Make multiple passes: Start at one end of the marked dado cut and make multiple passes along the cut line, gradually advancing the saw forward with each pass. Take your time and maintain control throughout the process.
Plunge Cuts
Starting a cut from the middle of a workpiece instead of the edge is made possible by plunge cuts. This method is ideal for producing slots or openings within the material. To execute plunge cuts using a circular saw:
- Mark the cut: Measure and mark the starting point and the length of the plunge cut on the workpiece.
- Position the saw: Align the circular saw blade with the starting point of the cut. Hold the saw firmly with both hands.
- Activate the saw and lower the blade: Start the saw and gently lower the blade into the material at the marked starting point. Take care to maintain control and ensure a straight plunge cut.
- Guide the saw: Once the blade is fully engaged in the material, guide the saw along the marked cut line to complete the plunge cut.
Cutting Curves
Although a circular saw is mainly intended for making straight cuts, it is still feasible to create curved cuts with the appropriate method. Here are the steps to follow when cutting curves with a circular saw:
- Create a template: Start by creating a template or pattern of the desired curve using a piece of sturdy material like plywood or MDF. Ensure the template is smooth and accurate.
- Secure the workpiece and template: Clamp the workpiece and the template together firmly, ensuring they do not shift during the cutting process.
- Cut in stages: Remove the bulk of the waste material along the marked curve on the template using a jigsaw or a coping saw.
- Follow the template: With the circular saw blade set to a shallow cutting depth, carefully guide the saw along the edge of the template, using it as a guide to cut the workpiece along the desired curve. Take your time and maintain control throughout the cut.
Tips for Optimal Results
- Use a sharp blade: A sharp blade will provide cleaner and more efficient cuts. Replace or sharpen the blade when it becomes dull.
- Support the material: Use sawhorses or a stable surface to support the material being cut. This helps prevent vibrations and ensures smoother cuts.
- Use clamps and guides: Secure the workpiece with clamps and use guides, such as a straight edge or a fence, to maintain straight and accurate cuts.
- Make test cuts: Before cutting into your final workpiece, practice on scrap material to ensure you are comfortable with the technique and achieve the desired results.
- Practice proper blade alignment: Ensure the blade is aligned with the cut line or template for accurate cuts. Take your time to set up the saw properly before making the cut.
By applying these advanced techniques and following the provided tips, you can enhance your circular saw skills and take on more intricate woodworking projects. Keep in mind that practice is key.
Maintaining and Caring for Your Circular Saw
To ensure your circular saw lasts for a long time and operates at its best, taking good care of it is crucial. By performing regular maintenance, you can improve the performance of your saw and achieve precise and consistent cuts for many years.
Cleaning the Saw
Keeping your circular saw in top condition is crucial for its optimal performance. Regular cleaning is essential to eliminate any debris or buildup that can affect its functionality. Follow these steps to effectively clean your circular saw:
- Disconnect the power: Always unplug the saw or remove the battery before cleaning.
- Remove the blade: Follow the manufacturer’s instructions to remove the blade from the saw safely.
- Clear debris: Use a brush or compressed air to remove sawdust, dirt, and other debris from the blade, blade guard, base plate, and other saw parts. Pay attention to the areas around the motor vents and the depth adjustment mechanisms.
- Wipe down the saw: Use a clean cloth or rag to wipe down the exterior of the saw, removing any residue or buildup.
- Reinstall the blade: Carefully reattach the blade, following the manufacturer’s instructions. Ensure it is securely tightened.
Blade Maintenance
Achieving clean cuts and extending the lifespan of a circular saw blade requires proper maintenance of this crucial component. Here are some key considerations:
- Sharpness: Regularly inspect the blade for dullness, chips, or damage. Replace or sharpen the blade as needed to maintain optimal cutting performance.
- Blade Cleaning: Remove pitch, resin, or other residue from the blade by using a blade cleaning solution or a specialized blade cleaning product. Follow the manufacturer’s instructions and use caution when handling the blade.
- Storage: Store the blade in a clean, dry place to prevent rust or corrosion when not in use.
Lubrication
To ensure smooth operation of your circular saw and reduce friction, lubrication is crucial. It’s important to refer to the manufacturer’s guidelines for specific lubrication requirements, but here are a few general tips to keep in mind:
- Motor and Moving Parts: Apply a few drops of lubricating oil to the motor bearings and other moving parts as recommended by the manufacturer.
- Depth Adjustment Mechanism: Periodically lubricate the depth adjustment mechanism to maintain smooth operation. Follow the manufacturer’s instructions for the specific lubrication points.
Inspection and Alignment
It is important to routinely check and adjust your circular saw for precise and secure usage.
- Blade Alignment: Check the blade alignment with the base plate and make necessary adjustments to ensure it is parallel to the plate.
- Base Plate Alignment: Verify that the base plate is flat and aligned with the saw body. If misalignment is detected, consult the manufacturer’s instructions for adjustment procedures.
- Safety Features: Regularly inspect the blade guard, anti-kickback pawls, and other safety features to ensure they are functioning correctly. Replace any damaged or worn-out components.
Storage
Proper storage helps protect your circular saw from damage and keeps it ready for future use:
- Clean and Dry: Before storing the saw, ensure it is clean and dry to prevent corrosion.
- Case or Cover: Store the saw in its designated case or use a protective cover to shield it from dust, moisture, and other environmental elements.
- Secure Storage: Store the saw safely and securely away from children or potential hazards.
By implementing regular cleaning, blade maintenance, lubrication, inspection, and proper storage practices, you’ll maintain the performance and longevity of your circular saw, allowing you to enjoy years of precise and reliable cutting.
And, that’s it!
Congratulations! You have now gained a comprehensive understanding of using a circular saw, from its components and safety precautions to basic techniques, advanced methods, and maintenance practices.
See? I told you the circ saw is awesome.
In addition to the saw, you’ll likely want the after-market blade mentioned above, the speed square for straight cuts, and few other safety accessories. Here’s our essential toolkit for the circular saw. Have fun, be safe, and go make something!
More Power Tool Inspiration
- Power Tools 101 | Power Sanders
- Power Tools 101 | The Cordless Drill
- How to Avoid Splintering and Tearing when Cutting Plywood
- The Curbly collection of woodworking articles
- Power Tools 101: How to Use a Circular Saw, and Why You Definitely Need One in Your Tool Kit
- Tool School: Why an Impact Driver is So Freakin’ Awesome
- Tool School: The RIGID NXT Wet/Dry Vac
- Tool School: Framing Nailer
- Tool School: Essential Hand Saws for Every Tool Box
- Tool School: The Drywall Screw Gun
Will a blade with more teeth give me a smoother cut? How many teeth can I have for to cut malemine boards. Please, provide the minimum and the maximum.
@Carlos – Generally, yes, that’s the idea. The more teeth, the finer the cut.
Nice post. It gave me several ideas that I will surely put into practice. Thanks!