
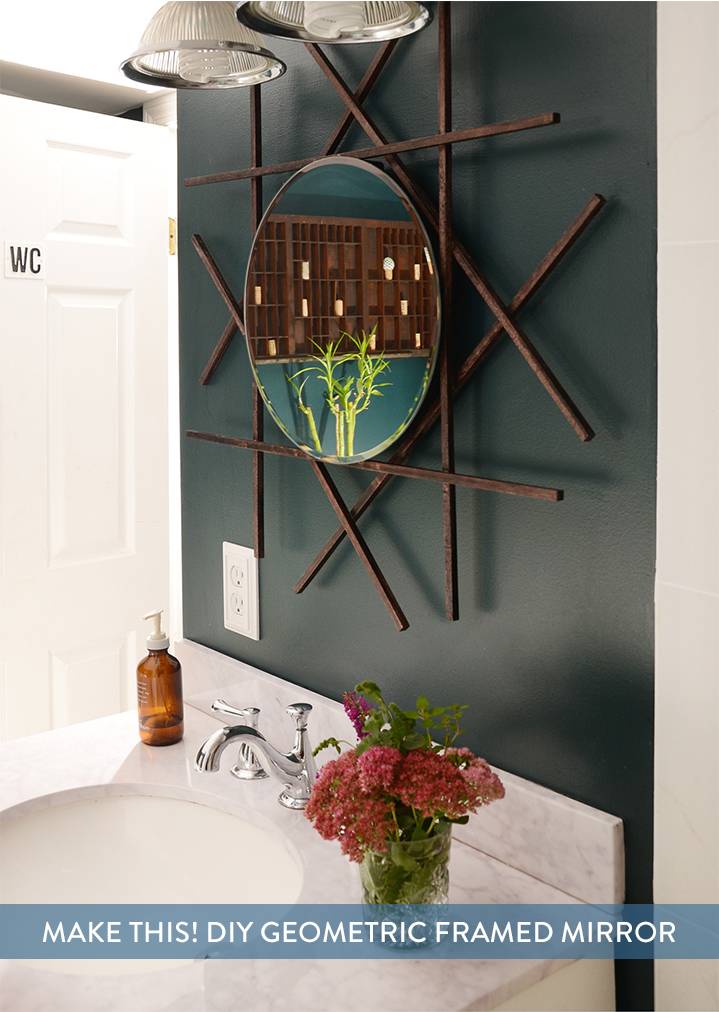
Have you ever tried to shop for a decorative bathroom mirror? The process can be frustrating… it’s tough to find something that works well with your decor, while also staying within your budget. That was my experience when I tried to find the perfect bathroom mirror. So, of course, I made one! Keep reading to find out how to make this DIY vanity mirror using wooden dowel rods.
Materials
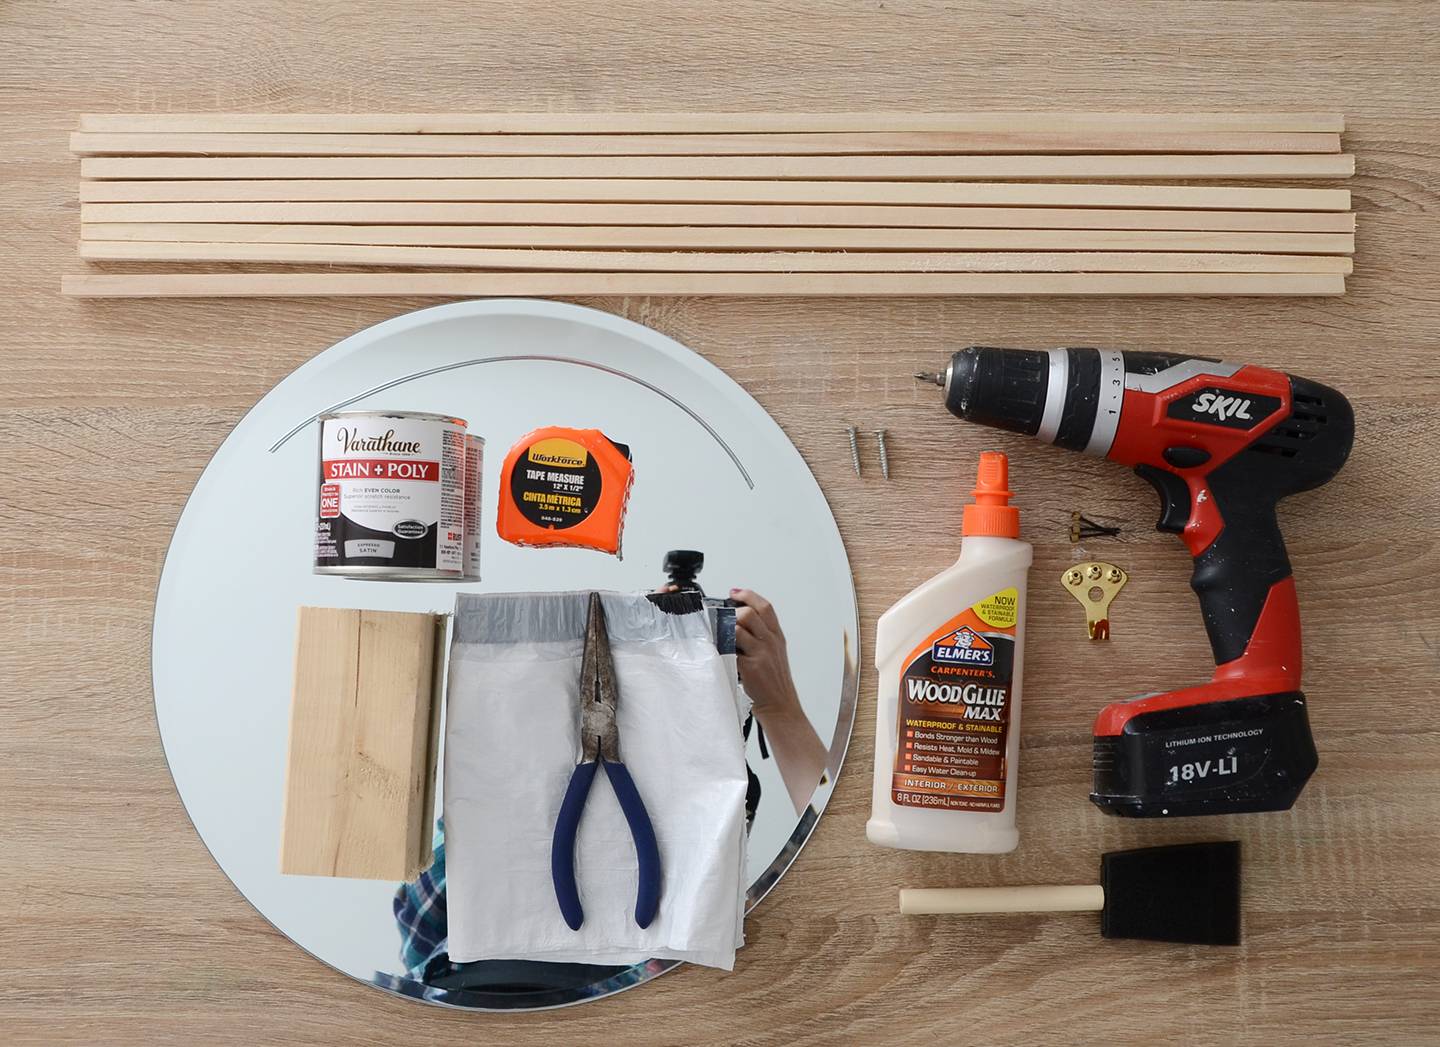
- 8 square wooden dowel rods, 3/8 inch thick and 26 inches long
- 14 inch diameter beveled edge mirror
- Stain + Poly in Espresso
- 4 inch long wooden 2×4
- Measuring tape
- Trash bag
- 8 inch long piece of wire
- Wire cutters
- (2) 1 inch wood screws
- Wood glue
- E6000 glue (not pictured)
- Disposable paint brush
- Picture hanger for mounting
- Electric drill or screwdriver
- Rubber gloves (not pictured)
How to Make a DIY Vanity Mirror
Step
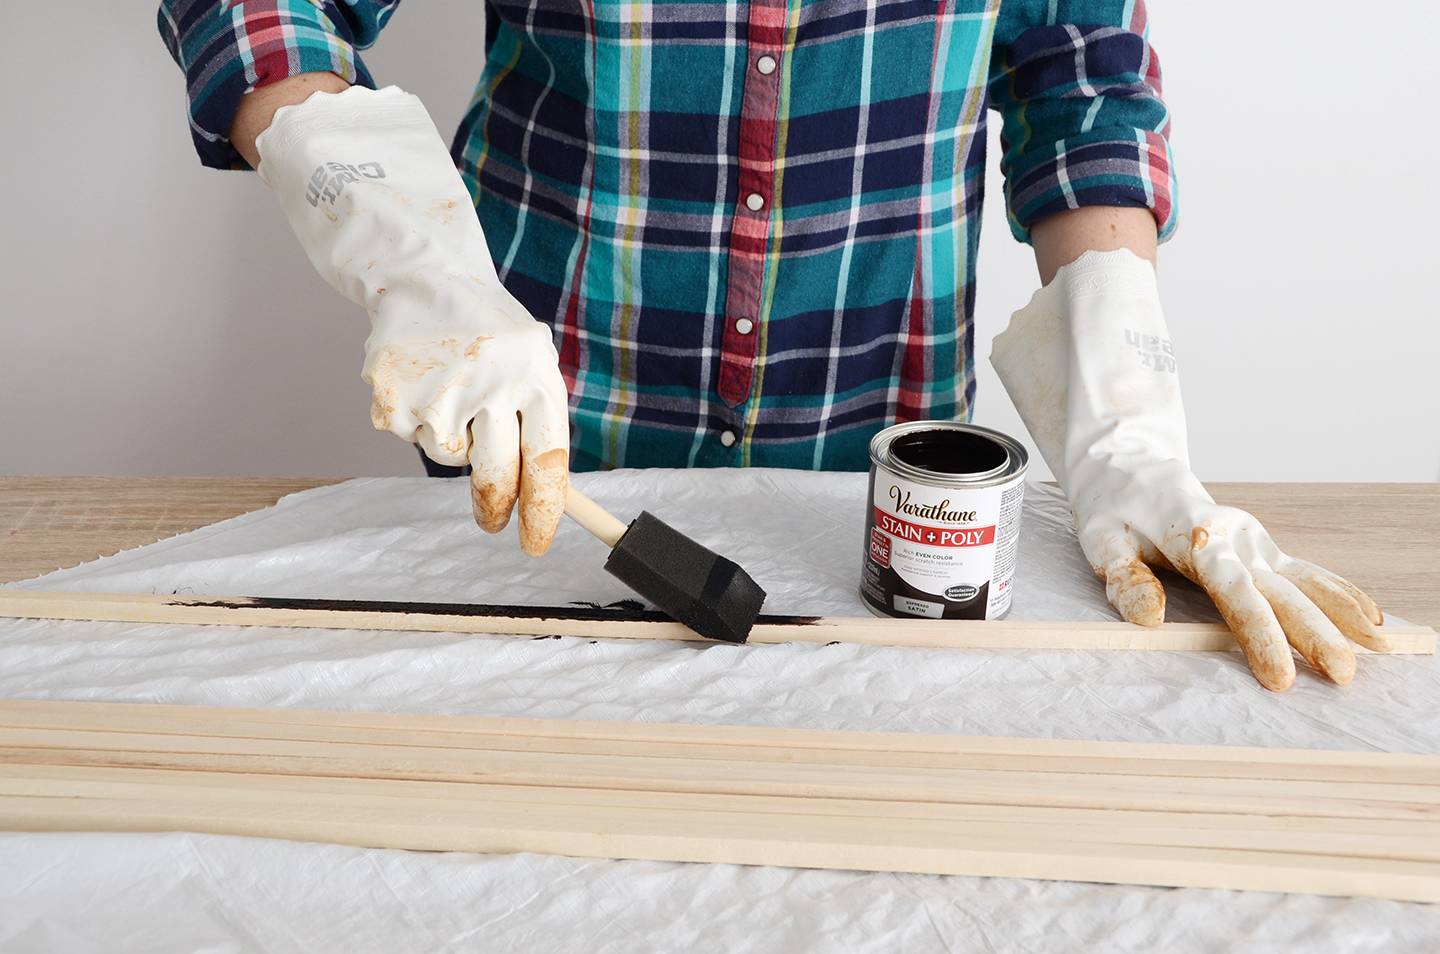
Begin by staining your dowel rods using the instructions on the can. Wear rubber gloves and protect your work surface with a trash bag or a plastic drop cloth. Also be sure to open a window for ventilation. Let the first coat of stain dry and then apply a second coat. Stain the small 2×4 piece as well.
Step
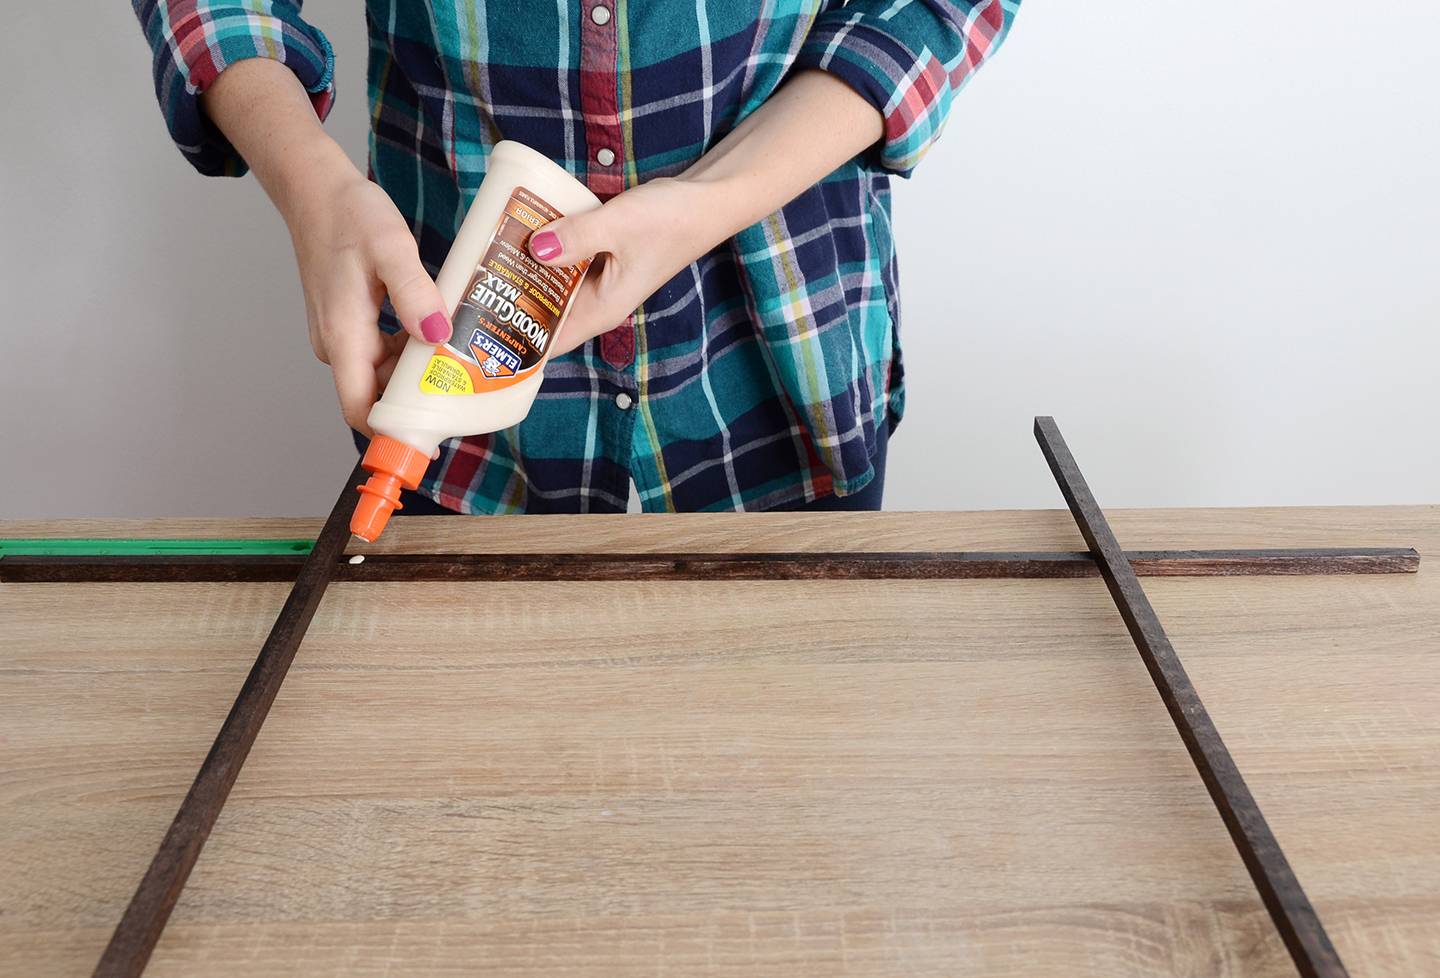
Once the stain is completely dry (I’d wait a day or two), arrange four of the dowel rods on a flat surface in the shape of a hashtag. Lay out the first two parallel to each other, then put the next two on top perpendicular to the first two. The square that’s formed should be just a touch smaller than your mirror, so the mirror can sit on the two top dowels (so about 13 inches apart). Test it out before you start gluing. Add a dab of wood glue at the connection points, wipe away any excess and let it dry thoroughly. Repeat the same process on the other four dowels.
Step
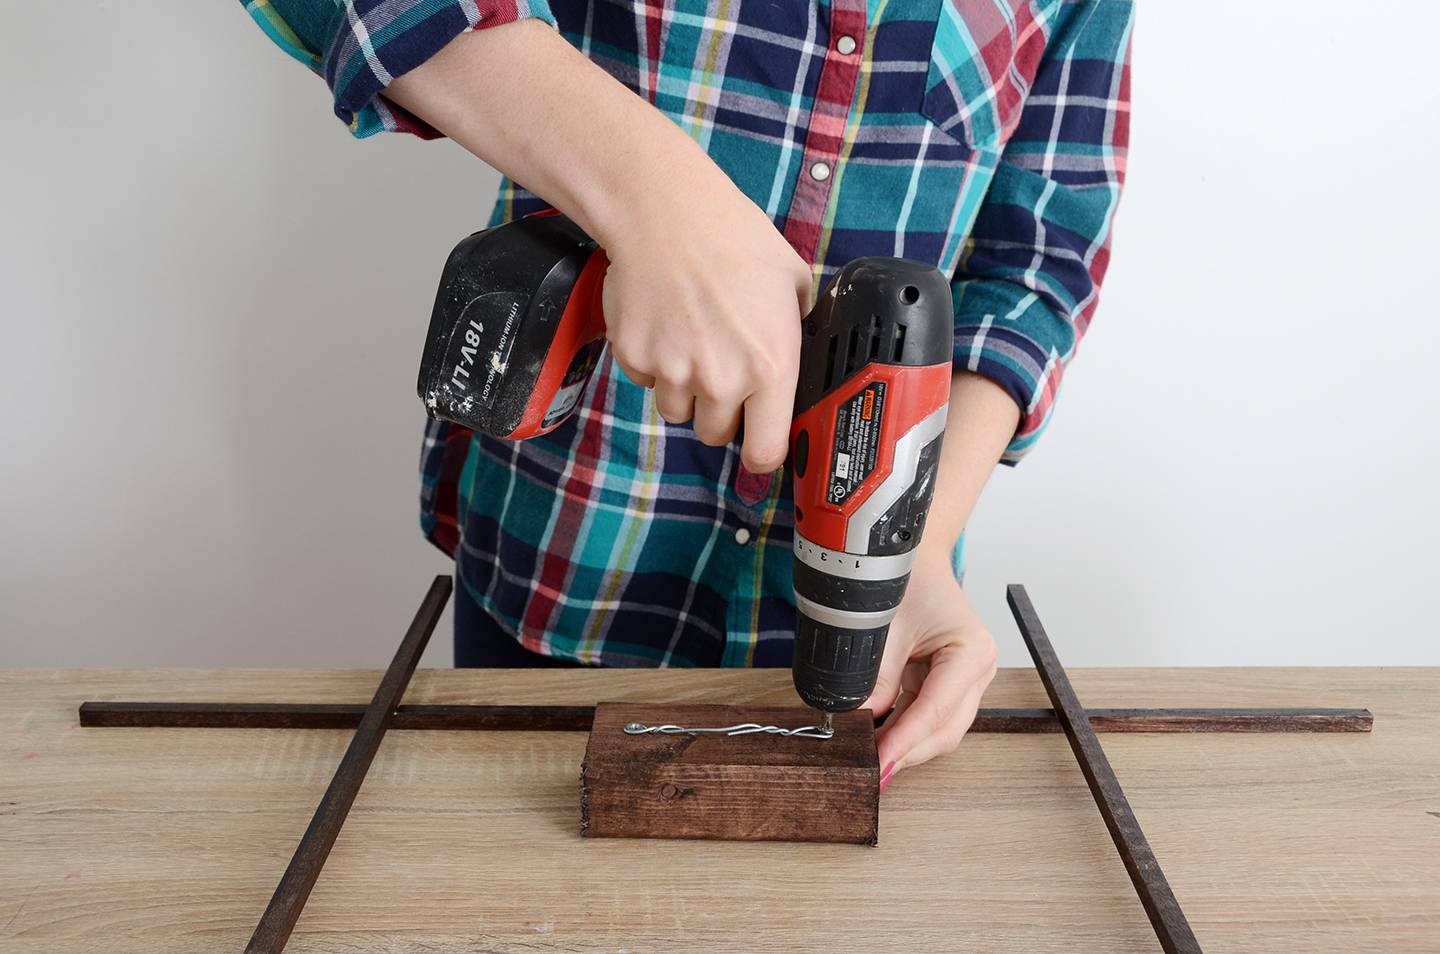
While the dowels are drying, make your mounting piece. Bend the wire to create a loop on each end and attach the loops into the wood using the screws. Screw them in 3/4 inch from the bottom of the piece.
Step
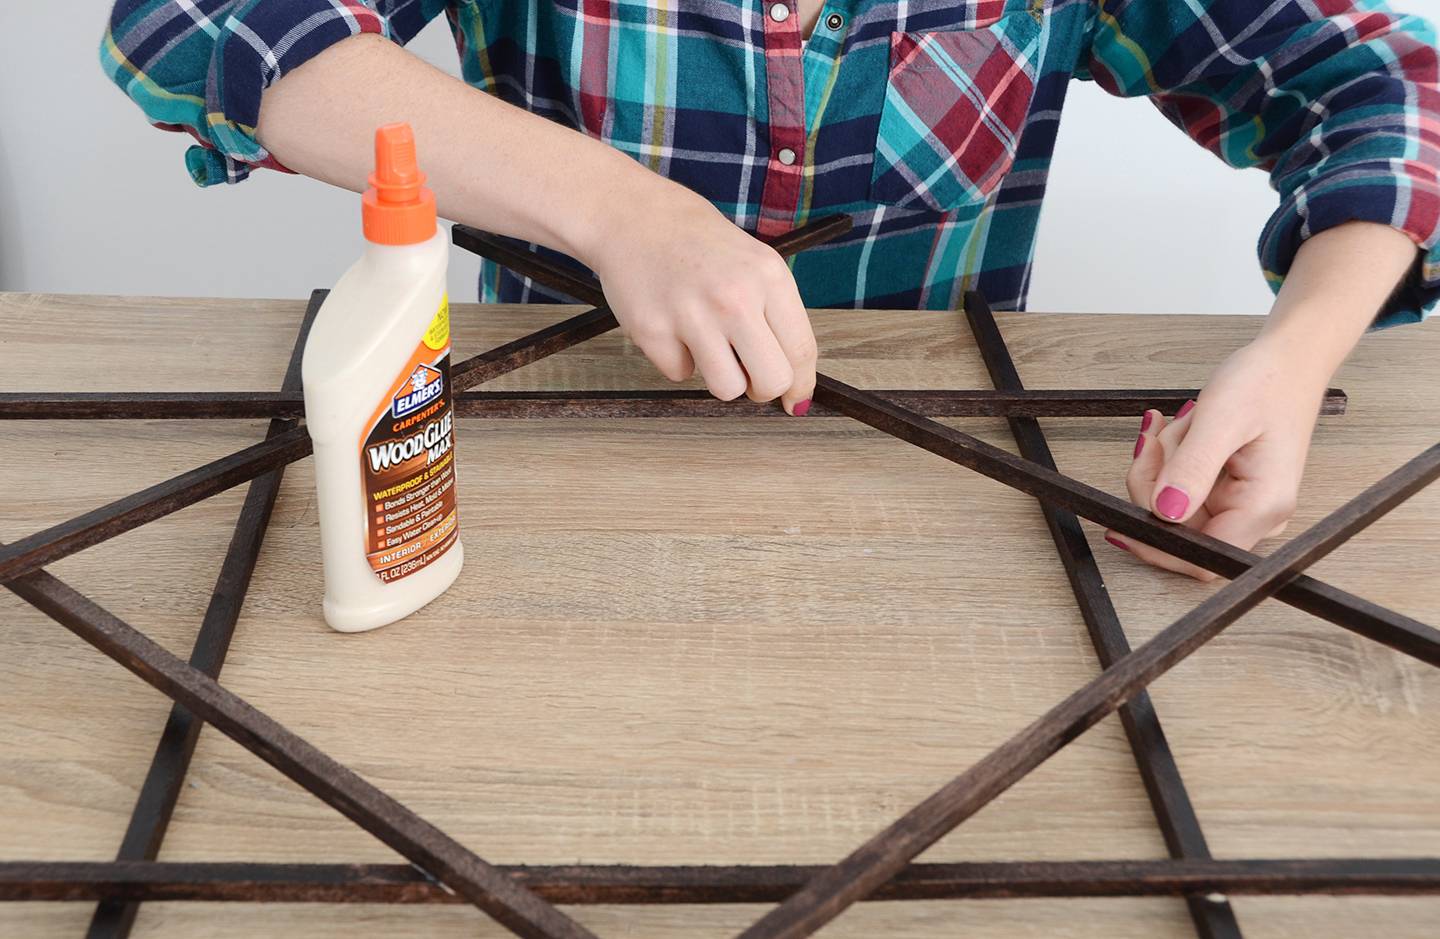
Next, glue one of your hashtag-shaped dowel sets on top of the other one. They will only connect at two spots, so glue them well. Wipe away any excess glue.
Step

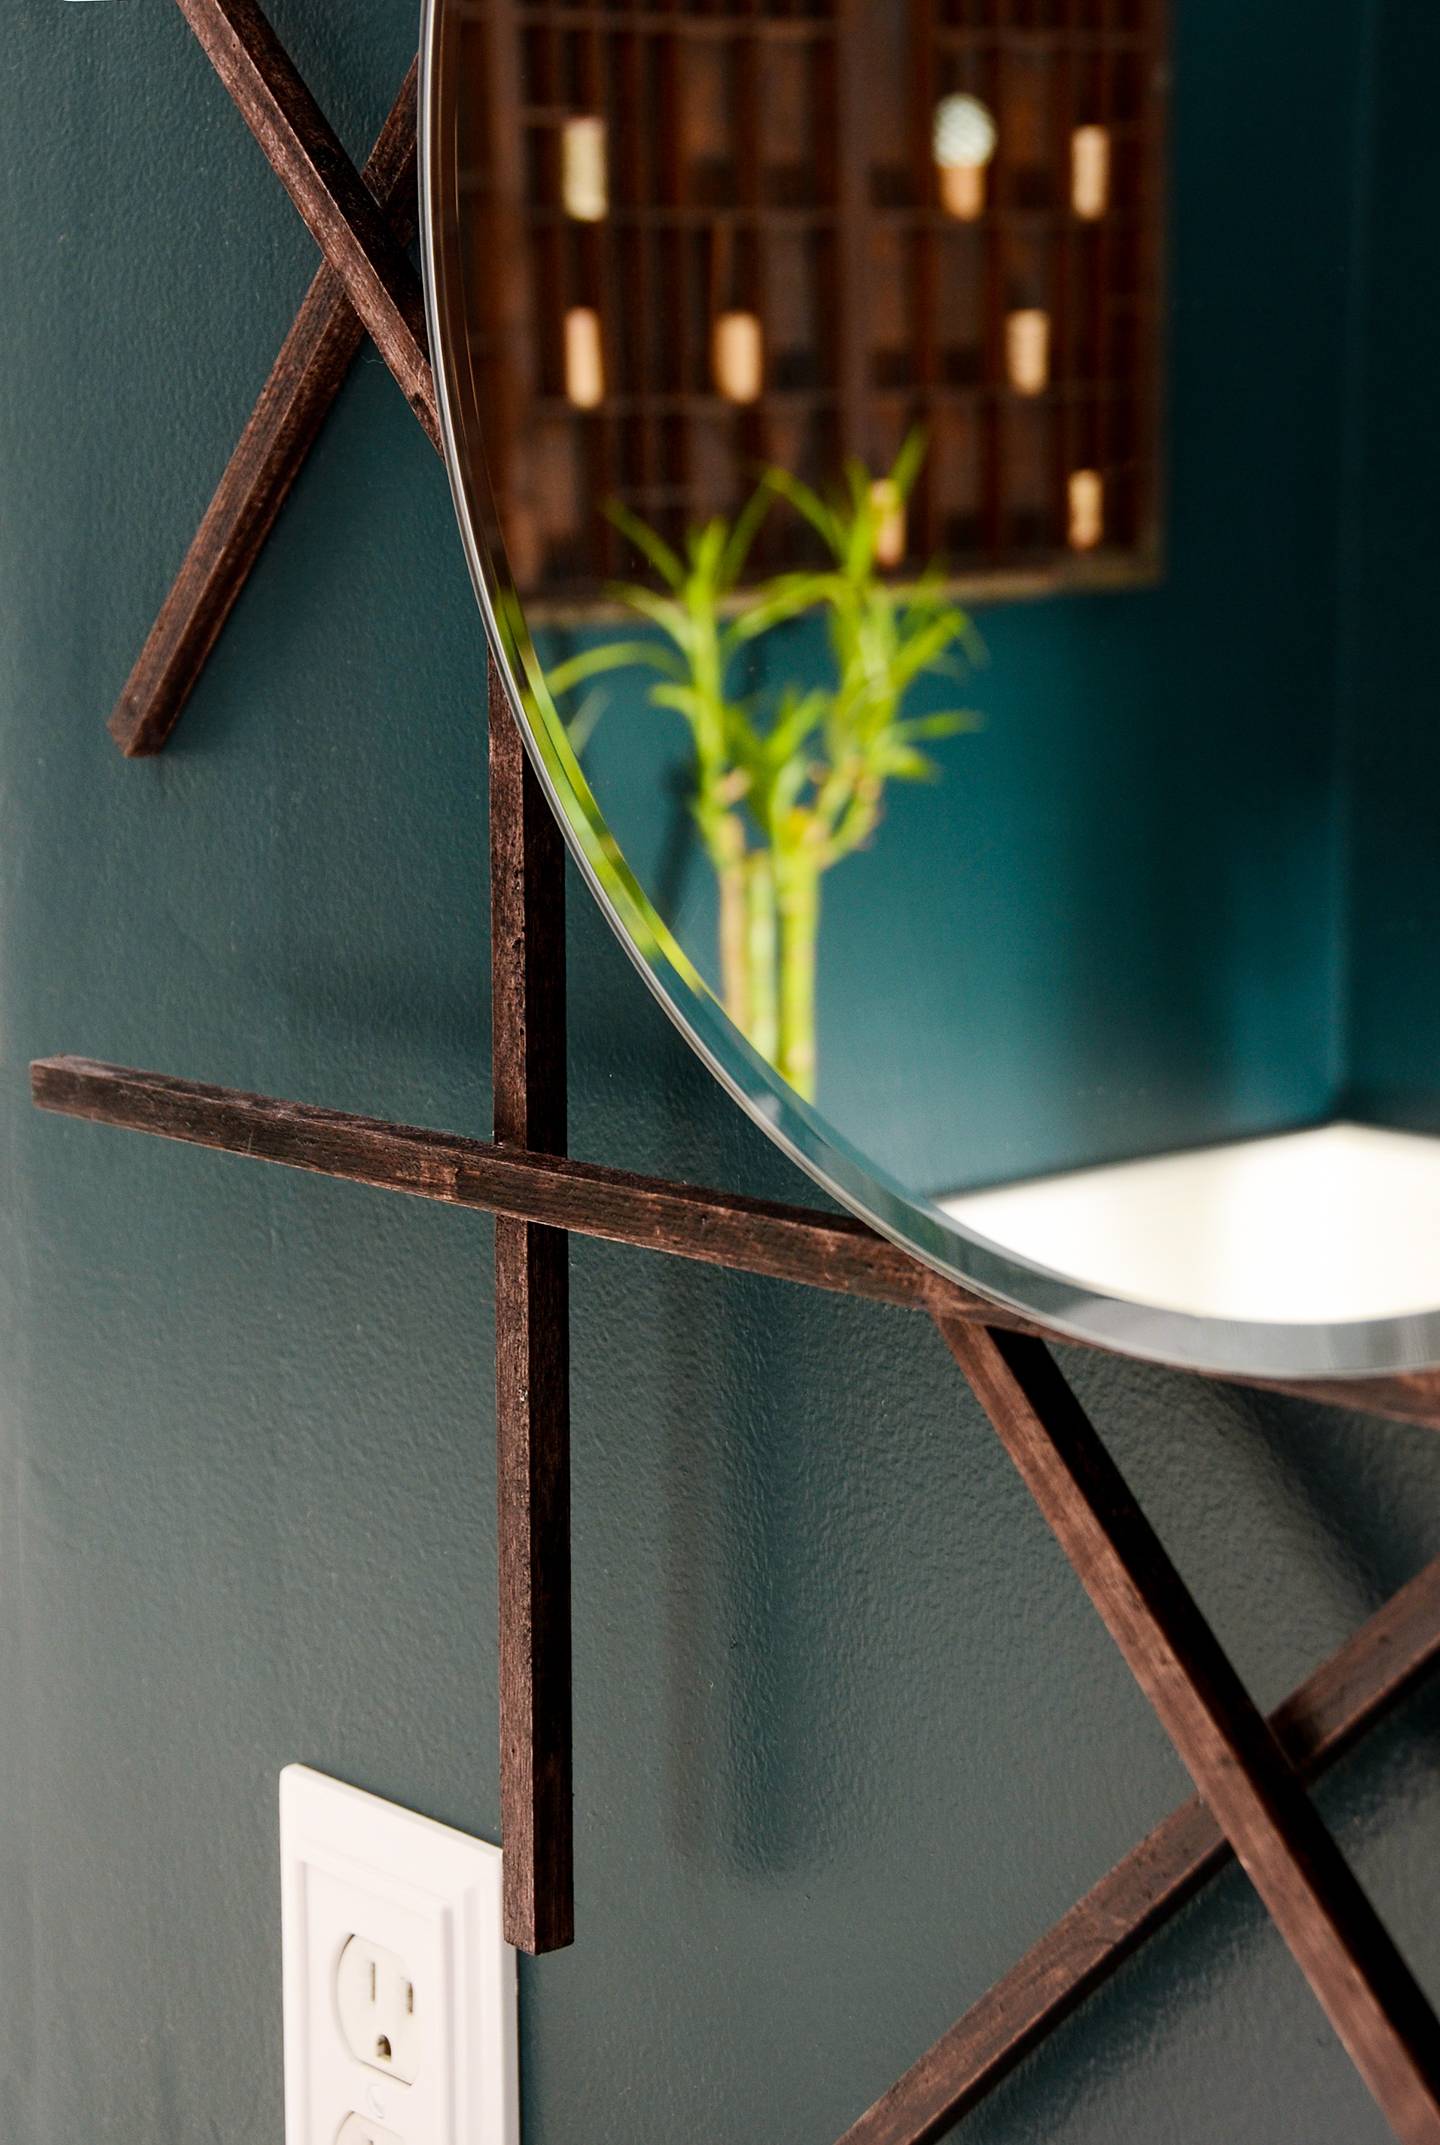
Next, place the mirror face down on your table and glue the two dowels on the lowest layer to the back of the mirror using E6000 glue. Glue the mounting piece to the back of the mirror using E6000 as well, so that it is touching the dowel at the top. Be sure to glue the mounting piece with the wire on the bottom of the mounting piece, towards the center of the mirror (unlike what I did in the photo… I had to turn it around!). This is important so that the picture hanger doesn’t show above your DIY mirror.
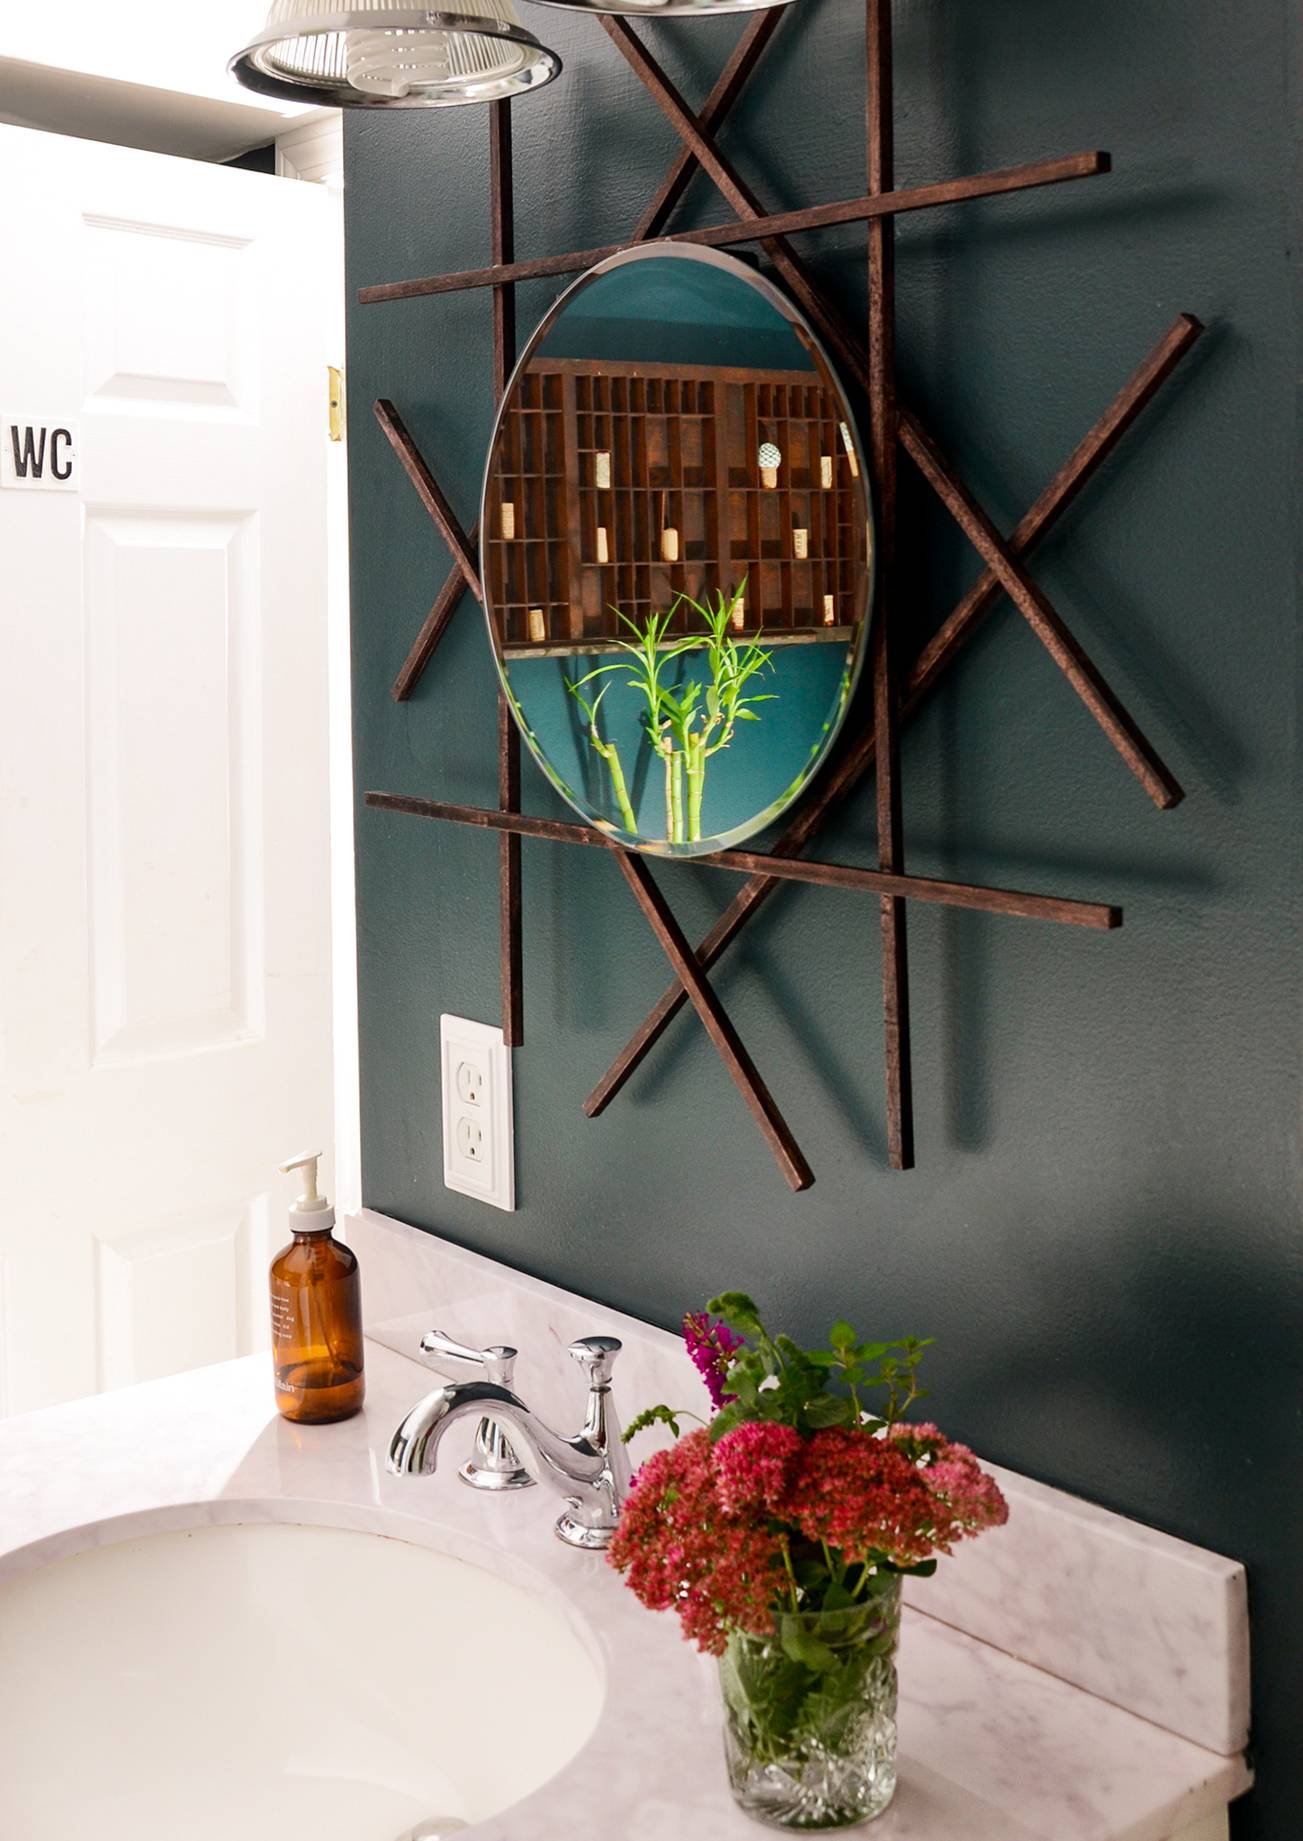
Attach the picture hanger to the wall and hang up your beautiful new DIY mirror!
The finished piece is quite unique, and much more interesting than any store-bought bathroom mirror. Also, it’s a lot less expensive! Bathroom mirrors can get mighty pricey, but since this one is made with a smaller mirror bought at a craft store, the total cost is somewhere in the vicinity of $40, or less if you already have some of the tools.
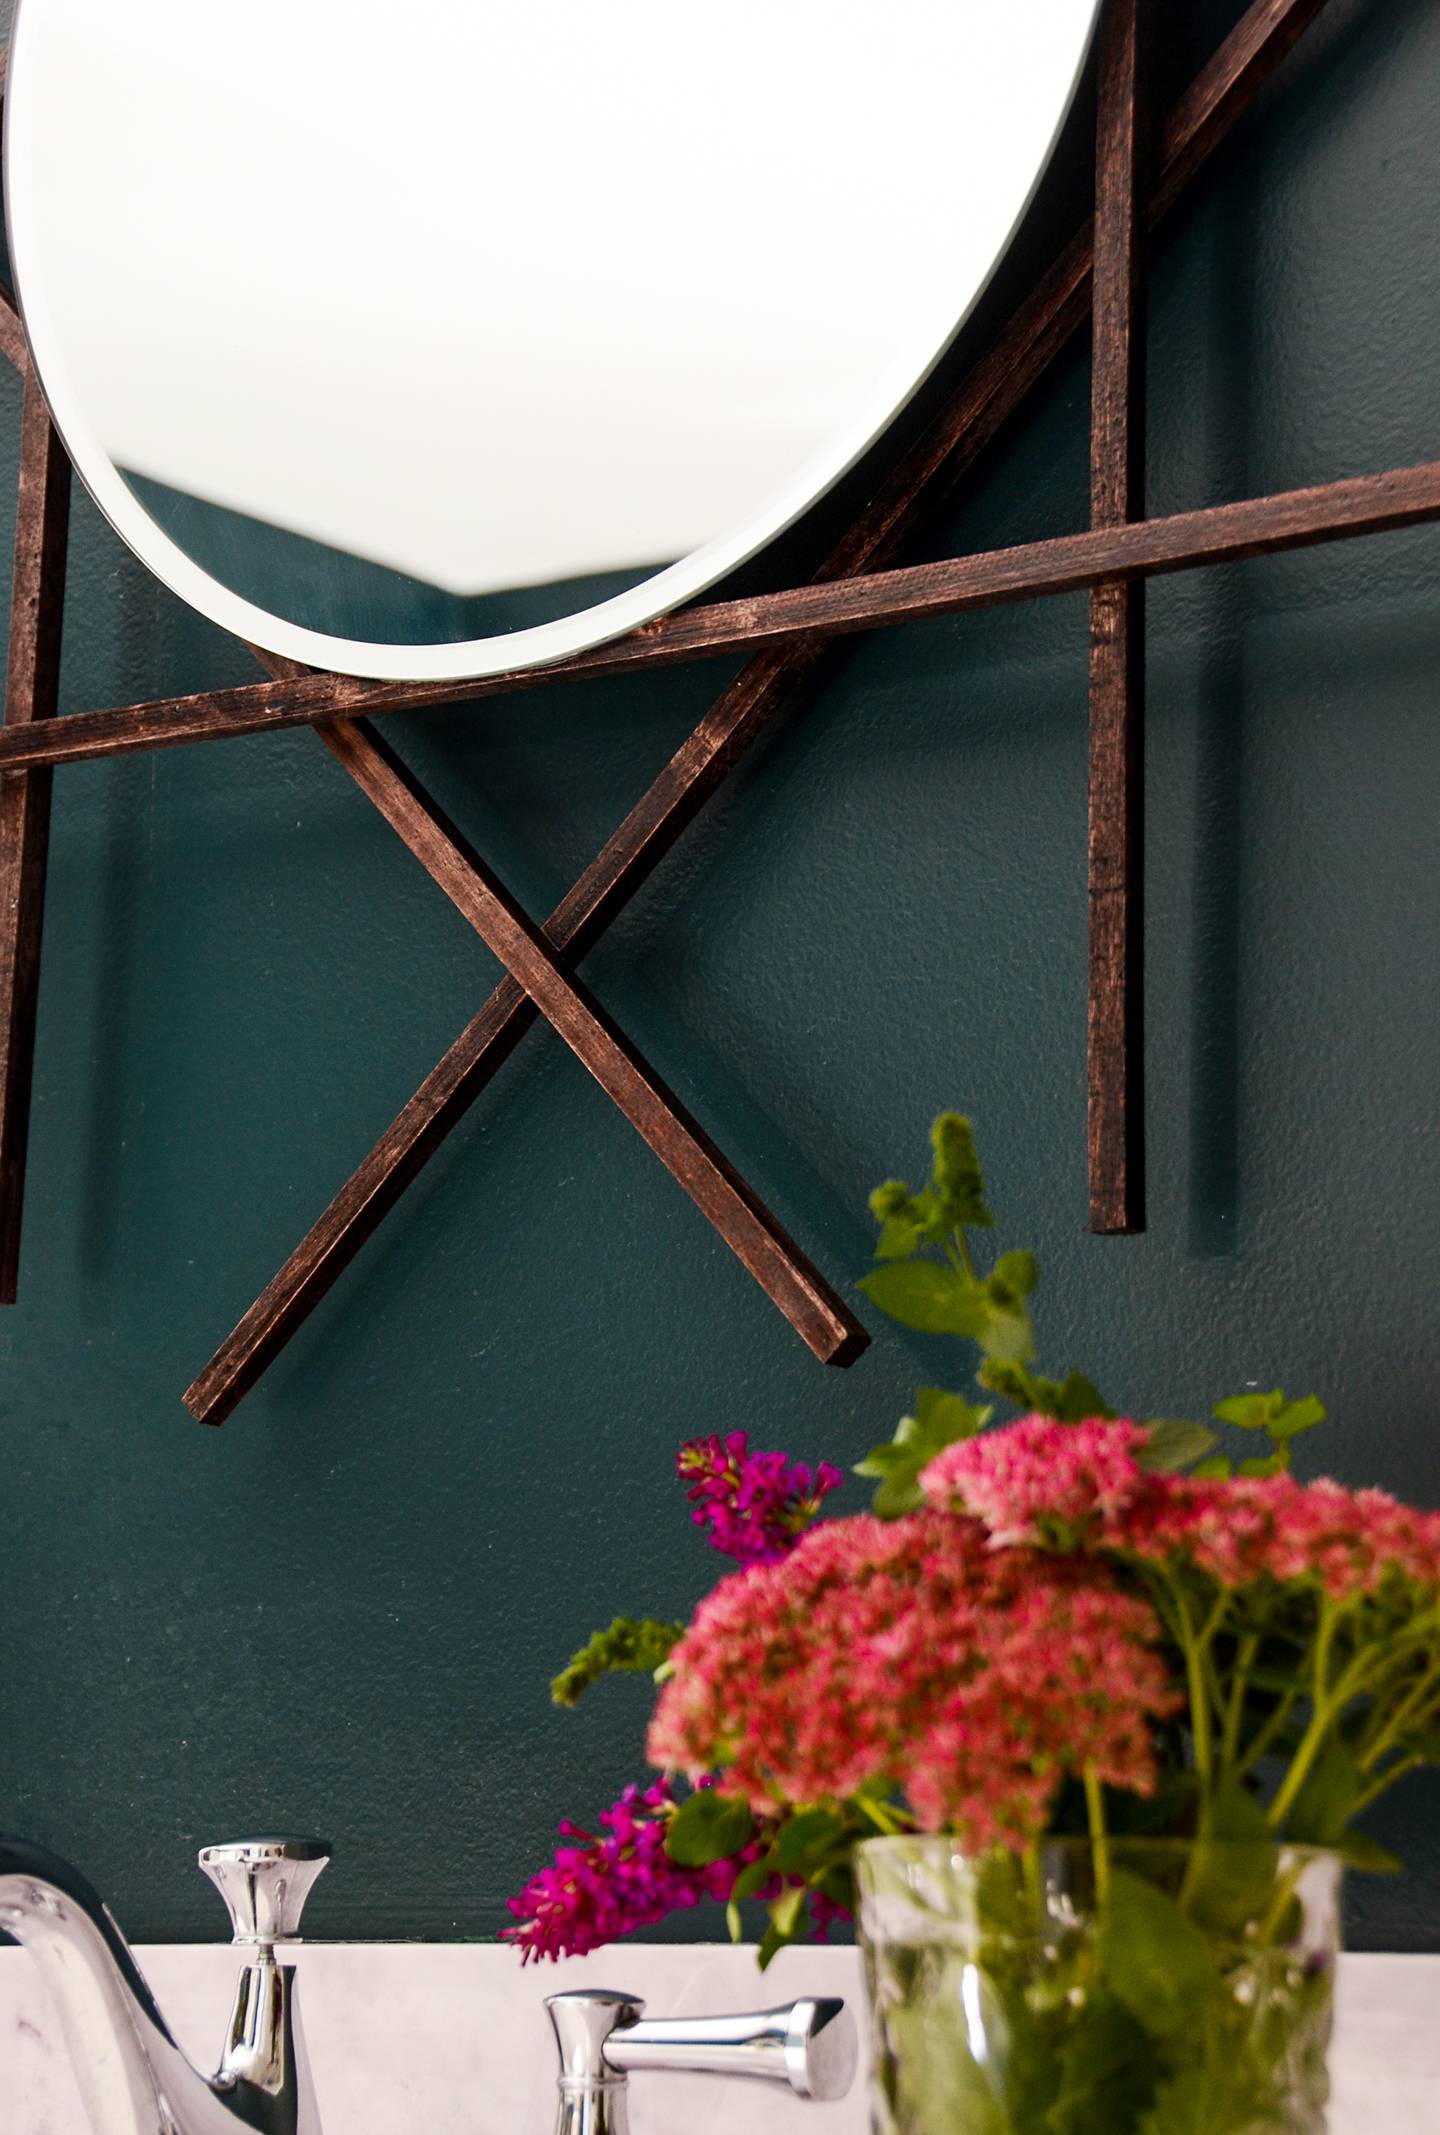
It works well anywhere you need a DIY frame for a mirror… in the bathroom, above a makeup vanity or in the entryway. It’s a great way to add some personality to any space!
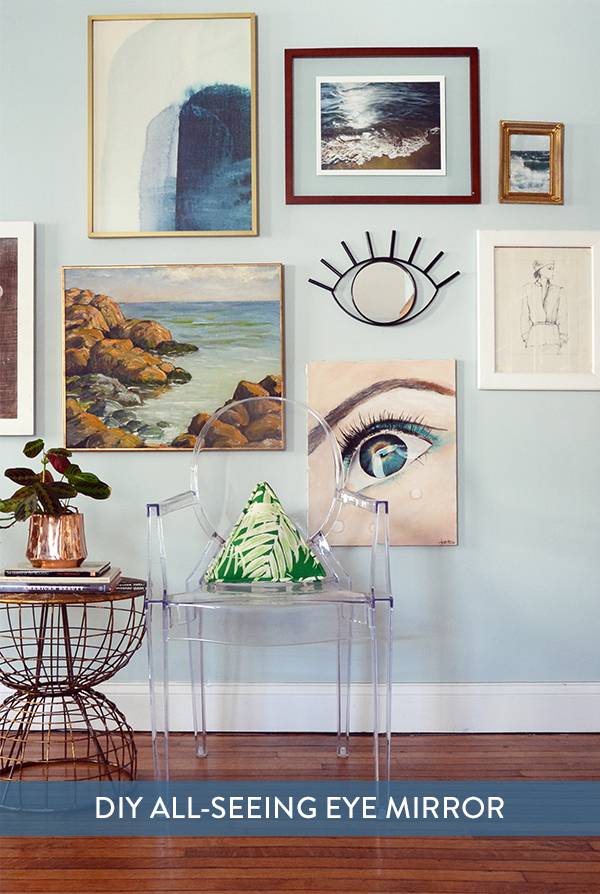
Looking for more projects like this DIY vanity mirror? Check out this all-seeing eye mirror project!
Thanks for sharing this. I’m going to do this in my bathroom.