Are you considering a home renovation project that involves removing a wall? Perhaps you want to create a more open and spacious living area or improve the natural light flow throughout your home. Whatever the reason, removing a wall can be a game-changer in transforming your living space. However, it’s crucial to approach this task with the right knowledge and caution.
In this blog post, we will guide you through the process of removing a wall the right way. We’ll cover everything from assessing the wall’s structure and understanding load-bearing elements to ensure the safety of your home during the removal process. By following these steps, you can avoid potential pitfalls and achieve a successful wall removal without compromising the integrity of your home.
So, let’s dive into the world of wall removal and discover how to create the space you’ve always dreamed of, all while ensuring your home’s safety and structural integrity.
Table of Contents
Importance of Proper Wall Removal
Proper wall removal is of paramount importance for several reasons.
Firstly, it ensures the safety and structural integrity of your home. Walls play a crucial role in supporting the weight of the structure above them, especially load-bearing walls.
Removing a load-bearing wall without proper consideration and support can lead to significant structural problems, compromising the stability of your home. By following the correct procedures, you can minimize the risk of structural damage and ensure the long-term safety of your living space.
Secondly, removing a wall the right way allows you to comply with building codes and regulations.
Most jurisdictions have specific guidelines regarding wall removal, particularly when it comes to load-bearing walls. Adhering to these regulations keeps you on the right side of the law and ensures that your home meets safety standards and remains insurable.
Lastly, proper wall removal minimizes the potential for unexpected surprises.
Walls can conceal elements such as electrical wiring, plumbing pipes, or HVAC ducts. By systematically approaching the removal process, you can identify and address these hidden components, avoiding damage and additional costs.
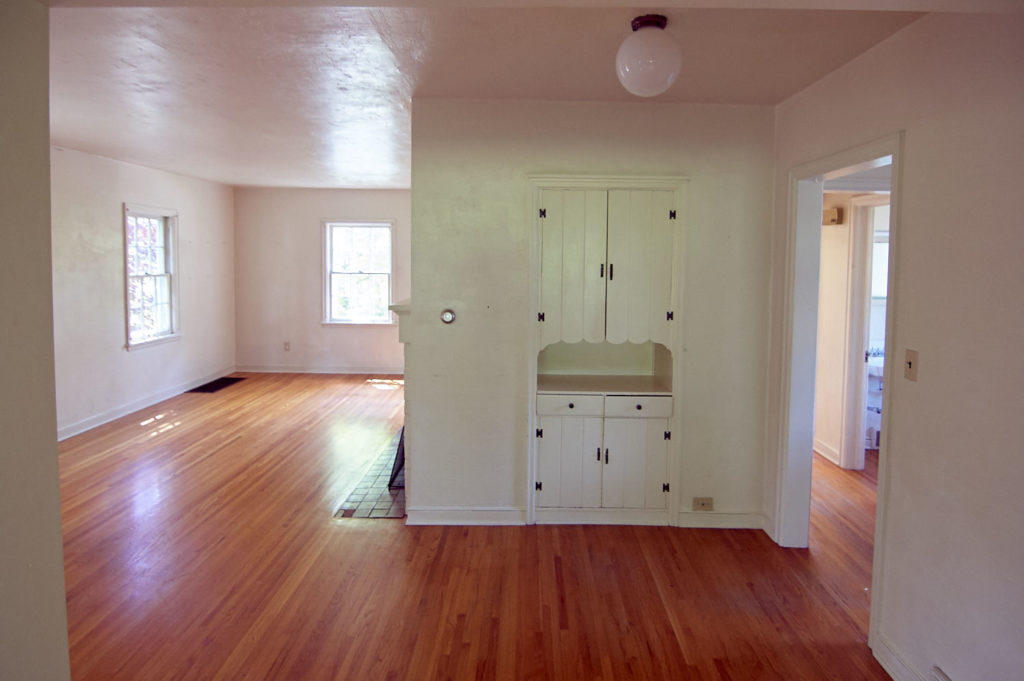
Potential Benefits of Removing a Wall
The decision to remove a wall can bring numerous benefits to your living space.
Firstly, it can enhance the overall aesthetics of your home. By opening up the floor plan, you can create a sense of spaciousness and flow, making the area more inviting and visually appealing. Removing a wall can also improve the natural light distribution within your home, allowing sunlight to penetrate deeper into previously enclosed spaces and brightening up your living environment.
Additionally, removing a wall can facilitate better social interaction and connectivity.
Open-concept living areas promote communication and togetherness, making engaging with family members or entertaining guests easier while working in the kitchen or relaxing in the living room.
Assessing the Situation
Before removing a wall, it’s essential to assess the situation thoroughly. This step will help you determine the type of wall you’re dealing with and whether it is load-bearing or non-load-bearing. Assessing the situation correctly will guide your decision-making process and ensure the structural integrity of your home.
Determining the Wall Type
Load-bearing walls
These walls bear the weight of the structure above them. They are crucial for maintaining the stability and integrity of the building. Removing a load-bearing wall without proper support can lead to serious structural issues.
To determine if a wall is load-bearing, you can:
- Consult blueprints or architectural plans: These documents often indicate load-bearing walls. You can contact your local building department for information if you don’t have access to them.
- Examine the wall’s location: Load-bearing walls are usually perpendicular to the floor joists and parallel to the ridge of the roof.
- Look for support beams and columns: Load-bearing walls often have beams or columns located directly above or below them for structural support.
Non-load-bearing walls
These walls serve as partitions and do not carry any significant weight. Removing a non-load-bearing wall is relatively straightforward and poses fewer structural concerns. Common examples include walls separating rooms or dividing open spaces.
Consulting with a Structural Engineer or Contractor
If you’re uncertain about the type of wall or its load-bearing nature, it’s wise to consult with a structural engineer or a qualified contractor. These professionals have the expertise and knowledge to assess the structural implications of wall removal and provide guidance specific to your home.
A structural engineer can perform a thorough analysis of your home’s structural integrity and provide recommendations on the proper removal process. They may suggest additional measures, such as installing support beams or transferring loads to other parts of the structure, to ensure safety.
Obtaining Necessary Permits and Permissions
Before you begin any wall removal project, obtaining the necessary building permit and permissions from your local building department is crucial. Building codes vary by location, and specific regulations govern the removal of walls, particularly load-bearing ones.
To obtain permits, you will likely need to submit detailed plans or drawings of the proposed wall removal, along with any structural modifications or reinforcements. The building department will review these plans to ensure safety and structural requirements compliance. It’s important to follow the permit process diligently to avoid fines, delays, or potential legal issues.
By assessing the situation thoroughly, determining the wall type, and consulting with professionals, you can make informed decisions about wall removal. Obtaining the required permits and permissions will ensure that your project adheres to safety standards and building codes. In the next section, we will discuss how to prepare for wall removal, including gathering the necessary tools and taking safety precautions.
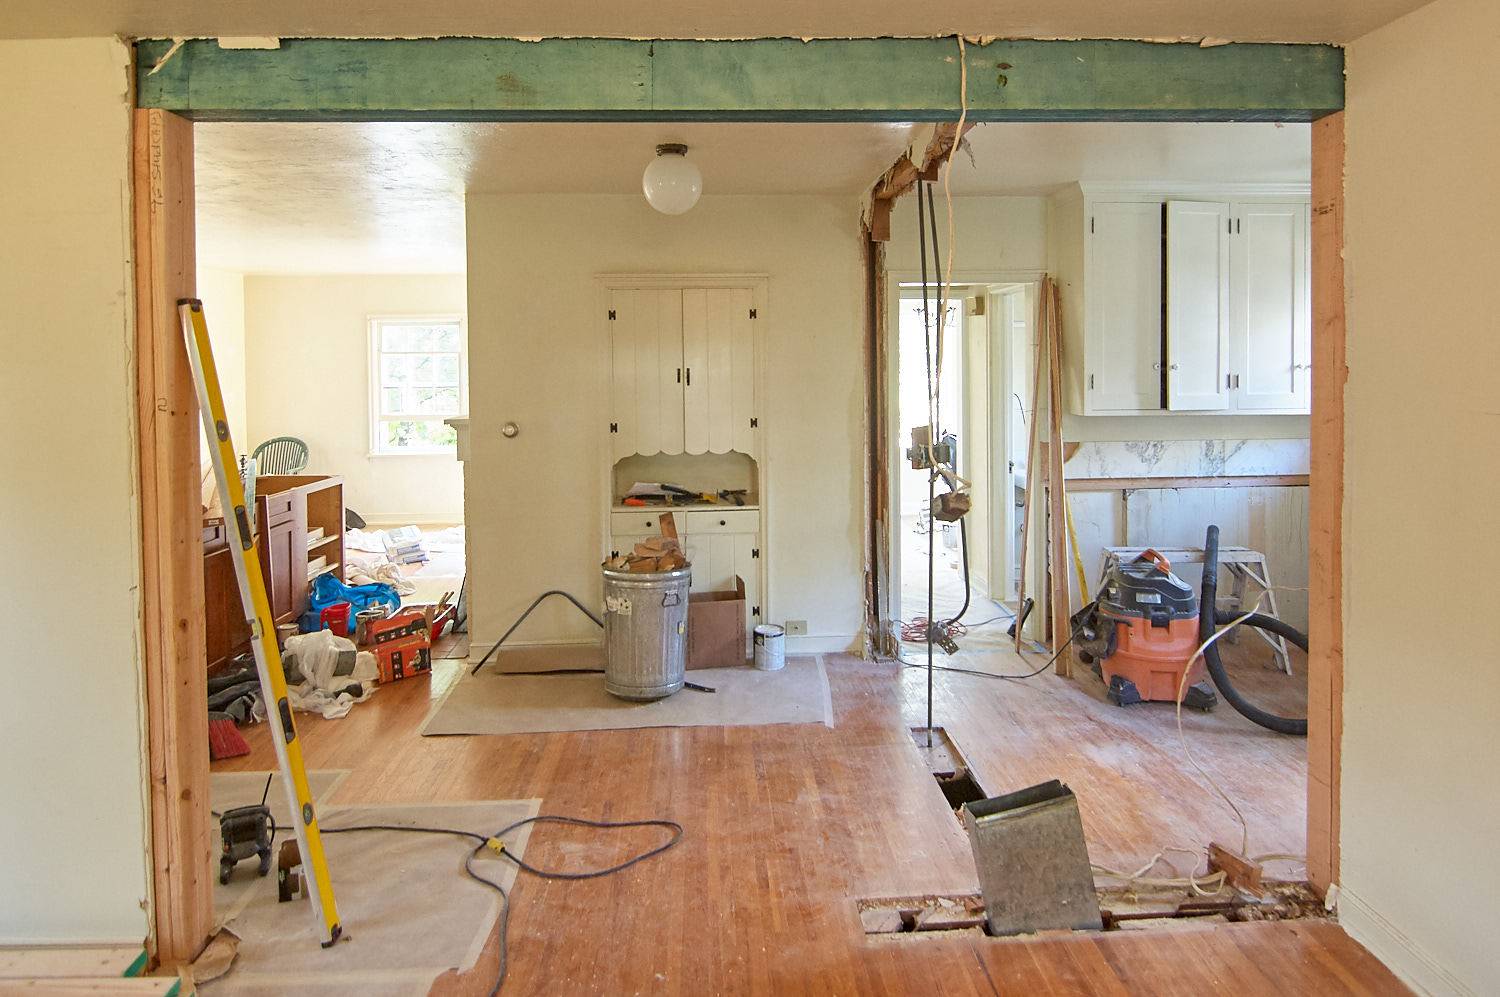
Preparing for Wall Removal
Before you start removing a wall, proper preparation is essential to ensure a smooth and safe process. This section will guide you through the necessary steps to prepare for wall removal.
Gathering the Right Tools and Equipment
You’ll need the proper tools and equipment to remove a wall effectively. Here are some commonly used items:
- Safety gear. Prioritize safety by wearing protective gear such as safety glasses, gloves, and a dust mask or respirator to protect yourself from dust, debris, and potential hazards.
- Demolition tools. Essential tools for wall removal include a hammer, pry bar, reciprocating saw, and utility knife. These tools will help you dismantle and remove the wall materials efficiently.
- Reinforcement materials. If you’re removing a load-bearing wall, you’ll need temporary supports or bracing materials to ensure the stability of the structure during the removal process. This may include adjustable support jacks, steel beams, or lumber.
- Cleaning supplies. Prepare garbage bags, a broom, and a dustpan to clean up debris and tidy the work area.
Clearing the Area of Furniture and Belongings
To ensure a safe and smooth wall removal process, it’s important to first clear the surrounding area of any furniture, decorations, or valuable items. This will help prevent any damage to your belongings and create an unobstructed workspace for the project.
Consider the following steps:
- Remove furniture and large items. Empty the room and relocate furniture and oversized items to a safe area away from the demolition zone.
- Protect delicate items. Cover any remaining items, such as electronics or fragile decor, with drop cloths or plastic sheeting to shield them from dust and debris.
- Securely store items. Store furniture and belongings in another room or a temporary storage area until the project is complete.
Taking Safety Precautions
Safety should always be a priority during any demolition project. Take the following precautions to ensure your well-being:
- Turn off utilities. Before beginning any work, turn off the electricity, water, and gas supply to the area you’ll be working in. This minimizes the risk of accidents and ensures your safety.
- Inspect for hazardous materials. Older homes may contain hazardous materials such as asbestos or lead-based paint. If you suspect the presence of such materials, it’s crucial to have them professionally tested and removed before proceeding with wall removal.
- Secure the work area. Erect temporary barriers or caution tape around the work area to prevent access by children, pets, or unauthorized individuals. This will help maintain a safe environment throughout the project.
By gathering the necessary tools and equipment, clearing the area, and taking safety precautions, you’ll be well-prepared for the wall removal process.
Supporting the Structure
Supporting the structure is crucial when removing a wall, especially if it is load-bearing. Properly supporting the structure’s weight during the removal process is essential to maintain the stability and integrity of your home. Follow these steps to ensure adequate support:
Identifying Load-Bearing Elements
- Consult with professionals. If you’re unsure about the load-bearing nature of the wall or the structural implications of its removal, consult a structural engineer or a qualified contractor. They can provide expert guidance and help identify load-bearing elements.
- Examine the wall’s position. Load-bearing walls typically run perpendicular to the floor joists and parallel to the ridge of the roof. They are often positioned in the center of the house or where support is needed for upper-level floors or the roof.
- Check for additional support. Look for beams, columns, or posts located above or below the wall. These elements are commonly used to transfer the load to the foundation.
Temporary Bracing and Support Installation
- Plan the bracing strategy. Based on the structural assessment, develop a bracing strategy to support the structure during wall removal. This may involve installing temporary beams, columns, or support jacks.
- Locate bearing points. Identify suitable locations to place the temporary supports. These points should align with load-bearing elements, such as beams or columns, to ensure proper weight distribution.
- Install temporary supports. Carefully install supports to bear the structure’s load using adjustable support jacks, steel beams, or lumber. Follow manufacturer instructions and ensure a secure and stable connection to both the floor and ceiling.
- Distribute the load. Consider distributing the load across multiple supports if necessary, depending on the length and weight of the removed wall. This helps prevent excessive stress on individual supports.
Ensuring Structural Stability
- Monitor for movement. Regularly check the temporary supports and the surrounding structure for any signs of movement or shifting during the wall removal process. This includes observing cracks, sagging, or unusual noises. If you notice any concerns, consult a professional immediately.
- Seek professional assistance if needed. In complex situations or when dealing with large load-bearing walls, it’s advisable to involve a structural engineer or contractor to ensure the proper installation and stability of temporary supports.
Remember, ensuring the structural stability of your home during wall removal is crucial. Neglecting this step can lead to severe structural damage or compromise the safety of the building. When in doubt, consult with professionals to obtain expert advice and guidance specific to your home’s unique characteristics.
Removing a wall
At its core, wall removal is not a delicate act. There’s really no way to do it neatly, so just get used to the idea that you’re going to make a mess. You can contain it by putting up plastic sheeting, and by covering carpeted or hardwood floors that you want to protect.
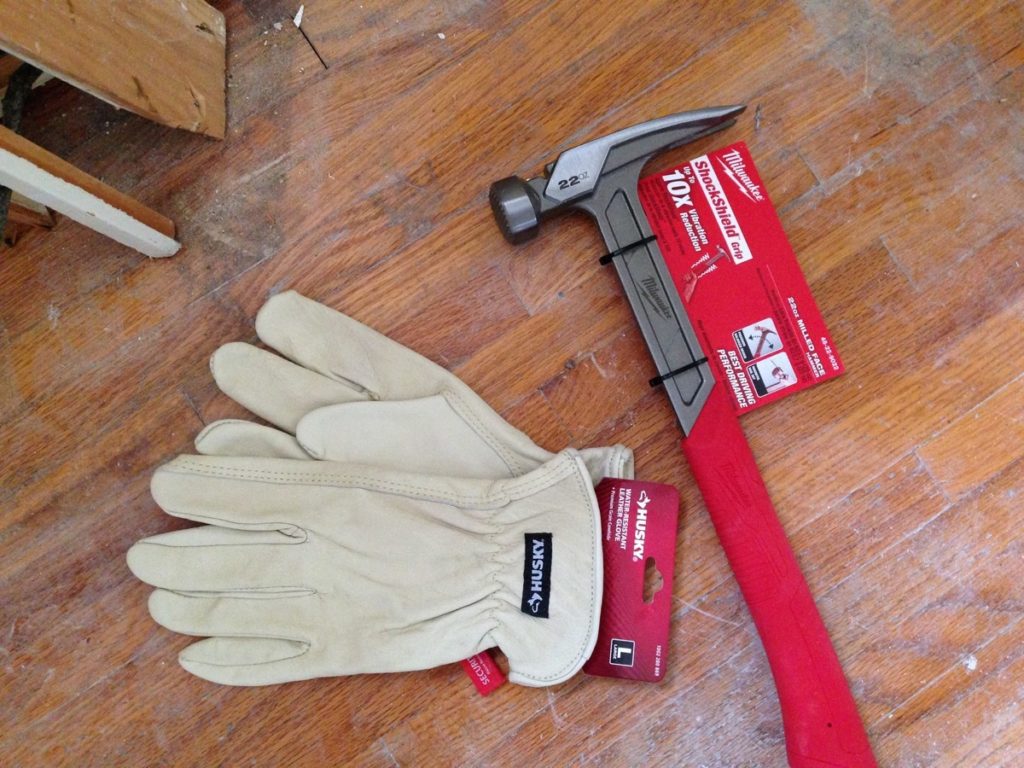
Tools needed:
- Safety gear (eyewear, gloves, ventilation mask)
- Razor or utility-knife
- Hammer
- Sledgehammer
- Pry bar
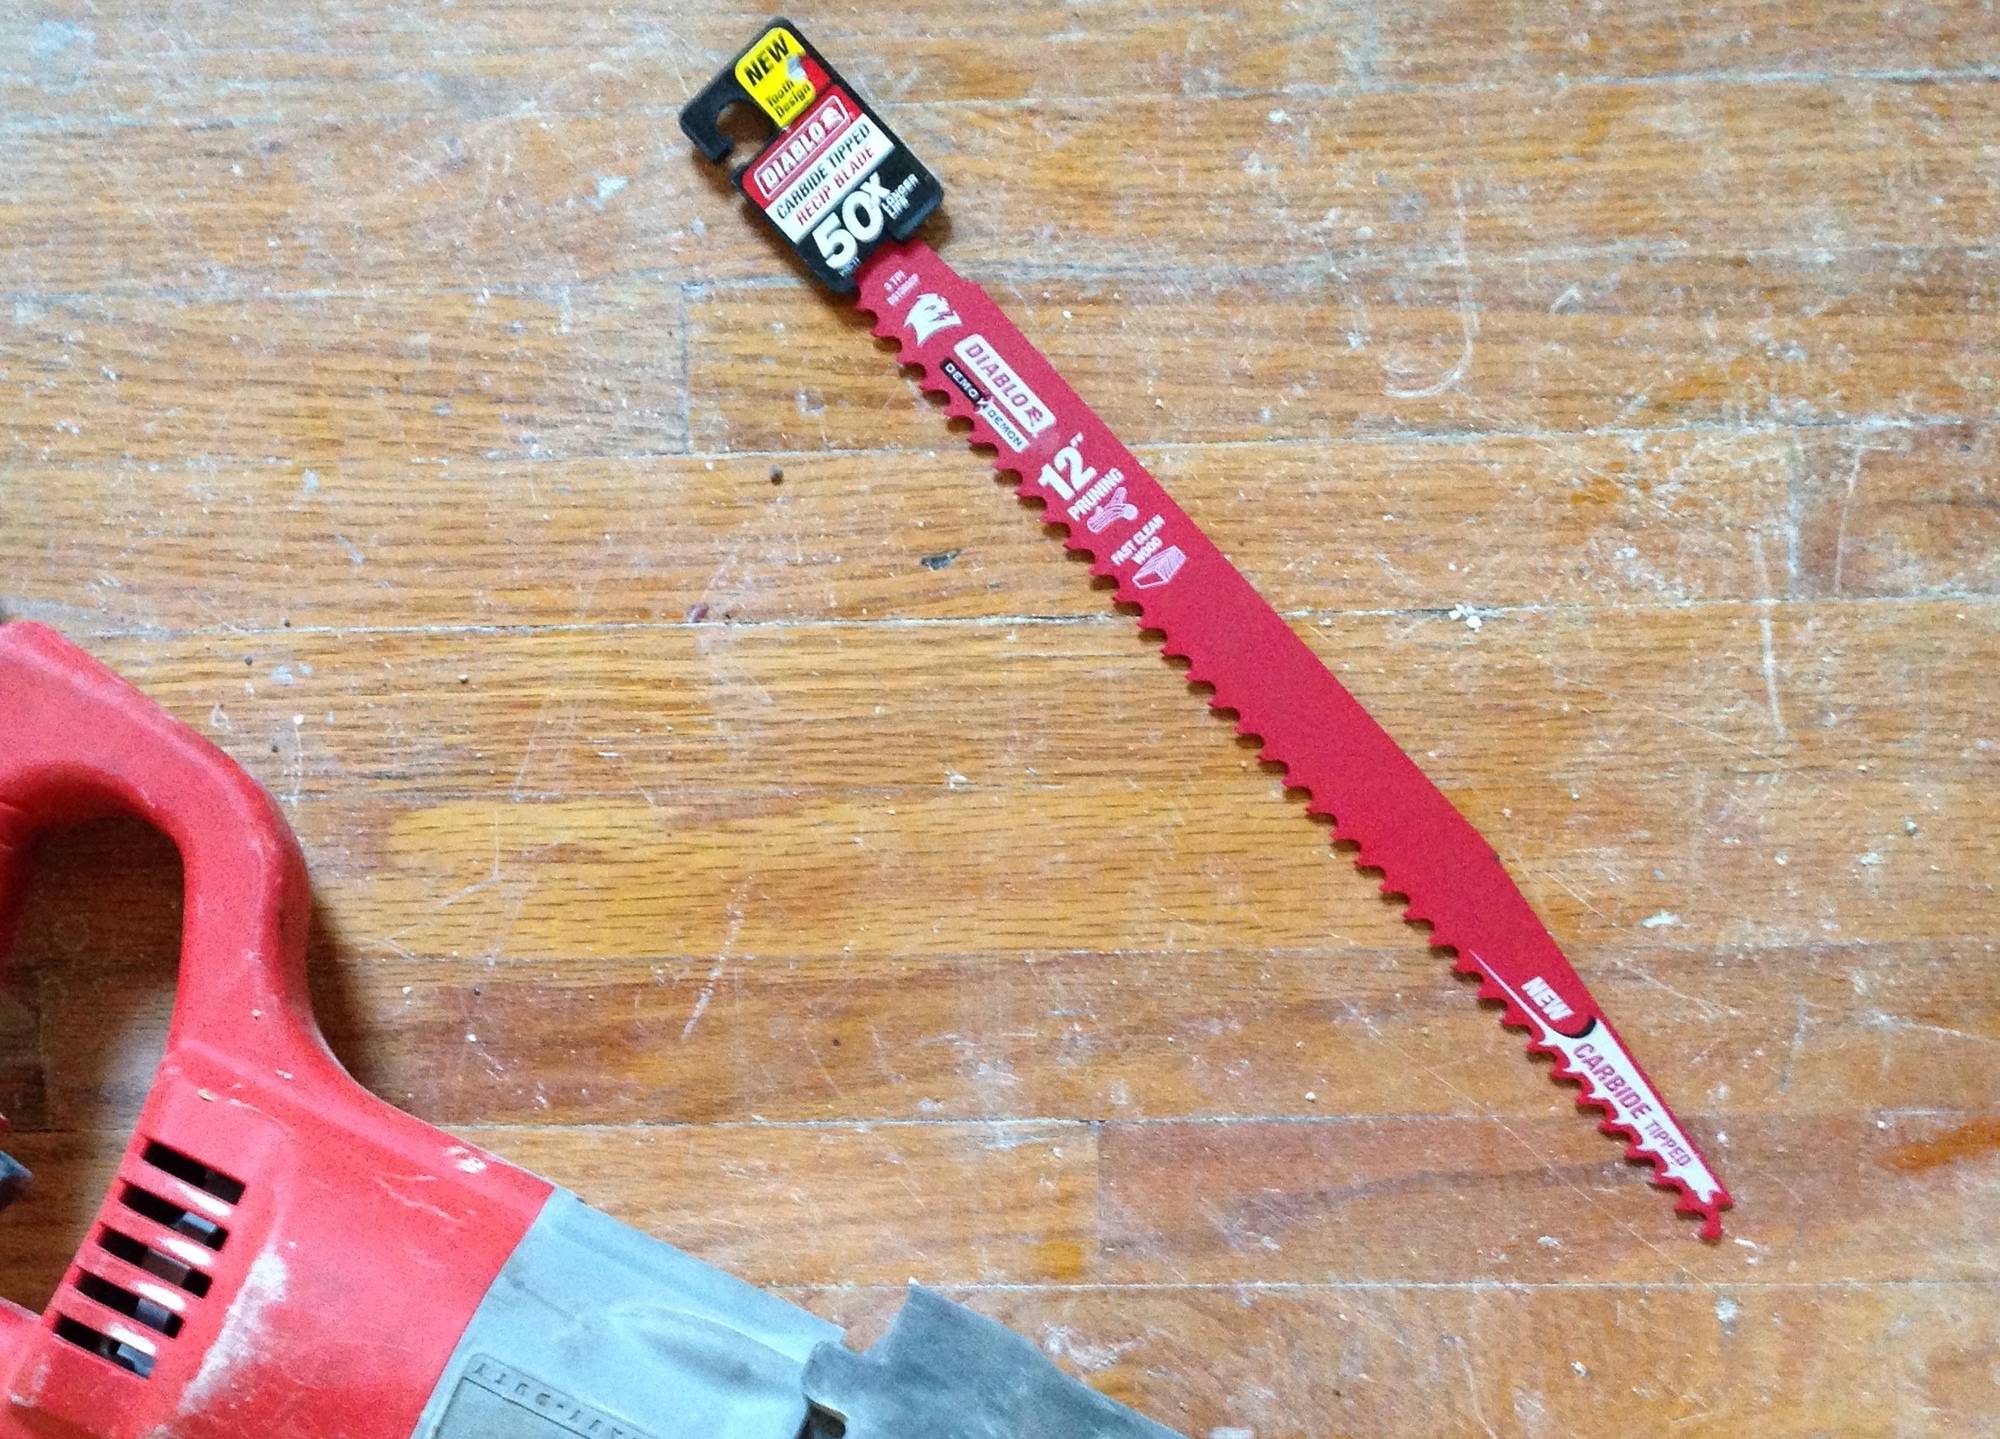
- Reciprocating saw and appropriate blade (I like the Diablo Demo Demon)
With the structure properly supported, you can now proceed with the removal of the wall. This section will guide you through the step-by-step process, ensuring a safe and efficient wall removal.
Starting with the Finishes (Drywall, Paneling, etc.)
- Turn off utilities. Ensure that all utilities, including electricity, water, and gas, are turned off and disconnected from the area where the wall removal will take place.
- Remove fixtures. It is imperative to remove light switches, outlet covers, and other fixtures in preparation for renovation.
- Remove wall finishes. Begin by removing any finishes covering the wall, such as drywall, paneling, or wallpaper. Use a utility knife or a reciprocating saw to cut along the edges and carefully pry off the materials.
- Inspect for hidden elements. While removing the finishes, be attentive to any electrical wiring, plumbing pipes, or HVAC ducts concealed within the wall. Take necessary precautions and consult professionals if you encounter any complicated systems.
Cutting Through Studs or Framing
- Identify load-bearing elements. Confirm the location of load-bearing elements within the wall, such as wall studs, headers, and sill plates. Exercise caution to avoid cutting through them as they contribute to the structure’s stability.
- Create an opening. Use a reciprocating or circular saw to carefully cut through the drywall or sheathing along the edges of the wall. Create an opening that allows access to the framing members.
- Remove studs and framing. Starting from the top and working your way down, remove the wall studs and other framing members. Use a pry bar or a hammer to detach the studs from the adjacent framing or plates. Take care to support any load-bearing elements during this process.
- Structural reinforcements (if necessary). Removing a load-bearing wall may require additional structural reinforcements, such as installing a beam or transferring the load to adjacent support columns. Consult a professional if you are uncertain about the necessary reinforcements for your specific situation.
Disposing of Materials Safely
- Clean up debris. As you remove the wall materials, clean up the debris regularly to maintain a safe and organized work area. Use a broom and a dustpan to gather loose debris and dispose of it properly.
- Sort and recycle. Separate recyclable materials from other waste, such as metals and clean wood. Consult local recycling centers or waste management facilities to ensure proper disposal methods.
- Dispose of non-recyclable waste. Bag non-recyclable waste, such as broken drywall or non-reusable materials, and dispose of it according to local regulations. Check with your local waste management authority for specific guidelines on proper disposal.
- Hazardous materials. If you suspect the presence of hazardous materials, such as asbestos or lead-based paint, during the wall removal process, consult professionals for testing and proper disposal procedures.
By following these steps, you can safely remove the wall, ensuring a clean and organized work area and proper disposal of materials. The next section will discuss how to address utilities within the wall and handle necessary relocations or modifications.
Dealing with Utilities
During the process of removing a wall, it’s important to address any utilities that may be hidden within the wall, such as electrical wiring, plumbing pipes, or HVAC ducts. Properly handling these utilities ensures their safety and functionality. Follow these steps to deal with utilities effectively:
Shutting Off Utilities
- Electrical. Locate the circuit breaker panel and turn off the circuit breaker corresponding to the area where the wall removal will take place. Use a voltage tester to verify that the power is indeed turned off before proceeding.
- Plumbing. If the wall contains plumbing pipes, shut off the water supply to that specific area. Locate the main water valve and close it to stop the water flow. Relieve any pressure by opening faucets in nearby sinks or showers.
Relocating or Rerouting Utilities
- Electrical wiring. If the wall contains electrical wiring that needs to be relocated, consult a licensed electrician. They will safely disconnect and reroute the wiring according to code requirements.
- Plumbing pipes. In the case of plumbing pipes running through the wall, consult a licensed plumber for assistance. They will disconnect and reroute the pipes to maintain the water supply and drainage system.
- HVAC ducts. If the wall contains HVAC ducts that need to be relocated, consult an HVAC professional. They will assess the system and determine the best way to reroute the ducts while maintaining proper airflow and functionality.
Seeking Professional Assistance
- Complex utility systems. If the wall contains intricate utility systems or you are uncertain how to handle them, it’s best to seek professional assistance. Electricians, plumbers, or HVAC technicians have the expertise to address complex utility situations safely and efficiently.
- Permits and inspections. In some cases, relocating or modifying utilities may require permits and inspections to ensure compliance with building codes. Consult with local authorities to determine your specific project’s necessary permits and inspections.
- Safety precautions. When working with utilities, always prioritize safety. Follow proper procedures, use appropriate tools, and consider wearing protective gear. If you need clarification on any aspect of utility handling, consult professionals to avoid potential hazards.
By shutting off utilities, relocating or rerouting necessary utilities, and seeking professional assistance when needed, you can ensure the safety and functionality of the utilities within the wall. In the next section, we will discuss the rebuilding and finishing process to complete the wall removal project.
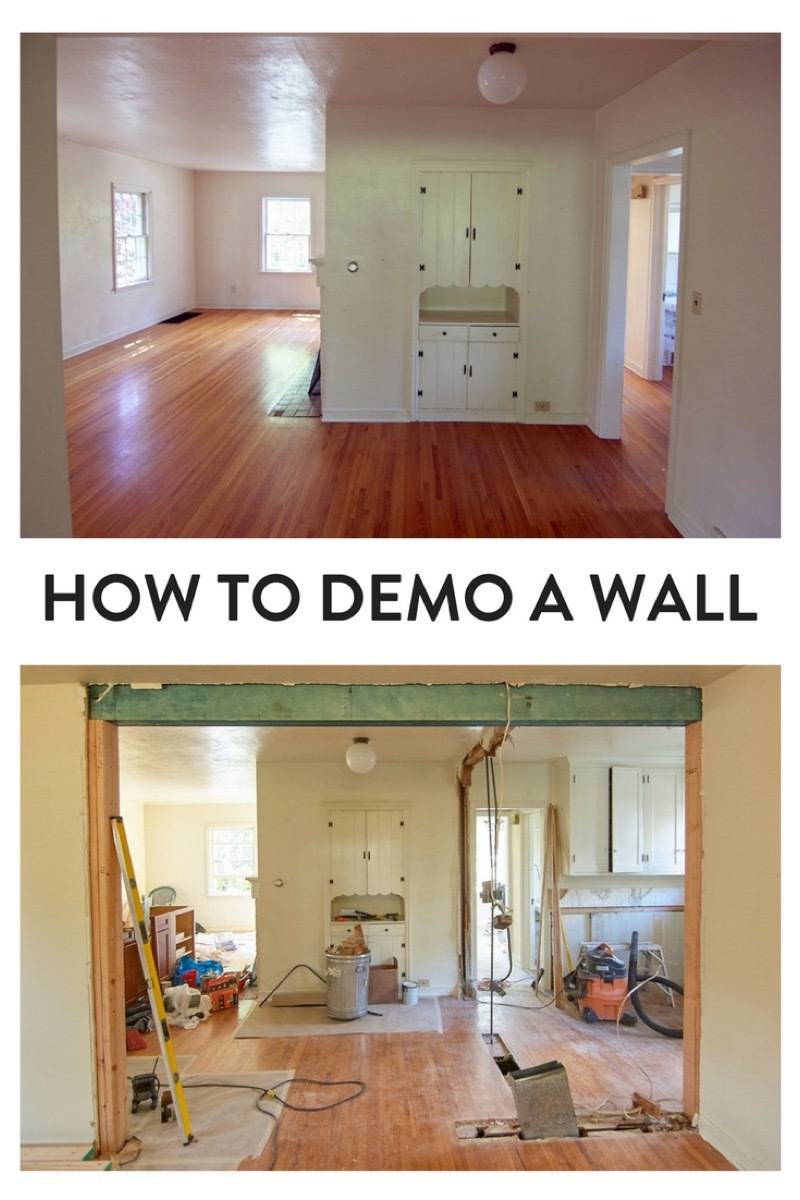
Rebuilding and Finishing
After successfully removing the wall and addressing utilities, it’s time to rebuild and finish the area to restore the functionality and aesthetics of the space.
This section will guide you through the rebuilding and finishing process:
Structural Repairs and Modifications
- Repair any damage. Inspect the surrounding areas for any structural damage that may have occurred during the wall removal. Address any issues, such as cracks or weakened sections, with appropriate repairs or reinforcements.
- Install necessary supports. If the wall removal requires structural modifications, such as the installation of beams or columns, follow the guidance of a structural engineer or contractor to ensure proper installation.
Framing and Drywall Installation
- Frame the opening. Measure the dimensions of the opening left after the wall removal and frame it using lumber or metal studs. Ensure that the framing is secure and properly aligned.
- Install new drywall. Cut and install new drywall to cover the framed opening. Attach the drywall using screws or nails, ensuring a tight and seamless fit. Apply joint compound and tape to smooth out the seams and create a finished surface.
Finishing Touches
- Sand and smooth the surface. Once the joint compound is dry, sand the surface to achieve a smooth finish. Remove any dust or debris before proceeding.
- Paint or finish the wall. Apply a coat of primer to the drywall surface, followed by your chosen paint color or finish. Use a brush or roller to achieve an even application. Allow the paint to dry completely before adding additional coats if necessary.
- Install baseboards and trim. To complete the look, install baseboards and trim around the newly finished wall. Ensure proper measurements and secure them with nails or adhesive.
- Flooring adjustments. Depending on the layout and design of the space, you may need to make adjustments to the flooring to blend the newly opened area with the existing flooring seamlessly. Consult a professional if you require assistance with flooring modifications.
Final Inspections
- Building inspections. Depending on local regulations, you may need to schedule a final inspection to ensure compliance with building codes and safety standards. Contact your local building department to determine if an inspection is required.
- Utility reconnection. If any utilities were disconnected during the wall removal, contact the respective professionals to reconnect them according to proper procedures safely.
By following these steps, you can rebuild and finish the area to restore the functionality and appearance of the space. Remember to obtain any necessary inspections and approvals before considering the project complete.
After you clean up, enjoy your newly opened and transformed living area!
Conclusion
Removing a wall can be a transformative process that opens up new possibilities in your living space. By understanding the importance of proper wall removal, assessing the situation correctly, and following the step-by-step process outlined in this guide, you can safely and successfully remove a wall the right way. Always prioritize safety, consult professionals when needed, and adhere to local building codes and regulations. Whether you’re creating an open floor plan, expanding a room, or redesigning your home, proper wall removal can make a significant difference in achieving your desired outcome.
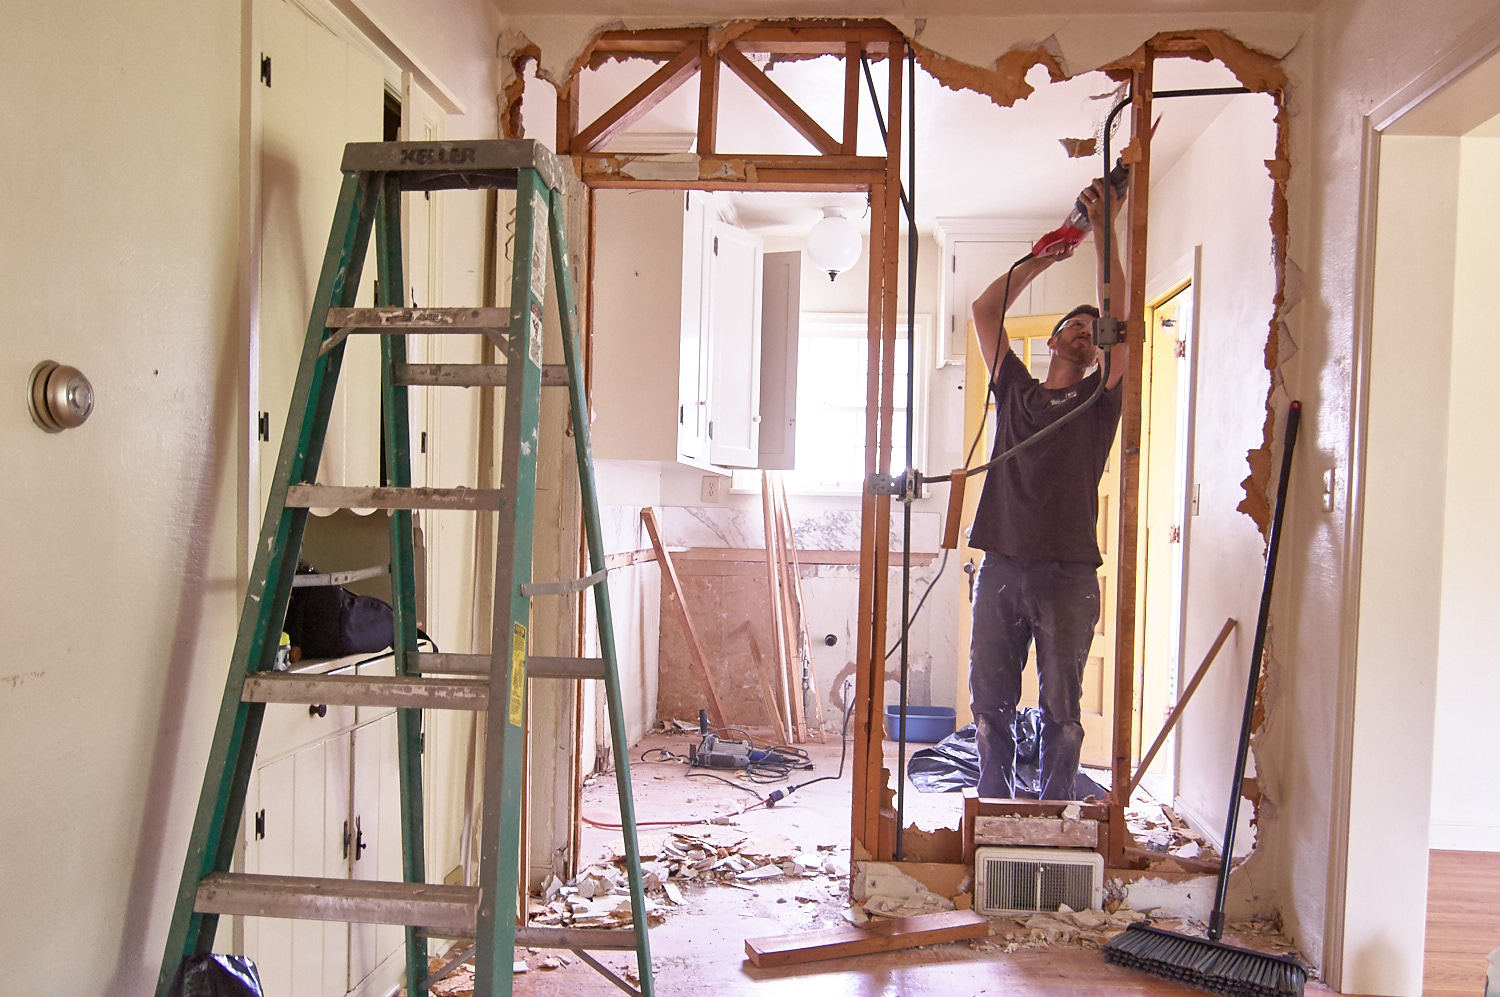
These tips were awesome in helping us remove one of our kitchen walls! We had this massive wall between our kitchen and living room and it’s now so much more open! We followed all the steps you provided and we had no issues! One of the best things we did was getting a dumpster rental delivered. It made hauling all the old materials so much easier and stress-free. I’m ready for my next project now! HA!
Best wishes from Gainesville, VA!