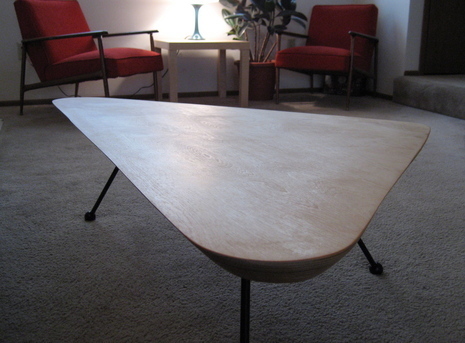
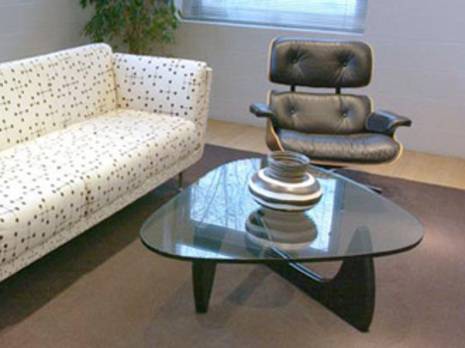
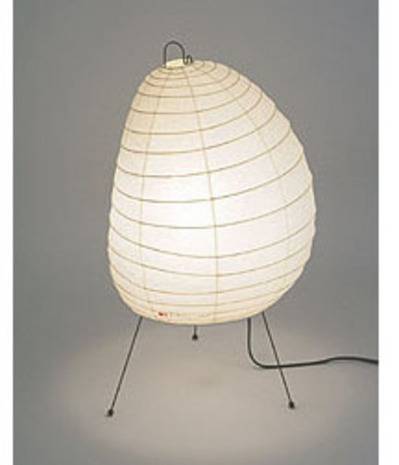
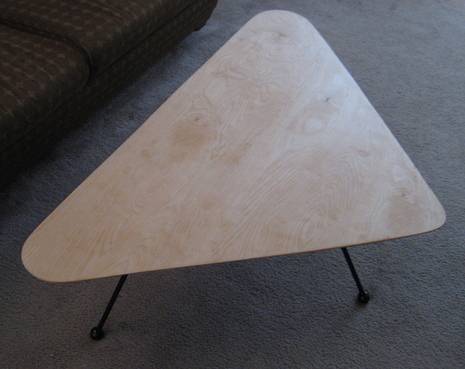
With very minimal woodworking know-how, I built a mid-century-ish, Isamu Noguchi-inspired “spaceship” table for under $80. The top is similar to Noguchi’s 1948 “Noguchi Table” and the legs are inspired by Noguchi’s Akari series of table and floor lamps.
[When I first made the table, there was no Curbly.com, so I didn’t think to take step-by-step photos. However, I decided to remake the legs to adjust to the height of my new sofa, and refinish the top, so there are illustration photos for those steps.]
Materials and Tools
60”x60” piece of high-ply (11-15) Baltic birch, or other high-ply plywood
4’ length of 1/2” solid steel pipe (available in the weldable steel section of the hardware store, denoted by the red tip).
4’x 4” piece of 1/2” MDF
1 1/4” wooden balls, with 1/2” hole (available at any craft store) (3)
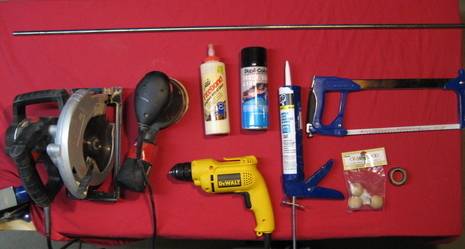
Circular Saw, with beveling capacity (and plywood blade)
Random-orbit sander, with various grits of sandpaper
Hack saw, with bi-metal blade
Electric Drill, with 1/2” and 9/64” drill bits
Soft rubber mallet, or scrap 2x stock
Protractor
1 1/4” wood screws (12)
All purpose acrylic caulk
Wood glue
Contact cement and paintbrush
Electric Tape
1/2” wood dowels (4) (reusable)
Several wood clamps
Scrap wood for clamping cauls
Wood Stain or Danish Oil Finish
Polyurethane, Shellac, or Finishing Wax
Safety Glasses, Safety Gloves, and Dust Mask
Recommend, but not necessary:
Vice
Straight-edge for use as circular saw fence
Miter saw, Radial arm saw, or miter box
Shop vacuum
Laminating and Cutting the Tabletop
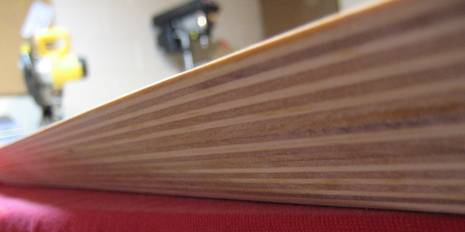
Since the plywood edges are exposed, I sought the highest ply I could procure. I found a 15-ply piece of 3/4” Baltic Birch, which is generally used to make the sides of drawers in bureau and dressers. Check woodworking shops, and lumberyards that do specialty millwork. Baltic birch comes in 60’ x 60” square sheets, rather than traditional 8’x4’, which is cool, because it’s less expensive, easier to transport (have them cut it in half at the shop, and it should fit in most back seats), and there’s less waste. My piece cost around $55.
Laminating the Top
Cut, or have the lumberyard cut, your plywood into half, with the grain. If using Baltic birch, this creates two 30”x60” rectangles. If using an 8’x4’ sheet of ply, have the pieces cut to size.
To laminate the top, select the best face of each piece (let’s call the top A and the bottom B), and turn the plywood over. Spread a coat of contact cement onto the underside of each piece, and let air-dry for 15 minutes (consult the manufacturers directions.). Then, evenly place the dowel rods (four will be plenty) across the glued side of piece B; they won’t stick. Place piece A atop the dowel rods, and line up all the edges. Remove each of the dowel rods singularly, and attach pieces A and B. Since we will be cutting out the table shape, it’s not essential that the glue up is perfect. Clamp the table top with every clamp you own, using scrapwood cauls, and let dry overnight.
Cutting the Table
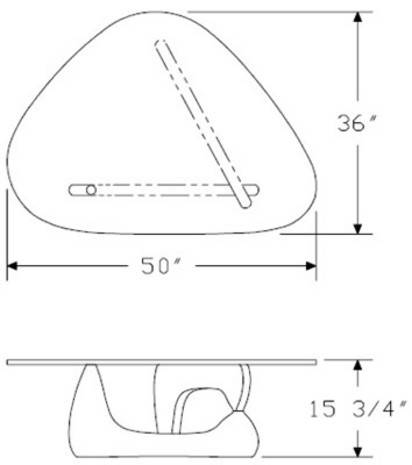
Create a template for your table top with craft-paper or the reverse side of wrapping paper. Check out the photos for the original Noguchi table design, and for my adaptation. (The most clever of you will note that you can’t make a 36”x50” tabletop out of a 30”x60” piece of plywood, so adapt accordingly.) Check your template with the shape/length of your sofa and the space in which it will lie. Mine was 51” long by 29 3/8” tall, with side lengths of 51”, 41 1/2”, and 36 5/8”.
Transfer your edited template to the bottom (piece B) of your glued-up top, flipping it upside down for a mirror image. Using a combination square, compass, or calipers, mark a “con-triangular” identical shape 3 3/8” (or whatever the distance between the foot or your circular saw and the 45-degree blade) smaller than the larger shape. This internal line will be the cut-line, and with your saw at a 45-degree bevel, allows the top [A] to match your initial template. You need to cut the tabletop face down so as to prevent chipping of the plywood.
Using you circular saw, outfitted with a blade appropriate for plywood and set to a 45-degree bevel, cut out your shape. Cut the three long sides, and then use small, repeated passes to approximate the curved angles. There was no way my jigsaw, set to 45-desgrees, could cut through a 1 1/2” piece of plywood, but you’re encouraged to try if yours is more stout. Of course you could also make these cuts on a table saw, or perhaps a band saw, if you have access to one. These cuts don’t need to be joinery-perfect, as you will clean up the shape while sanding.
Sanding and Shaping the Tabletop
Check the beveled-edges of your tabletop. If there is a gap between the two original pieces A and B, spread some wood glue on a piece of cardstock, and use it to apply glue in between the layers. Clamp with cauls, remove excess glue squeeze-out, and let dry.
Now, using your sander and rough grit sandpaper (60-grit), begin to shape your table. Smooth out the angled corners, trying to mimic the 45-degree bevel along the edges. If you have a lot of material to remove (as I did), use a flapwheel designed for hand-held grinders and a grinder adapter for your electric drill to remove the stock more quickly.
Continue to sand, increasing your grit of sandpaper (60-100-120-150-220) to you satisfaction, Take your time. Round over your corners for comfort and safety.
Creating the Legs and Brackets
Making the Legs
While your tabletop is clamped, get started on making your legs. Of course, you can always purchase legs, but I was unable to find any that matched my Noguchi ambitions.
First, using a hacksaw with a bi-metal blade (or an angle-grinder or chop-saw), cut the steel rod to length. The length is up to you, depending on the height of your sofa, so dust off your Pythagorean theorem. The leg length is the equivalent of the “hypotenuse”. In my case, a 14 3/4” leg length, with a 50-degree angle on the bracket, produced an approximate height of 15 1/4”, which is close enough to the 15 3/4” height of the Noguchi table. (You can actually adjust the height of the legs later, if need be.)
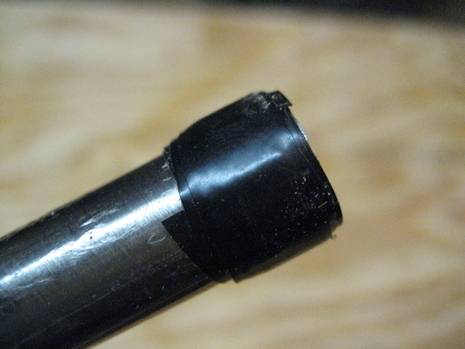 Fill the wooden balls half full with acrylic caulk, and wrap a half-width of electric tape around the steel rod. Cover the tape with a thing layer of wood glue. Insert the leg into the ball, and remove any excess caulk that has squeezed out. Once the caulk and glue has dried, fill any excess space with wood filler. Sand away the filler for cleanliness.
Leg Brackets
If you know how to weld, then I am jealous, and you can weld the legs to steel brackets, and be on your way. For the rest of us, through several trial-and-error sessions, I came up with a reasonably modern design that matches the aesthetic of the table (at least I think so) and maintains structural integrity.
Using 1/2” MDF, cut three 4”x 4” squares, three 2 3/4”x 2 3/4” squares, and three 2”x2” squares. Stack them atop each other, like a layer cake, and glue and clamp (see photo). Paint the brackets with black matte spray paint. (Or any color, if you please).

While the glue and paint are drying, make a jig out of a scrap piece of MDF. You’ll use this jig to get a consistently drilled angle in each of your brackets. You can experiment with different angles and a pencil as a mock-leg. As mentioned above, my angle was approximately 50-degees.
Using your jig, drill 1/2” holes all the way through the brackets. If you don’t have brad-point drill bits, make a starter hole by drilling a 1/8” deep hole at 90-degrees into the bracket, so the bit won’t slide around.
Using a soft mallet, force the legs into the bracket, from the bottom, so that the 2” square is facing the ball-end of the leg. You want to have to force the leg into the hole to create a tight fit. If there’s too much play, wrap the edge of the leg in more black tape, or fill the hole with a little wood filler. If you hammer the leg in too far, use a chisel from the reverse side to make it flush.
Prime and paint the legs (and brackets) with spray primer and two-three coats of black gloss, automotive spray paint (such as Dupli-color®), available at an auto parts store.
Assembling the Table
Stain your tabletop. I used a thinned coat of “Golden Oak” Danish Oil, and then 4 coats of “Natural” oil. Baltic Birch is essentially white, so it will truly reflect the color of the finish. Rub with steel wool 15 minutes after applying oil to prevent the grain from rising.
I don’t care for shiny wood, so I put a coat of finishing wax instead of a polyurethane finish. The use of Danish oil and wax was a popular choice for Danish modern furniture, and I like to think corresponds to my intended aesthetic.
Turn the finished tabletop upside down, and rough fit your legs. You want the balls to come as close to the edge of the table (without sticking out) for maximum stability. Drill pilot holes into the bracket and tabletop. Secure the legs with 1 1/4” wood screws, attached through the largest square, and counter-sink for sleekness. Use a black marker to color any exposed MDF.
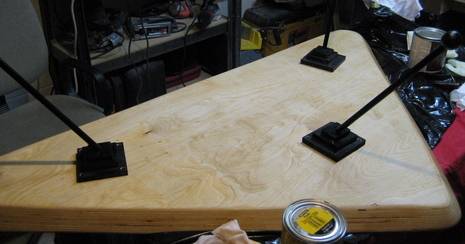
Apply feet and enjoy. Cheers.
