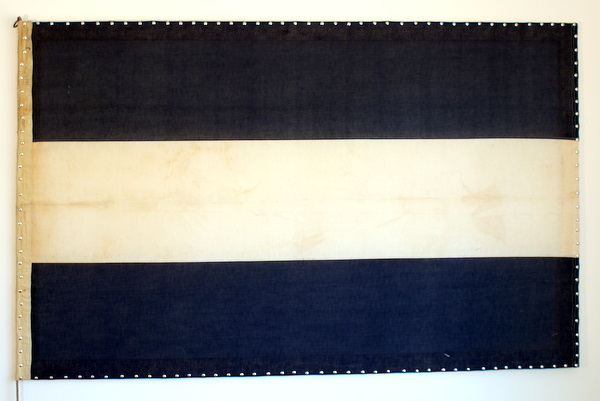
When my husband and I moved from Chicago to Houston last year one of the things we looked forward to was trading our small condo for a larger home. Now we have double the space and lots of rooms to decorate. In the living room I really wanted to find a piece that was original, interesting and would make a big statement. Ultimately I was inspired by photo I found of designer (and HGTV Design Star winner) Emily Henderson’s home on Apartment Therapy that featured a large flag stretched on a wooden frame.
Having just come from high-rise city living my toolbox contained little more than two screwdrivers and a telephone number for a maintenance man, so I knew that building the wooden frame would be a learning experience. But this is how I get my thrills so I went for it and now, for $75, I have a unique piece of art and new appreciation for the inventor of the electric saw.
I searched around Etsy before heading to eBay where I found lots of WWII-era nautical flags for sale right away. A few hours later I paid $45 + shipping for a 4 foot by 6 foot blue and white striped letter ‘J’ design. I chose it primarily because I liked the look, but it’s also conveniently my husband’s first initial. Later I learned that it is used to signal ‘I am on fire and have dangerous cargo; keep clear’ which I think is awesome.
Then it was time to build the frame.
Materials
- Flag or other fabric ($45 + $11 shipping)
- 3x 1”x3”x8’ pieces of wood ($1.39 ea)
- 3 boxes (about 150 total) thumb tacks or upholstery tacks ($1.59 ea)
- Wood Glue ($2.59)
Total: $77.53
Tools
- Saw- I used a hacksaw because it was inexpensive. If you have a circular, table or miter saw this project will be even easier.
- Miter box
- Wood Glue
- Staple Gun
- Rubber Mallet
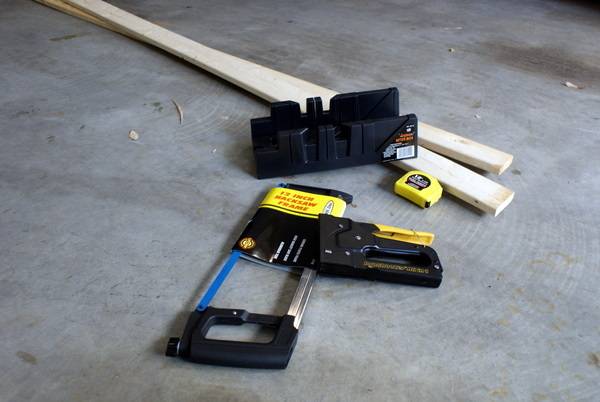
1. I wanted the frame to be the exact size of the flag so that I could tack it right on top and not wrap it around the sides like you would for an artist’s canvas. It was important to measure the length and width of the flag carefully while pulling it taut. Have a friend help hold one side to be sure you get an accurate measurement.
2. Mark the length of your flag on the first piece of wood. Insert the wood into the miter box and make your cut at a 45 degree angle. (Be careful to keep the saw perpendicular to the wood as you go.) Sawing the wood was harder work than I expected! I started each cut in the miter box and switched and finished it on the sawhorses because it was easier, but this took a toll on the my precision.
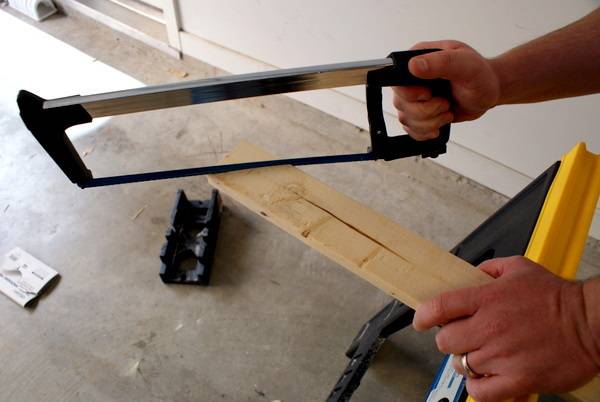
3. Flip that piece of wood around and miter the other side by just cutting the corner off so your piece of wood has a 45 degree angle at each end. Repeat this process to cut the other piece of wood for the length of the flag and then cut the two shorter side pieces.
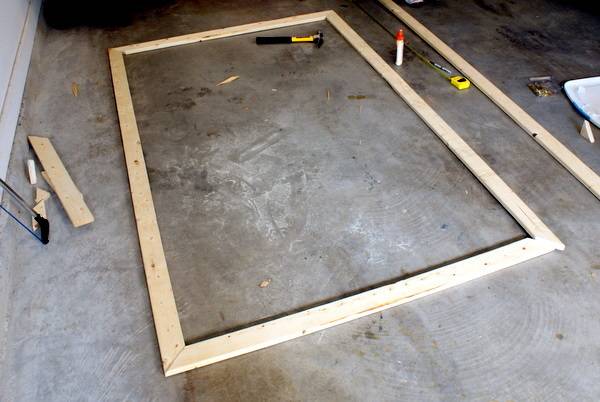
4. Lay your cut pieces out on the floor. If you’ve mitered everything perfectly and your wood isn’t warped it should all fit together easily. Or, if you’re like me, you might have to flip some pieces around a bit to find the best fit.
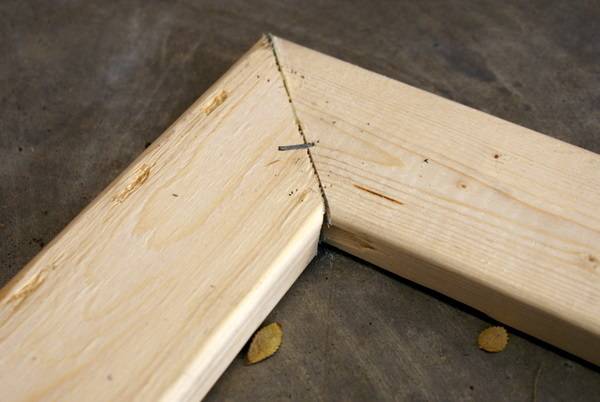
5. Secure all four corners together by first running a bead of glue along the cut edge before putting 5 – 6 staples across the joint. I had a little trouble getting the staples to go all the way into the wood so I used a hammer to tap in the ones that were sticking up until they were flush with the wood.
6. Flip the frame over and repeat the stapling of each corner. Let the glue dry before starting to attach the flag.
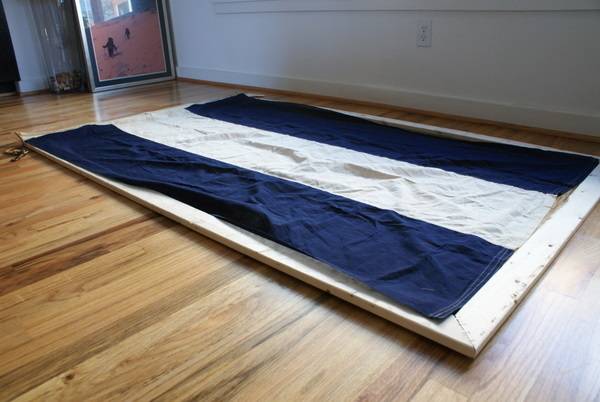
7. Lay the flag over the frame. You can use thumb tacks or upholstery nails to attach the flag. I chose thumb tacks because I preferred the simpler look over the more decorative and ornate upholstery nails, and because they were about 1/3 the cost. Start in one corner by pressing your tack through the edge of the flag and into the wood. Use the rubber mallet to finish driving it in.
8. Repeat for all four corners. This is when you find out if built your frame the right size! Don’t worry if you have to tug a bit to attach the flag because this will ensure that it’s nice and taut when you’re finished.
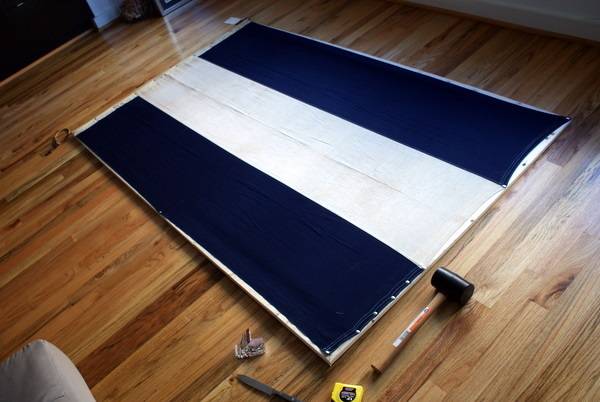
9. After the corners are attached begin working evenly around the flag. Since my flag had a stripe design that naturally divided it into thirds I used that as a starting point. If you start by placing the tacks in the center (or thirds, as I did) and then tacking each section into halves and repeating this process you can keep the fabric evenly distributed. Also, step back once in a while to assess (and admire) your work. I started to fret that my tacks weren’t perfectly spaced but once I stood up and looked at it I could see that it was fine.
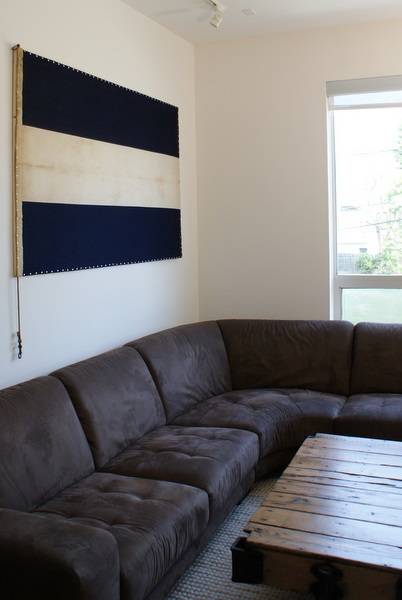
10. There are plenty of ways to hang your finished project. I had a picture hanging kit on hand that included some sawtooth hangers so I attached two to the back of the frame using the nails included. Even though the piece isn’t super heavy I recommend using drywall anchors and screws in the wall to be sure it’s hung safely and securely. I have to admit, I think I hung mine a little too high. I’m going to think it over for a week before moving it but I’ll probably lower it 6 to 8 inches next weekend.
That’s it! The whole thing took a few hours on a Saturday to complete and was a great first project for a person without any carpentry experience. It’s really gratifying to take an idea and turn it into a finished piece of art.
Alicia DiRago runs Dismount Creative, a social DIY experiences in Houston, Texas. Please, have a peek at her blog and Etsy shop!
Looking for more vintage projects?
