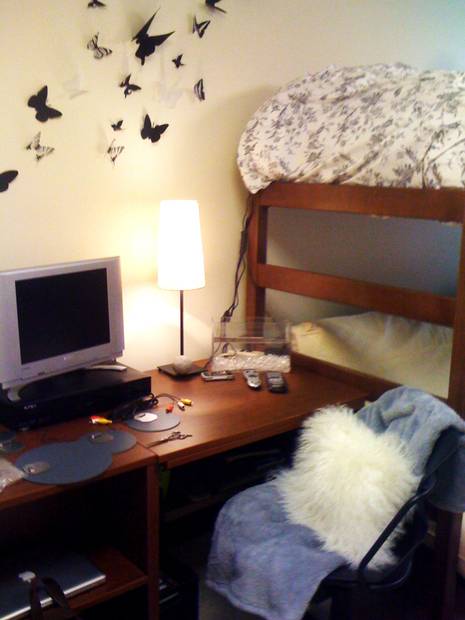
Here is a clever project to add character to your space without taking a lot of cash out of your pocket: paper butterfly wall art.
The back story: my daughter and I were shopping for accessories for her college dorm and went to a high end women’s clothing store in downtown Franklin, Tennessee. We love that store, as they are stylists for country music artists so they always have a great selection of women’s fashion. We saw “flutters” of butterflies all over the store, but when asked what were told they were not for sale having been made by their window display artists. Disappointed, but not for long as that night we returned home and were able to make them using leftover paper from other projects. Her dorm room color theme was black, grey and pink so our butterflies were black, and black and white for maximum “punch” against those bland dorm room walls.
Here’s how we did it:
1. Buy high-quality paper (please do not use construction paper), the kind at a craft store that has a substantial weight in your desired color and then a piece of vellum. Vellum is a film like paper that is translucent.
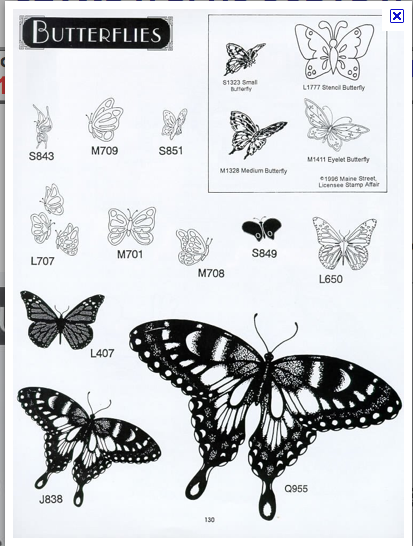
2. Search “butterflies” in Google images and select those images (not in flight, but flat), that are appealing to you, perhaps in a few different sizes too. And look for one that is “line-art” that is drawn with a pen, for the vellum paper.

3. Save the selected image and enlarge to what the size you want to print. You want the outcome to be a variety of sizes, and shapes. But here’s the design tip. Stay with one color of paper and the vellum. It will make a much more effective outcome,then using multiple colors of paper. For additional detail use a colored marker in the color of your paper on the velum butterfly.
4. Photocopy the images onto the paper that your have cut to 8 1/2” x 11” to fit in your paper tray in your printer. Alternate: “I don’t have a printer” Place the velum paper on your screen and trace the image with a narrow tip felt marker. Then cut that butterfly and trace the silhouette onto the solid paper.
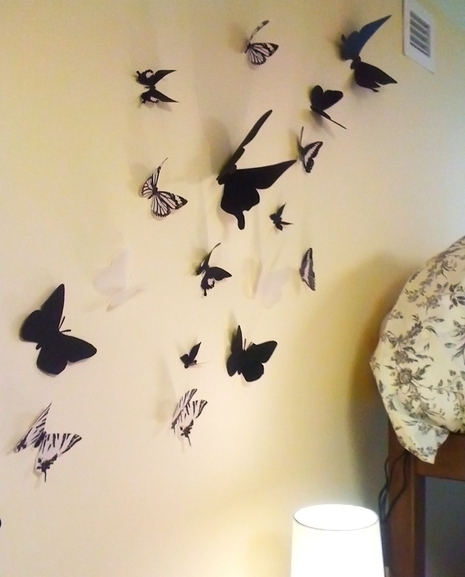
5. Cut the butterflies shapes from your paper. Fold each butterfly where the body meets the wing. Curlthe wings with a pencil placed on the tip. This where you give them character and why construction paper doesn’t work.
6. Apply your butterflies to the wall with double-sided tape the kind that is advertised that it can be removed easily. Arrange your “flutter” (that’s a group of butterflies) on the wall in a cluster mixing the various sizes.

My daughter’s dorm room turned out better than anticipated in part due to her roommate having the same color scheme, which wasn’t planned, but for all the money spent, the butterflies get the most comments. In fact, their room is now shown to perspective students!
Have fun with this project and please send comments and photos of your flutter flying free!
See you again soon!
-Diane L. Kazan
