First, some background:
“Holiday with Matthew Mead” is a “book-azine” offering inspiration and DIY/how-toprojects for the Christmas holiday season. It’ll be available in early November via online orders only, and in limited quantities (to purchase, follow the BUY HOLIDAY MAGAZINE link in our banner below). Check out Matthew’s Web site to learn more, discover who his famous features are and watch our video sneak peek here.
This week – here on Curbly – we are happy to share some of the wonderful projects that can be found in the pages of HOLIDAY. We hope you have fun recreating some of them and share in our excitement for the holiday season!
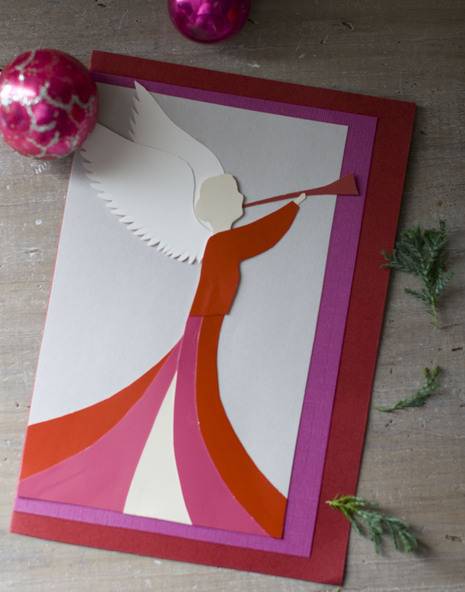
PAINT CHIP HOLIDAY CARD
This easy holiday card will join your artistic sentiments with your warm words of hope and joy. Scissors, paper and a glue stick are all that is needed to create a thoughtful, holiday greeting for someone special in your life. This card also looks pretty when hung by a ribbon and displayed as holiday art!
You will need:
- 4×5 inch paint chips from the home center
Colors: Cream, red, pink, gray, white and beige - 1 sheet red card stock 8 ½ x 11
- 1 sheet pink card stock
- 1 sheet gray card stock
- Glue stick
- Scissors
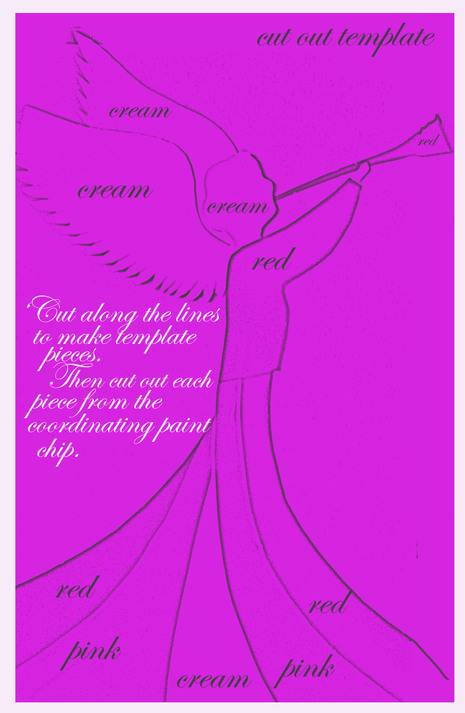
- Template (below)
Begin by folding the paper stock. Fold the red sheet in half length-wise to make the card. Fold the next two sheets in half and trim in order to create two smaller cards (for the pink paper, cut 1.5 inches off and for the gray sheet, cut 3 inches off). Slip the smaller cards over the larger red one (ending with the gray card) and adhere together using a glue stick.
- Print out the template (above) and cut out the pieces along the lines.
- You will end up with ten pieces.
- Trace these shapes onto the paint chips (or you can also use scrapbook paper) with a pencil and cut out using scissors.
- Re-assemble the pieces in the shape of the angel on the top of the folded cards made from card stock.
- Use a glue stick to hold the design in place. Let dry thoroughly.
 Like this project? Love to win Holiday with Matthew Mead? Curbly.com is excited to give away five copies. Head here to enter the contest!

