
So you needed about two feet of some sort of special ribbon for a particular project, but you now have several yards leftover. Or maybe it was a sewing or upholstery project, and you have one foot square of fabric leftover. What do you do? If you’re like me, you keep it thinking that someday you’ll find a use for it. Months pass. Maybe even years. And still, when you see that ribbon or fabric square, you think, someday. Why do I save random supplies for someday? Because I loathe waste and I figure soon after I dispose of the leftover, I’ll regret it because that someday finally arrived. Of course, keeping all those leftovers can become overwhelming, which is why a project like this one–making over plain gift bags–is a perfect way to finally used up some stash. And save cash as well. (Another thing I don’t like to waste.)
Step
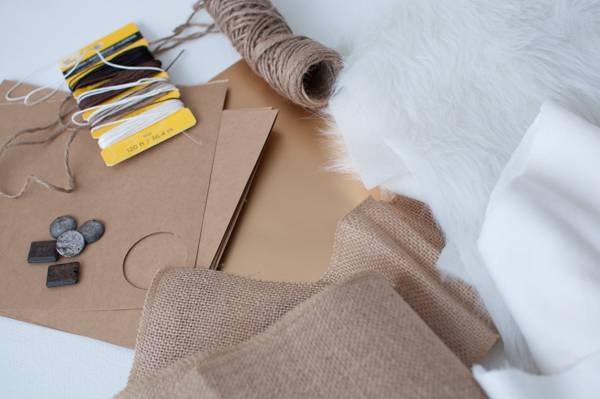
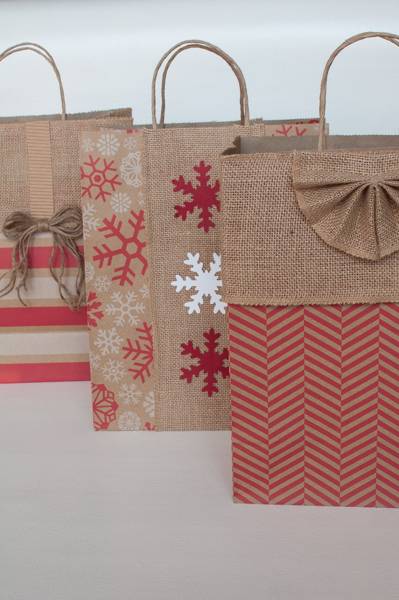
Before beginning a project like this, the first thing we have to do is assess our leftovers. It’s best to look for a theme. For me, that was neutrals. Brown, cream, gold, etc. They included a BUNCH of wide burlap ribbon (see intro), brown craft paper leftover from my Christmas cards this year, twine (I always seem to have ball of that on hand), gold craft paper, brownish flat-back gems, ecru faux fur, and a bit of Lux fleece, leftover from this year’s Christmas gifts.
Step

Next is looking for bags that will benefit of a makeover using your leftovers. It might go without saying, but I’ll say it anyway: the bags and your theme should jive. In my case, I spotted these inexpensive printed craft paper bags at my local fabric/craft store. A bundle of 3 cost about 3 dollars and I knew the craft paper brown & red print would work perfectly with my stash back home.
Step
When you finally introduce the bags to your leftovers, you’ll need to consider supplies you’ll need for actually doing the makeover. Those will be sharp scissors–one for fabric (if you have a pinking shears, now’s a good time to grab them) and one for paper–and a hot glue gun and glue sticks. And that’s about it. So, gather up those supplies and let’s get started.
Step
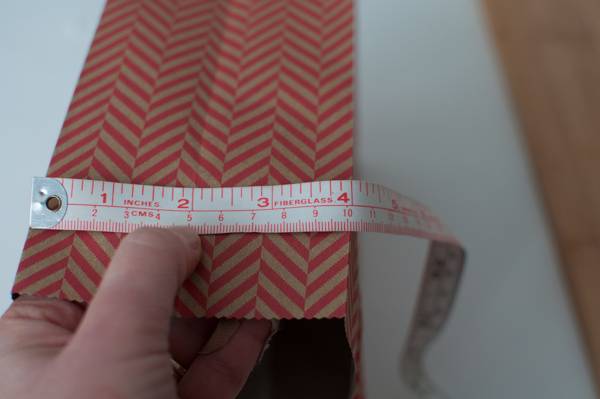
Applying ribbon or lengths of fabric around the top of the bag is a great way to begin. Just measure the circumference of the bag and add about an inch for insurance*. This little bag measured 7″ across and 4″ deep.

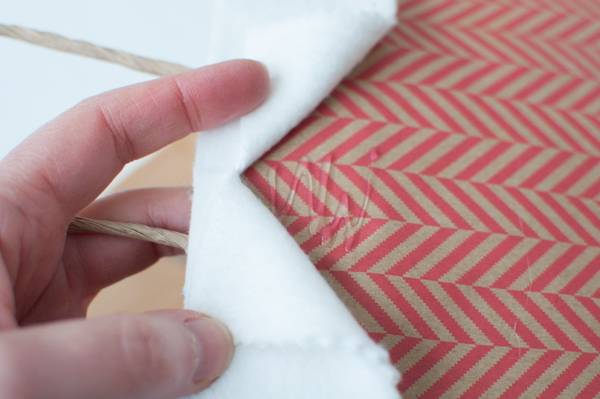
Then, cut a length of ribbon or fabric to match. Using the fleece, I trimmed one edge using a pinking shears for an added element. The section overall, is about 2″ wide.
Step
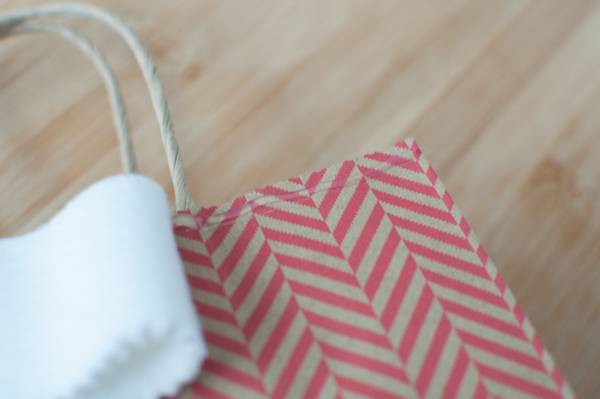
To attach the fleece to the bag, simply hot glue it to the top edge of the bag, starting at the center of one of the longer sides OR at one of the back corners. I did it both ways, and each have their benefits.
When you get to the back of the bag, shoot a bit of glue down the side of the bag the length of the width of the ribbon.
Step
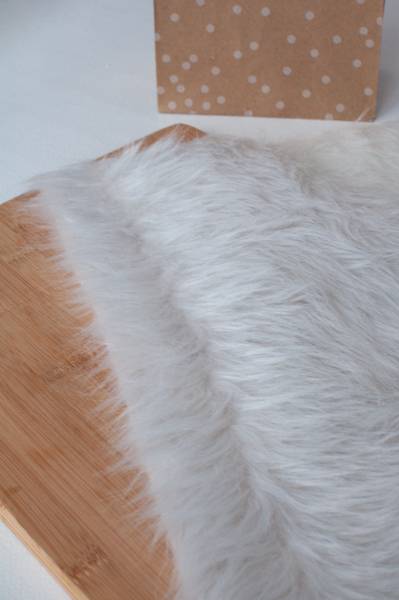
For this step, we’re going to tackle faux fur. We’re going to measure the perimeter and glue the fur on just like we did the last time, but FIRST, we’re going to comb it. Assess where your cut will be along the length of the fur, and then come the fur with your fingers, making a “part” of sorts where your cut line will be. This will prevent you from cutting the furry bits.
See? Furry bits intact.
Step
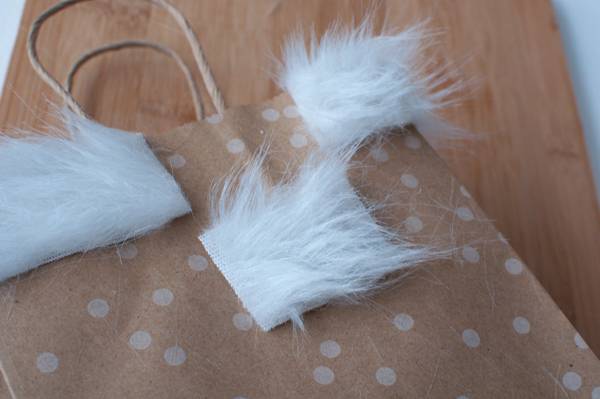
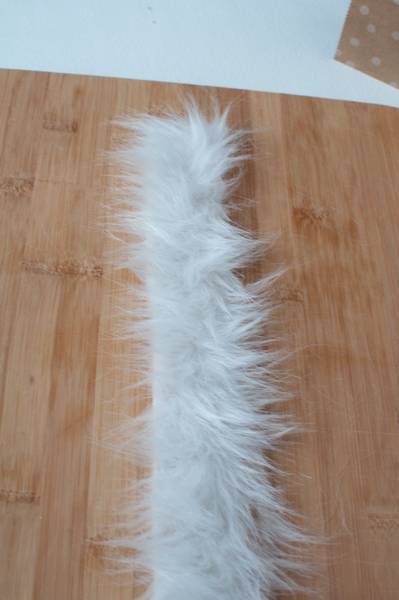
But wait! What if your fur isn’t long enough to reach around the entire bag? (Mine wasn’t.) No worries. Faux fur is very forgiving in such circumstances. Simply glue down both ends of the fur, and cut a piece to “patch” the bare spot, making sure to comb the fur out of the way of your scissor’s blades.
See? After fluffing the fur, you can’t even tell where the patch is.
Step
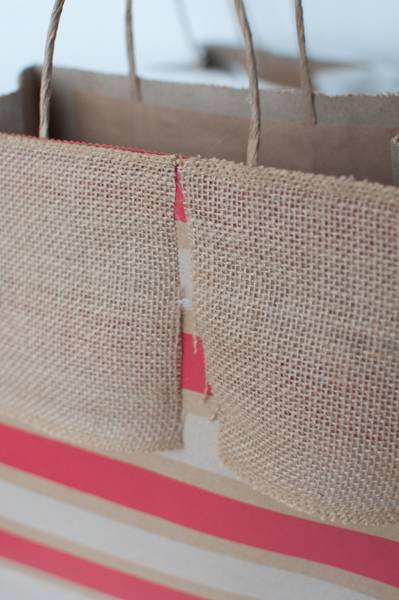
Okay, fur is easy to patch, but what about fabric ribbon? Yeah, that’s tricky. And it happened to me because I didn’t add my insurance inch*. Oops. No biggie! That’s where our next step comes in…embellishing!
Step
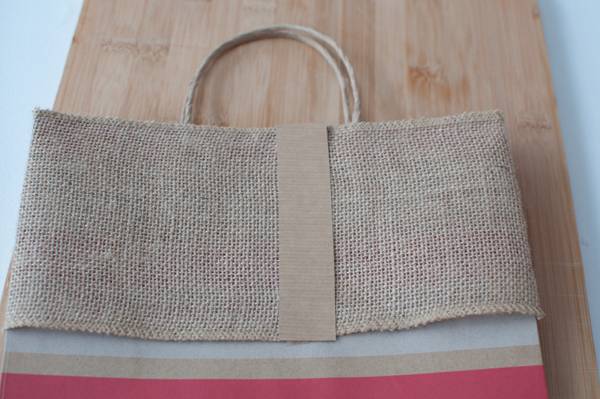
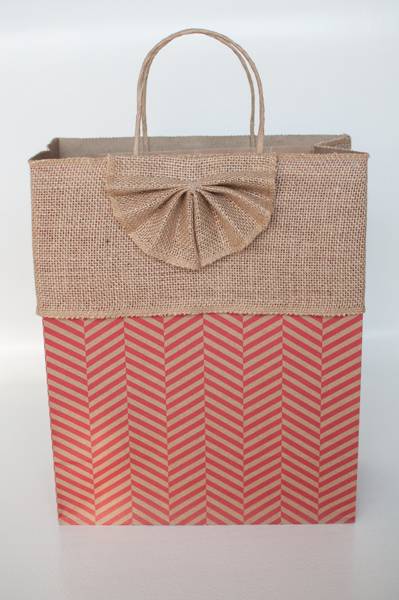
To patch the gap in the burlap, I added a piece of craft paper that, for added interest, I ran through my paper crimper.
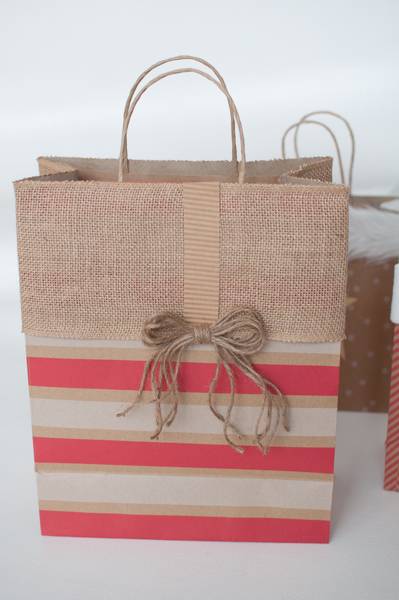
Then I grabbed a half dozen lengths of the twine and fashioned a bow, which I glued on securely with hot glue.
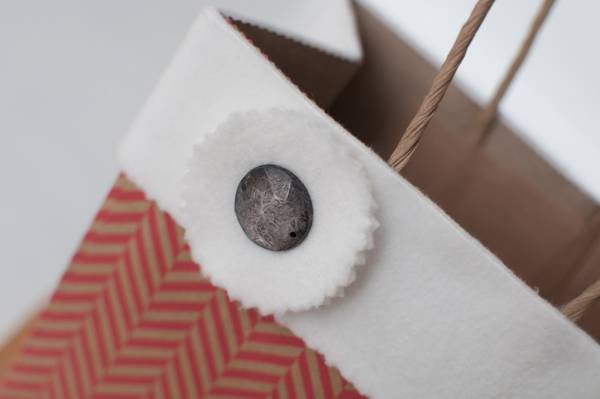
For the first bag with the fleece, I cut a round of the same fabric and added a flat-backed gem to its center. Then I glued both to the trim fashioning a brooch of sorts.
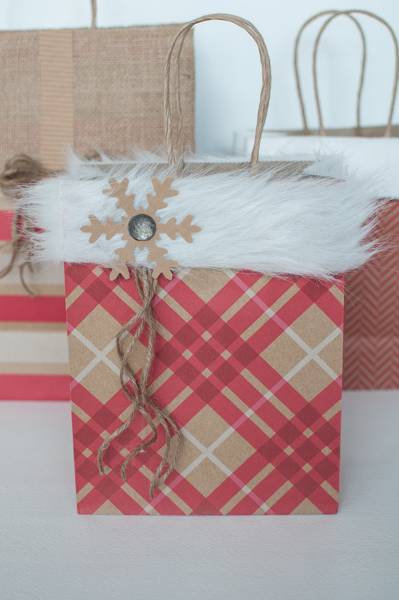
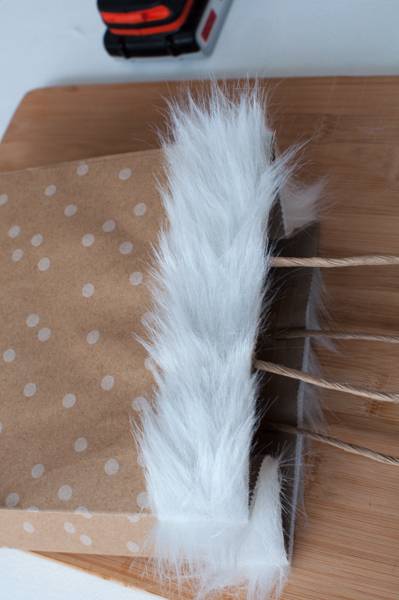
For the faux fur job, I grabbed a big snowflake punch in my collection and added one of those along with another flat-backed gem. Then I tucked some lengths of the twine under the fur just below the snowflake.
Step
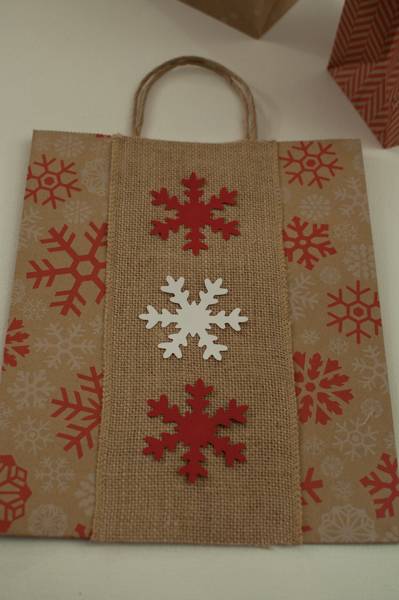
In this step, let’s consider other means of embellishment. Another easy one is running fabric or wide ribbon down the center front and back of the bags. For the one pictured above, I grabbed some red and white paper (also leftover), punched some snowflakes and added them to the burlap ribbon.
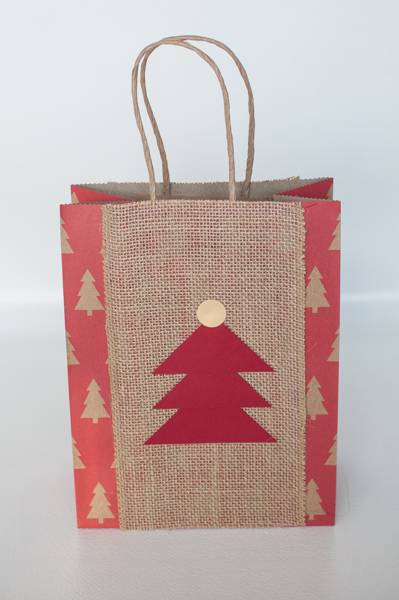
If you don’t have any fancy punches on hand, don’t worry. You can make a quick Christmas tree by cutting a couple of squares. Then cut them down the middle from one corner to the other. Arrange them accordingly, like I did for this bag, into the shape of a tree. I added a round bauble cut out of metallic gold paper to the tree’s top, because every tree needs a star at Christmastime.
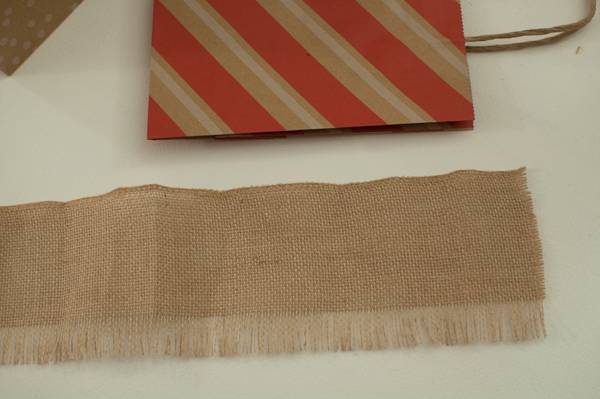
So let’s say you have burlap with raw edges everywhere. There are two ways to address this. First, you can pinch-press one of the long edges to make a hem. Or you can go with the flow and unravel the edges. If unraveling, take out about 1″ of threads. (At about 1″, the burlap will stop unraveling spontaneously.)
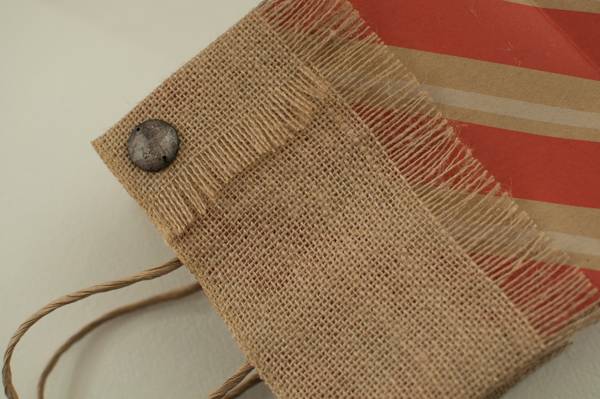
When you get to the short ends of the burlap, like I did with this bag, I unraveled one of the ends there too. Then I glued that unraveled end over the other cut end, making a feature of the former. Another flat-backed gem, and I was good to go.
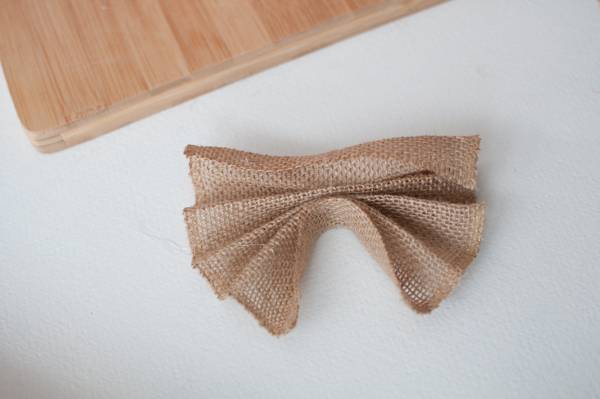
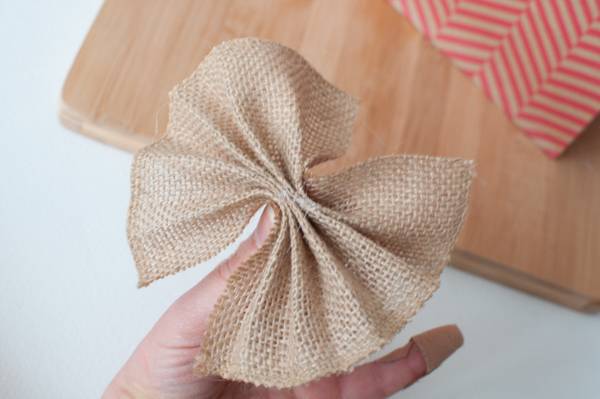
Another cool embellishment to consider is doing fan folds. Remember my tip about pinch-pleating burlap? This technique takes advantage of that big time. Basically, you just cut a length of burlap and create 1/2″ or so fan folds, making sure your first fold faces you–that means the raw edge will be facing away from you. (My ribbon is 5″ wide and I cut a piece 8″ long to do this fan fold.) Continue to fold until you’ve used up all the fabric, ending with a fold that faces you. (The raw edge will be facing away from you.) To further clarify…if you study the picture above, you’ll see that the raw edges are both facing the camera; that’s how you want the folds to end up–both raw edges facing the same direction.
Then, pinch the fan fold at the center, and apply hot glue at the back center of each fold, leaving the last two folds UN-glued. Then, glue the very first fold (the one with the raw edges) together to complete the fan.
Because we left those last couple of folds un-glued, we have now fashioned a bunting, which we can glue to the top of a bag.
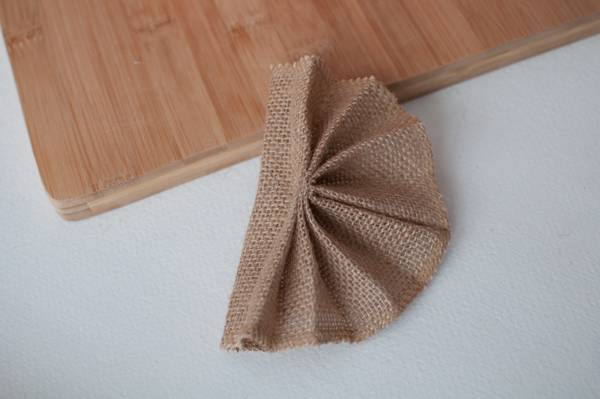
For this next one, we’re going to glue EACH of the folds at the pinched center. Then, we’ll glue the raw edges together, just like we did in the bunting technique.
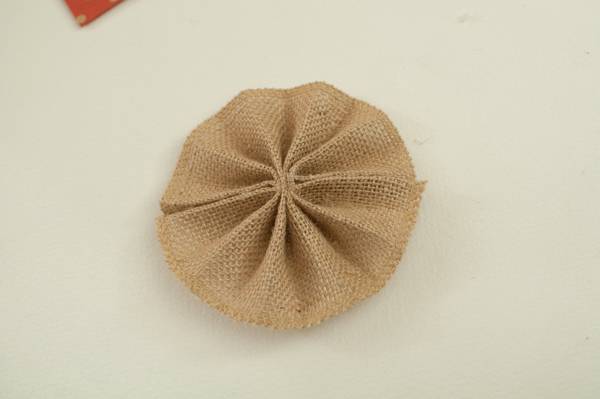
After we’re done, the fan fold now becomes a fan flower.
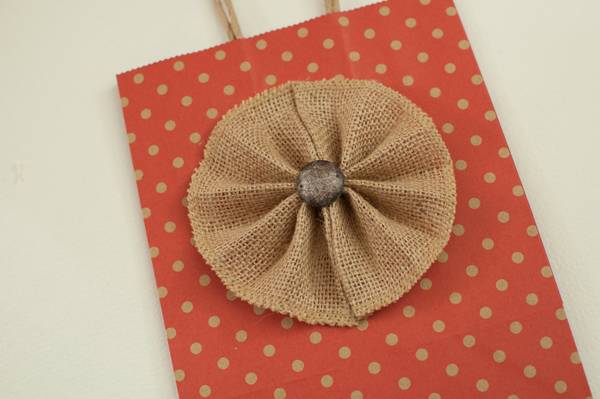
I hot glued the flower to the front of a bag and, again, added a flat-backed gem. (I’m loving those gems.)
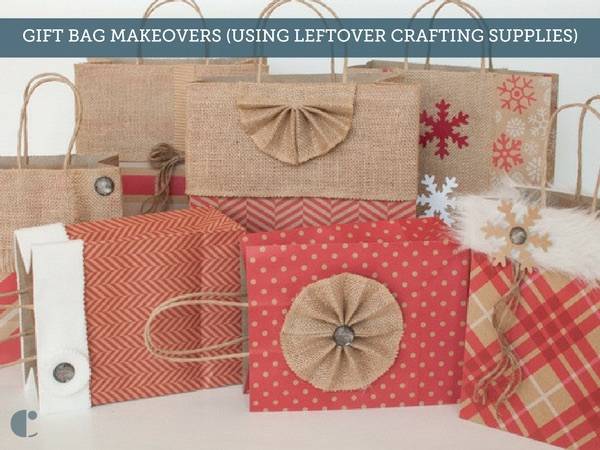
And here they all are. All tarted up and ready to go.
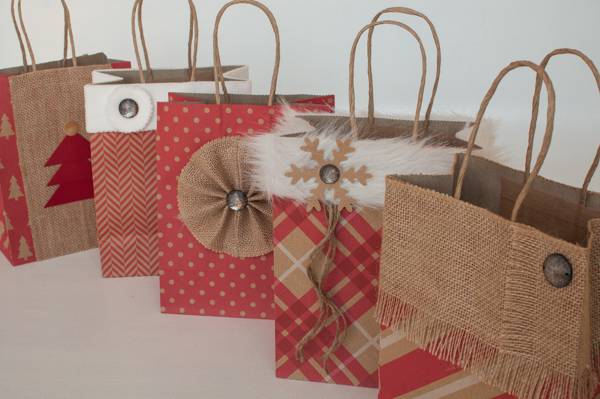
For a refresher, this is what they looked like before.
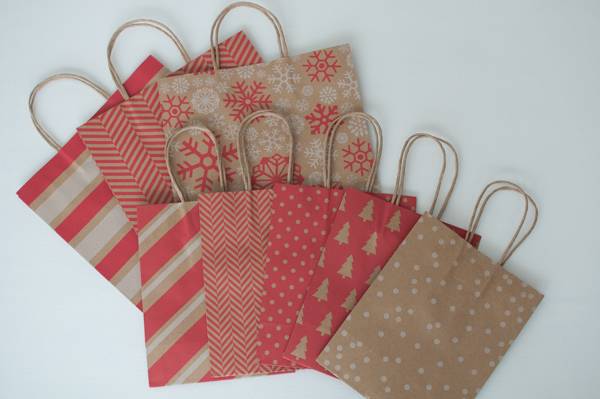
And, yes, they all still fold pretty flat!

If this tutorial has inspired you to use up some of your leftover craft supplies to adorn plain gift bags, fabulous! We’d sure appreciate a Pin to help spread the ideas.
Fantastic Ideas. I will put these to use next year!