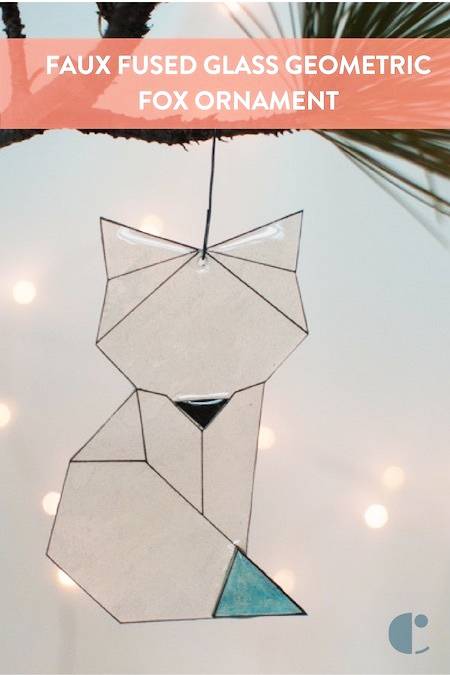
This holiday season, a group of the Curbly writers decided to team up and each of us created a simple and stylish new Christmas ornament. We’re calling it the “Curbly Ornament Challenge” but there’s not much competition involved…just a lot of fun, seasonal crafting. See all of the ornaments here.

I’ve been iffy about the longevity of geometric everything for awhile now, but it doesn’t seem like it’s going anywhere. Uncle, I cry! The simple lines and representative shapes are fairly easy to recreate and the result looks clean and crisp, especially at a small size. So, I decided to embrace the trend by marrying it with the classic look of fused glass and a holiday ornament using…wait for it…Shrinky Dink plastic.
Materials
- Art of your choice, sized to fit an 8.5″ x 11″ piece of copy paper. NOTE: Shrinky Dink paper is sized at 8″ x 10″ so adjust your image accordingly.
- Frosted Ruff n’ Ready Shrinky Dinks Creative Pack
- Tape
- Ruler
- Black Pigma Graphic 1 pigment ink marker, a Copic black marker (A Sharpie will not work with this project as is. More on that later.)
- Robin’s Egg Blue Copic Marker for an added dimensional element (Or a LIGHT color of your choosing. You want to keep it light because when the dink shrinks, the color will intensify greatly.)
- Paper towel
- Hole punch, standard 1/4″ size
- Scissors
- Parchment paper (or aluminum foil)
- Baking sheet
- Oven mitt
- Ranger Melt Art Ultra Thick Embossing Enamel (aka: UTEE) This is what makes the ornament look like glass. It also acts like a glue and holds the dimensional pieces in place.
- A round toothpick
Step

Begin by creating your design. You can draw something on a standard sheet of 8.5 x 11″ paper, or print out an image you found online. Once you have your art, tape it to the shiny underside of one sheet of Shrinky Dink paper. My design is based on Hug a Porcupine’s snow fox brooch, which is totally adorable. For other ideas that might work, check out these fabulous animal shapes.
Step

Using a ruler and the black pigment ink marker, trace all the lines of your art.
Step

With a sharp scissors, cut out the image, making sure to cut on the OUTSIDE of the black outer lines. (It’s best to cut from the outside in instead of pivoting your scissors at the inside corners as this can very easily tear the plastic.) Then, with the hole punch, punch a hole at the center top of artwork
Step

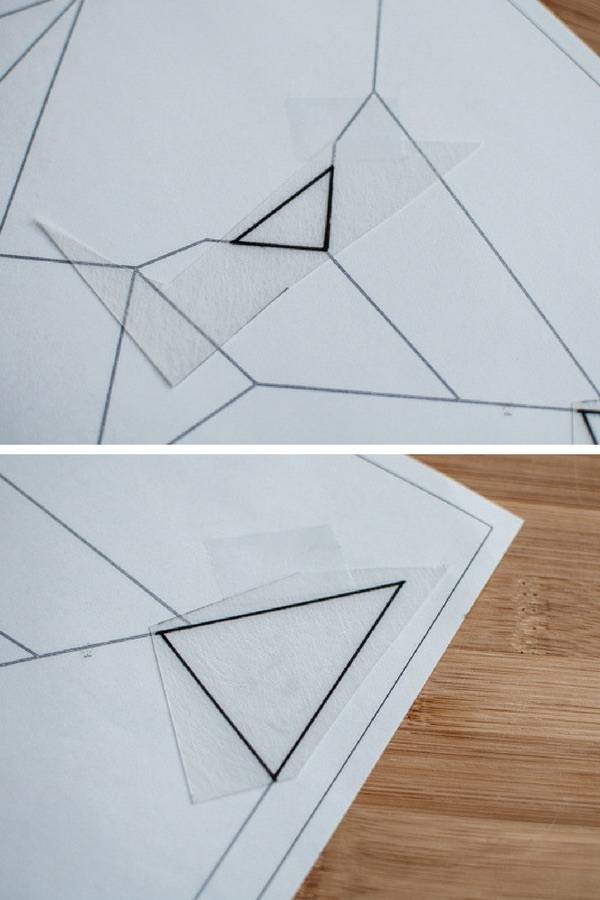
To give the ornament a fused quality, choose elements from your art to make it dimensional. For this image, I used the tip of the animal’s tail and his nose, the nose being a great dimensional element for any animal. Use some of the scrap shrink plastic to outline the sections you want to pop–literally–and cut them out of the plastic.
Step

Using the pigment ink markers, color in each section. Tip: If the black border around the your colorful piece gets smudged, you might want to retrace the outside perimeter of the segment.
Step

Pre-heat oven to 300 degrees Fahrenheit. Place the plastic pieces – outline and colored sections – on a baking sheet lined with parchment paper and bake until the plastic shrinks to about 50% of its size and is completely flat. (If you’re unfamiliar with Shrinky Dinks, you’ll probably panic a bit at this point because the plastic curls upon itself when melting. But don’t worry. The art should right itself and flatten out.

If it looks like it won’t–like if the small pieces are completely flat and the larger image is still all jacked up, you’ll need to rescue it by reaching inside the oven and gently pulling it apart, being careful not to burn yourself. (Chopsticks or a couple of pencils help with the manipulation, but I just use my fingers and suffer the pain.)
Step

After you’ve taken the your art and all it parts out of the oven with an oven mitt, quickly put another piece of clean parchment paper on top of the pieces and press down lightly on the image to flatten them. You only have seconds to do this! For comparison, check out the size of the image after shrinking compared to the original pattern I used. Also note the intensity of the robin’s egg blue.

Step

After the pieces cool, position the colored accent pieces on top of the larger image.
Gingerly, sprinkle a light to medium coating of UTEE over everything and place it back into oven on a lined baking sheet.

Keep an eye on the ornament until all the UTEE is melted. (In the photo above, you’ll notice that the UTEE has melted around the perimeter but not in the middle. Don’t remove the ornament from the oven until ALL the UTEE is melted.) THE UTEE WILL MELT OVER THE EDGES OF THE IMAGE. THIS IS EXPECTED AND WILL BE DEALT WITH IN STEP 12.
Step

When you take the ornament out of the oven, quickly check to make sure all the dimensional pieces on top of the larger piece below are straight. If they aren’t, use a toothpick to realign them.
Step

After the UTEE has set up a bit, inspect the ornament for any inconsistencies. You’ll see in the above image that the left ear didn’t get embossed very well. No worries–we’re going to do another coat of the embossing powder. Sprinkle the UTEE over the entire image one more time, and place back in the oven. Keep an eye on the ornament until this second layer of the UTEE has melted completely.
Step

After the UTEE is melted and you’ve taken the ornament out of the oven, slide the parchment paper with the ornament still on it off the baking sheet. The UTEE will only take seconds to set. While it’s still warm, use the round toothpick to ream the hole out from the center. (Yes, the hole size shrinks too.)
Step

After the UTEE has cooled, you’ll need to trim the excess UTEE that has melted over the edges. You CAN use a scissors to cut the UTEE, but I find breaking it off–FROM FRONT TO BACK–works best for me.

When you’re done with the big bits, you’ll have some jagged bits. You can use a straight craft blade to shave them off, but I find my fingernail works pretty well too.
Step

When you’re done trimming the excess UTEE, you’ll probably end up with some rough spots on the FRONT of the image. Don’t worry. Just pop it back into the oven and let the UTEE melt ever so slightly. Doing so will fill in the rough spots and smooth everything out. It kind of works like when you “flood a cookie” with icing. When you take the ornament out of the oven this time, you’ll have to re-ream the hole at the top–again, do this when the UTEE has set but is still slightly warm.
Step

Add a hook or string to the hole and display as desired, letting all who cast their gaze upon it admire your mastery of making a faux fused glass ornament.

Why do the coloured parts separate? Why not just colour in the section on the main image before you shrink and what is the purpose of the UTEE?
@ Sawan, I filled in the individual parts to apply them to the top of the image, giving it dimension. Without these parts, the finished ornament wouldn’t look like fused glass. The UTEE is a thick embossing powder that makes the plastic look like glass when it’s melted. (It’s super thick and shiny.) It also holds the top pieces to the bottom pieces.
I’m going to install a cat door with my prize! Or various home renovation projects I’ve been slacking on…
Some organizing bins would be on my list if I win.
it was amzing, thank you….and i will make the same,but isntead of cat i will make santa clause…
amazing and nice idea…, i m definitely gonna try it..