
To say I love decorating shelves & mantels, would be the understatement of the year. And during the holidays, I kind of go a little crazy with the accessories. I love the look of string art, but wanted a more simple version for our house. With a little leather cord, I brought a little fun macabre to my mantle!
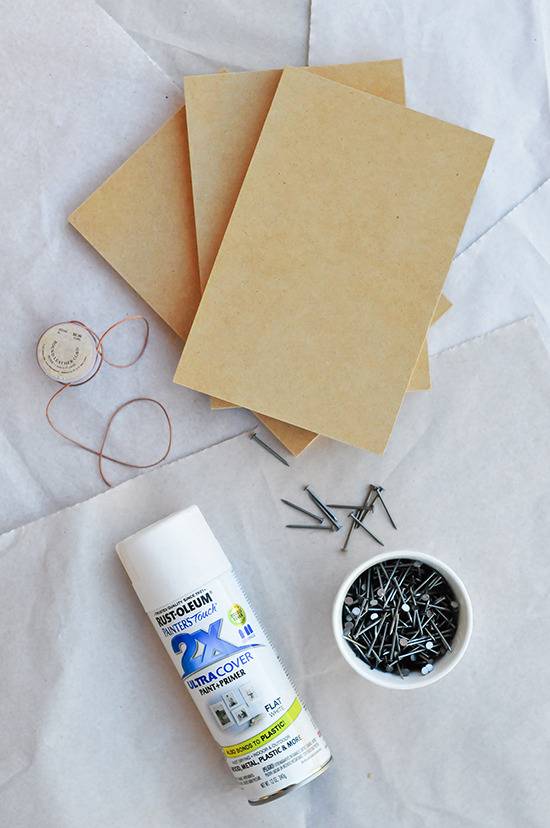
Materials needed:
- 3 pieces of wood MDF (measuring 6″ x 9″)
- white spray paint
- flat head nails
- leather cord
- hammer & paper letter templates (not pictured, but template download here – B & O)
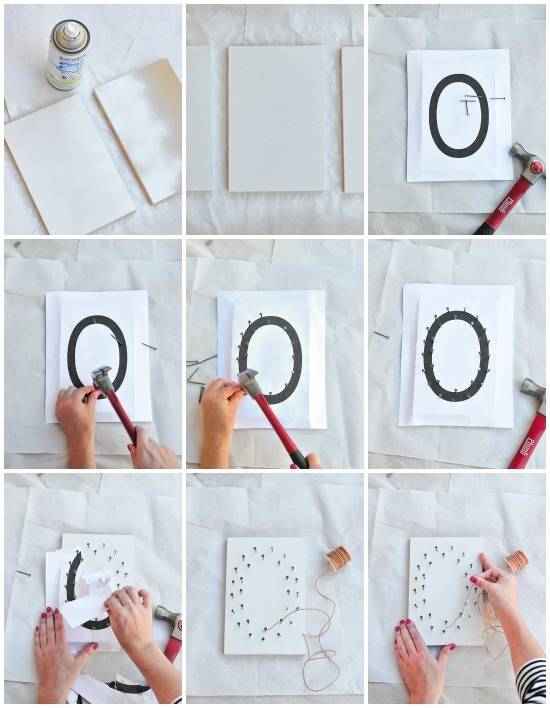
Step 1: Spray paint the MDF pieces white. They’re dry to the touch after 1 hour, but you can wait 24 hours to be sure they’re super dry.
Step 2: Download and print the letter templates and center each letter on a piece of MDF. Use double-stick tape to keep it in place if you’re having trouble!
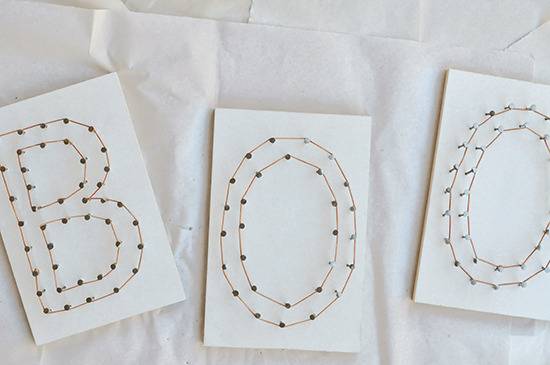
Step 3: Outline the inside and outside of each letter by hammering the flathead nails down about 1/2 inch down through the MDF. Be sure to space the nails as evenly as you can.
Step 4: Once you’ve finished forming a letter with each nail, gently tear the paper away.
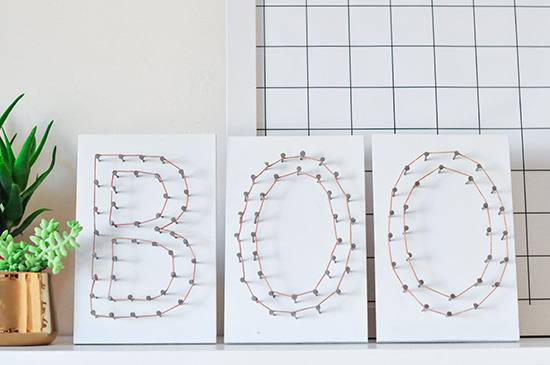
Step 5: Wrap the leather cord around each nail head. Instead of the traditional back & forth wrap that you see with nail string art, I opted for a simple outline by wrapping the inside of each letter, and then the outside of each leather. Keep things separate and minimal!
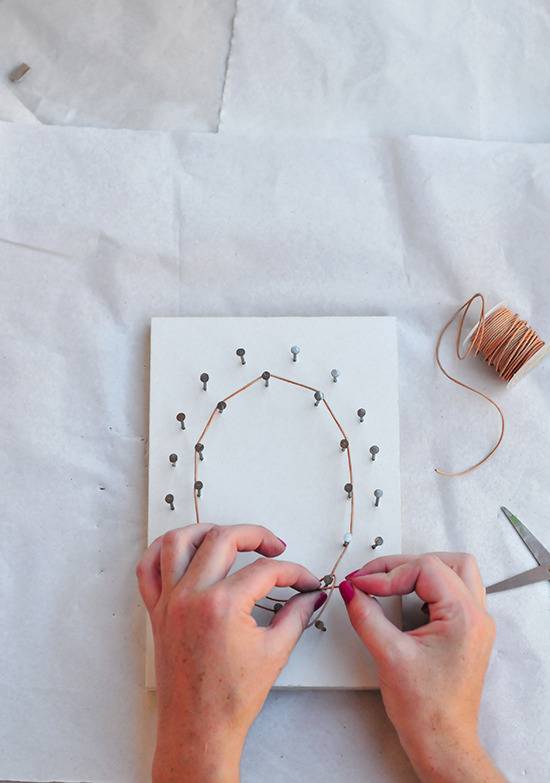
Step 6: Tie off the end by wrapping the nail last nail twice and tying in a knot.
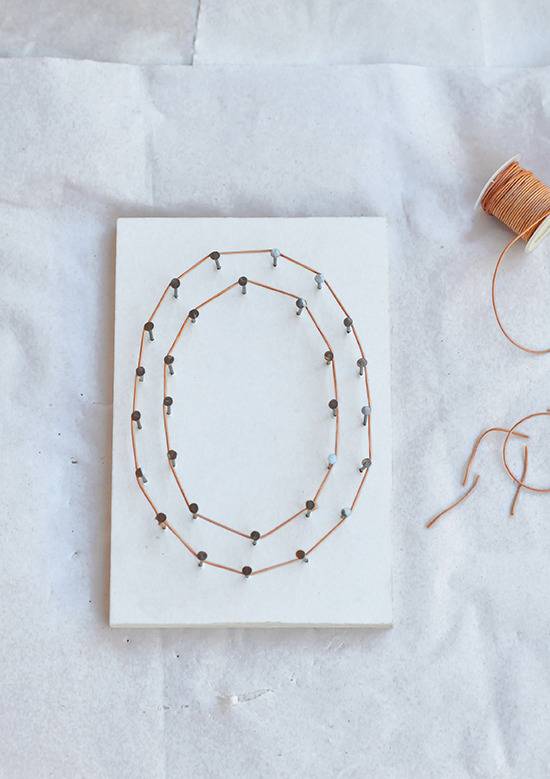
Step 7: Snip the ends of the leather cord with scissors and admire your leather handiwork!
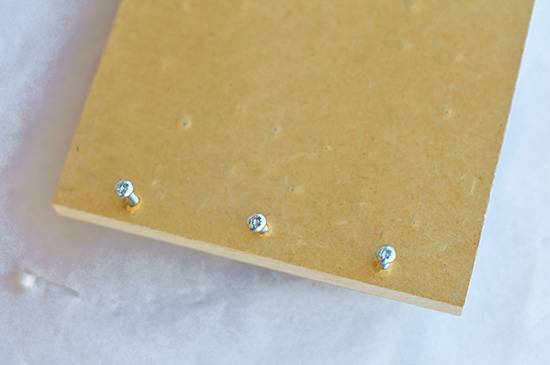
To keep the MDF letters standing upright, I screwed a few screws halfway into the back to support them. You could also use velcro strips to attach these to your mantle or walls.
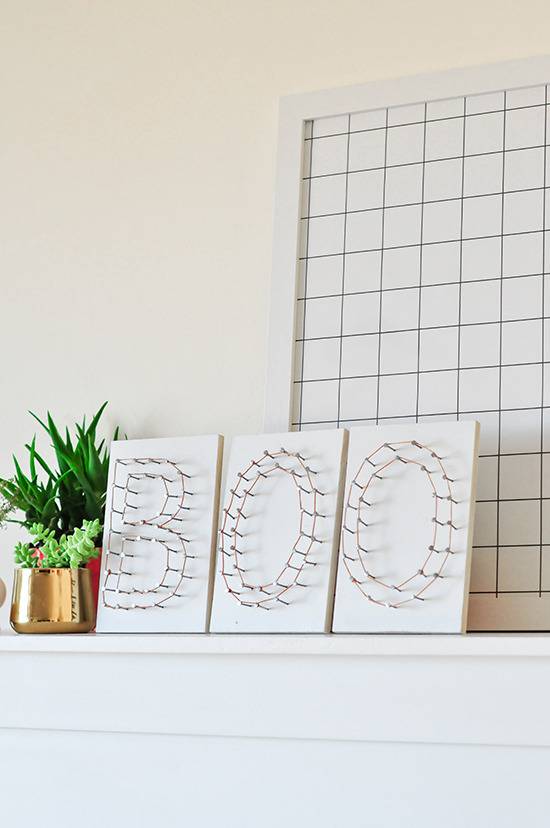
And voila! Place them on your mantle or shelves with a few other plants and macabre items.


I love how these turned out! Aside from Halloween decor, you could also use this technique to form your last name, or some other holiday-inspired phrases!
Hmm… I bet if you were really clever, you could use this to create a spiderweb somehow. I’d try it myself but I’m almost certain I would fail horribly! I’ll just stick to making letters 🙂