Traditional bread and pizza ovens feature stone or brick floors (and walls), which retain heat and redistribute it evenly across the cooking surface. The intense and immediate heat from the preheated stone surface allows the dough to become crispy while maintaining a delightfully chewy texture.
To replicate this at home, one could spend $2,000-13,000 and buy a proper wood burning pizza oven, il forno di pizza. A more popular route is to purchase a “baking stone” or “pizza stone”, a flat, rectangular or circular slab of ceramic designed for the home oven.
Unfortunately, unless you purchase a top notch stone, which are about $70 dollars for a medium sized piece, these home stones heat unevenly, and they often break after a year or so, usually from steam. An inexpensive model cost around $20, but that’s still a bit too much for a product that will break every few years.
So, instead of letting The Pampered Chef overcharge you, you can create your own for 5 bones.

There are a few options: you can find unglazed ceramic tiles, or unglazed quarry tiles, which are large, terra cotta stone pavers. You could even use an overturned drainage dish from a large terra cotta planter. You must be certain to use an unglazed product, as glazes contain lead and other harmful chemical you certainly don’t want to bake into your dough. These cost around $1.00 a piece, and although they are not as sturdy as a solid stone, they only cost a dollar, so can easily be replaced.
Or, you can go to a large garden/landscape or stone supply shop, (like my local Mr. Mulch) and buy slabs straight from the quarry. Any natural, untreated product will do, and the thickness will help retain heat and allow the stone to avoid cracking and breaking. Large, oven-sized cost only five dollars a piece: giving you a better product for a less expensive price.
1. Before you go shopping, measure your oven. If you don’t have a heating element on the bottom, you can place your stone directly on the floor (provided it doesn’t block any fans). If you have coils on the bottom, measure the bottom rack. Mine, for example, was 21”x14”, so I began to look for stones 12”x18” or a similar size.
2. Find a garden supply center, or tile shop. I wasn’t able to find the right products at Lowe’s or Home Depot, so grab your phonebook and look for independent options. Plus, without the help of professional, there’s no guarantee that the clay or ceramic doesn’t contain lead, so seek out experience assistance, which you’re guaranteed with a family business.
3. Look for a dimensional product (rectangular or square) instead of one with natural edges, and look for a smooth, flat surface. The best choice at my local store was a product called “Colonial Stone” which was $2.49 USD per square foot. Then, on my way out, I looked at the demo pile, and found an equivalent stone with a more ideal size, for only $1.49 sq./ft.
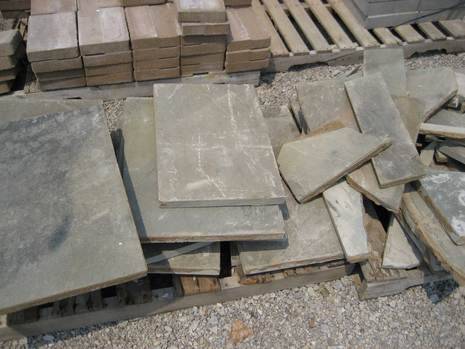
4. Once you’ve brought your stone or tiles home, inspect them for any sand or cement, especially if they’re from the scrap bin. Use rough sandpaper, a brick, or a masonary grinding wheel (available for both angle grinders and electric drills), and wearing gloves, a mask, and safety glasses, carefully remove the imperfections.
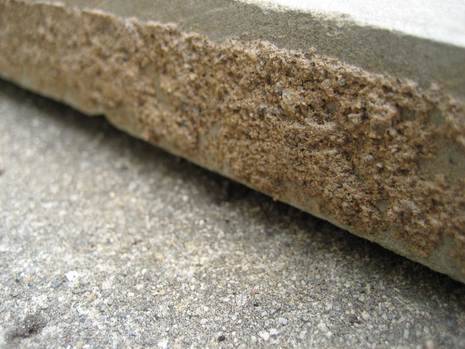
5. Clean off the stone or tiles with a strong spray from the hose, and allow them to air dry for 10 minutes or so.
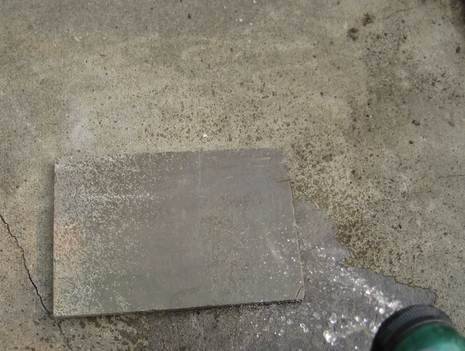
6. You baking stone(s) are now ready to use. Some folks recommend seasoning baking stones, as you would with cast iron, but I haven’t found it necessary. If you desire, cover the stone with oil and bake at 350° F for 30-45 minutes. Otherwise, the stone will eventually become seasoned with use: it will, at first, get spots and splotches, but will eventually turn dark and luscious with use.
7. To use your stone for pizza, preheat your oven at 500° for at least 20 minutes, but up to an hour. Build your pizza on an inverted sheet pan or pizza peel, sprinkled with cornmeal. Slide your pizza from the peel/pan onto the stone (you can also put corn meal on the stone if you’re really worried about sticking) in a single motion. It’ll come with practice.
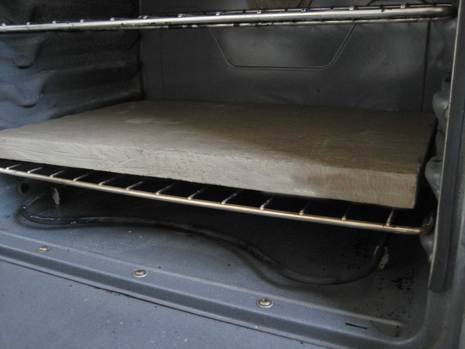
8. You can also bake loaf breads, rolls, croissant, and flatbreads. A pizza stone can also mimic the properties of a tandoori oven, making it useful for breads like Naan.
9. To clean the stone, allow it to cool, and scrap off any food or extra cornmeal. Rinse under water, but don’t use soap, as it will mess with the seasoning and make your food taste like soap.
Just for kicks, here’s a recipe for pizza dough that I developed to work with a home oven and baking stone.
1 packet of instant yeast
1/2 cup tepid water
1/2 cup low-protein (or cake) flour
1 cup all purpose flour
1 teaspoon salt
1 teaspoon sugar
1 tablespoon extra virgin olive oil
Preheat the oven, and the stone, to 500° F. Bloom the yeast in the water, and then mix the dry ingredients (you can use a handmixer, stand mixer, or my fave, the food processor). With the motor running, add the water/yeast until a sticky dough forms. Remove from the bowl, and form the dough into a tight ball, and coat with olive oil, and cover with plastic wrap or a towel. Let rise on the stove top (with the oven preheating) for an hour.
When the dough has doubled in size, dust your work surface with flour, and roll the dough into a circle the size of a vinyl LP, about 12 inches, and place the dough on a pizza peel, or inverted sheet pan (see above). Add desired toppings. (If desired, add olive oil to the exposed crust for added crispiness.) Slide the pizza onto hot stone, and bake for 8-10 minutes. Remove the pizza with the peel, and slice and enjoy.
(Pizza image by Seet Ying)
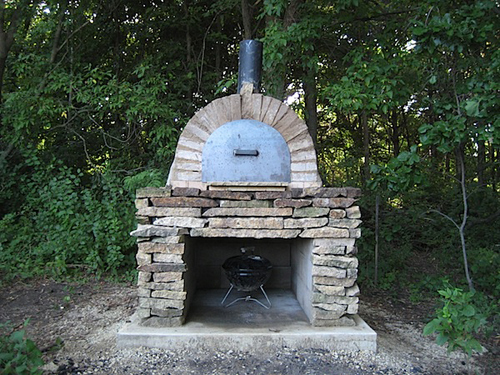
Great srticle… I already have a pizza oven.
But I am wondering instead of bricks …. would the stones you recommend be OK to use in the Pizza oven?? The rectangular or circular slab of ceramic???
Please recommend … thanks.