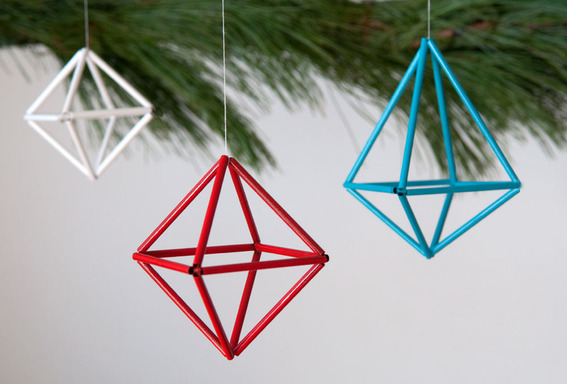
I love living right across the street from the public library. Sure, it makes checking out and returning things a breeze (and late fees inexcusable), but there’s another benefit. Every six weeks or so, when I see the “Friends of Library Book Sale” sign hit the sidewalk, I can scootch right over and snag the best goodies for a cool 25¢ each.
On my most recent trip, I scored one of my favorites yet: an old, yellow-ing craft book on Scandinavian Christmas traditions, complete with lots of those red Swedish horses (Dalahäst), tasty recipes for the Danish holiday doughnut/pancake æbleskiver (which are amazing), and lots of paper garland and ornament ideas.
My favorite are himmeli, which are a diamond-shaped Finnish mobile made from dried straw. I love how they look warm and rustic in their natural color, but become cool, modern, and geometric when coupled with a pop of color. They’re easy to whip up on the small scale as ornaments, or you can translate to a larger scale and hang from the ceiling along with your paper bulb ornaments and dot garland.
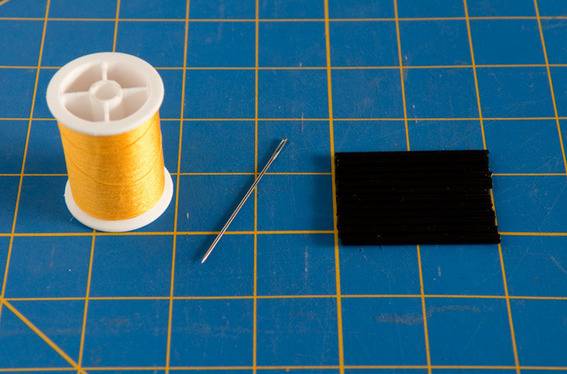
Tools and Materials:
- Small plastic drinking straws/coffee stirrers
- Thick thread or thin yarn
- Yarn needle
- Ruler and scissors
- Spray paint
- Super or modeling glue (optional)
Steps:
1. Cut all your straws to the desired size. In this example, my straws are all 2″.

2. Cut the string/yarn to roughly 5′ (I just measure twice the length of my arm), and thread the needle. Slip on four straws.

3. Push the straws near the end of the string and then pull them tight to create a square. Double knot, maintaining the rigid shape.

4. Add two more straws, and tie them off on the corner opposite of the first knot.

5. Repeat with two more straws, pulling tight to create the basic eight-faceted shape.
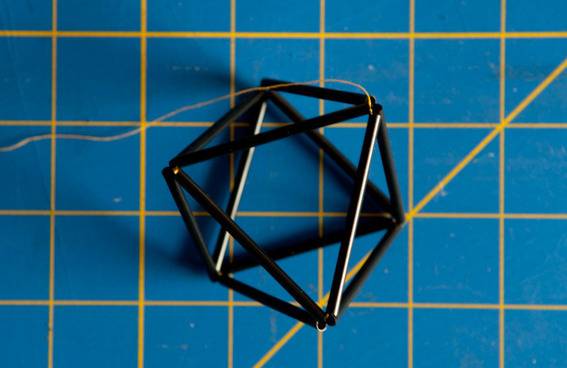
6. Thread the needle back through one straw to come out in the middle. Tie a knot, then add one straw between each of the sides, double knotting at every corner.
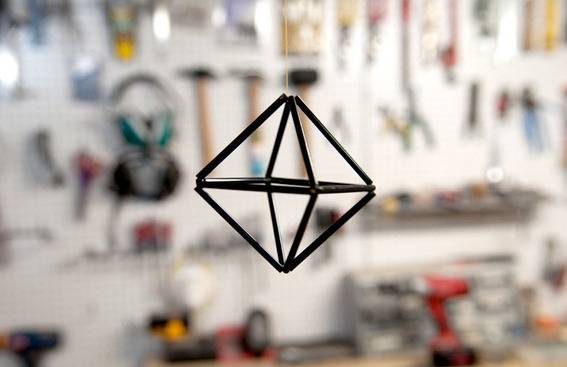
7. Decide which corner you’d like your ornament to hang from and tie a string to create a loop. If your string isn’t super tight, and the shape looks a little wonky, you can add a little super glue or modeling glue (or anything with a small application tip) to the inside of the corners to hold the straws in place. This is quite not the Finnish tradition using natural straw, but I found it helpful to keep everything set before painting.
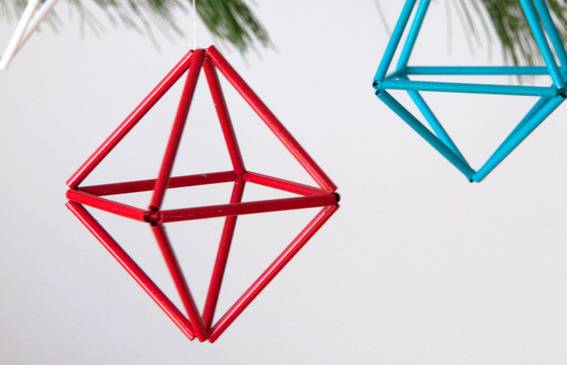
8. Take your ornament outside and spray paint your color of choice. I’d recommend wearing gloves for this one, since you’ll likely need to use your hands to keep the ornament from swinging around after being propelled by the paint. It’s not a hard task, but be prepared to… uh, interact with the straws while painting.
Once you figure out the technique, experiment with different sizes and shapes. The white one pictured is made from 1 3/4″ straws and the longer blue shape is 3″ on top, 1 3/4″ on the bottom, and 2″ for the middle pieces.
Make ’em by the dozens and give some to everyone you know!
Happy Holidays!
