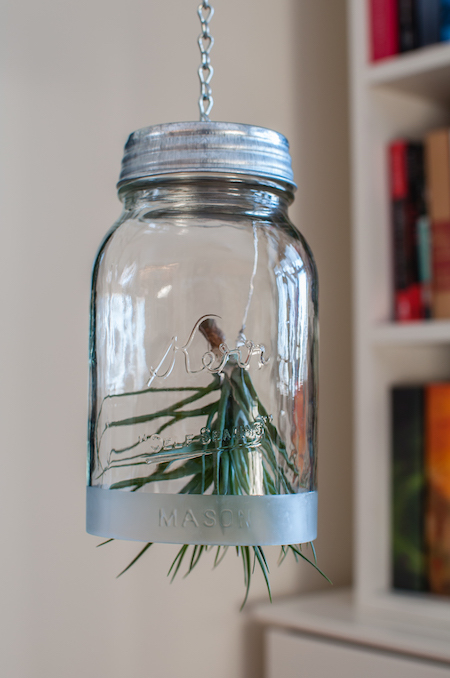
So psyched to be able to share the first of two projects from my recently released book, MASON JAR NATION (Cool Springs Press, 2016)! This DIY hanging air plant (tillandsia) planter is found in the “Crafts” section of the book and it’s one of my favorites. (Although, to be honest, there are a lot of favorites in the book–as it should be, otherwise they wouldn’t have made it into the book!) This project ranks medium on the easy to hard scale, but that’s only because it requires a bottle cutter (Click here to read my reviews of some popular bottle cutters. Long story short: Ephrem’s is the best out there). Because my publisher, Cool Springs, is so very accommodating, they’ve agreed to let me share the project in its entirety straight from the book.
SUPPLIES:
- 1 clear, quart-size Mason jar
- Bottle cutter and finishing equipment (We recommend Ephrem’s Deluxe Bottle Cutter, $37)
- Painter’s tape
- Small paintbrush
- Etching cream
- Metal hole punch or drill and small bit
- 1 lid and band or 1 reproduction lid to fit the Mason jar used
- 1 small cotter pin
- 2’ of #16 single jack electro-galvanized chain requirements
- Small washer with small a hole
- 18-gauge wire (about 8″ or so)
- 1 tillandsia
MAKING YOUR PLANTER:
Cut approximately 1” off the bottom of the jar and finish the cut edge according to the technical instructions in MASON JAR NATION or according to the bottle cutter’s instructions.
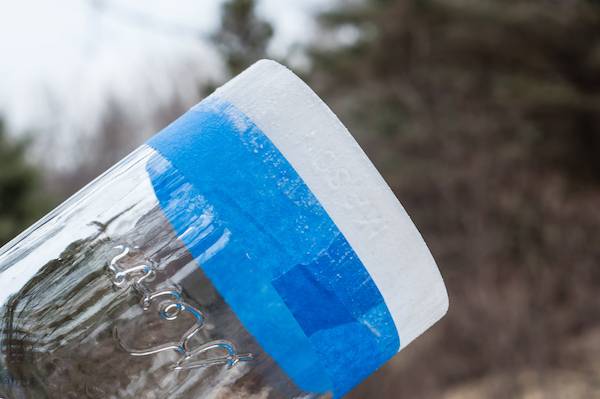
Apply painter’s tape about 1/2” up from bottom edge of the jar.
With a small paint brush, apply etching cream to the exposed area. Keep in mind that a thick, even coat works best. Leave the etching cream in place for as long as the product’s recommendations stipulate. After that, rinse off the etching cream and remove the tape.
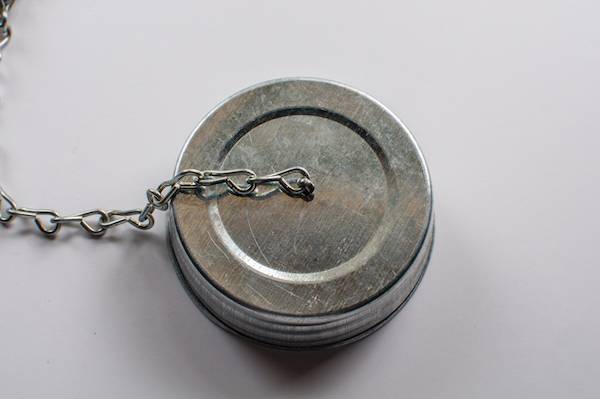
Next, punch or drill a small hole in jar’s lid. Thread the cotter pin through the last link in the chain, then feed the cotter pin through the hole in the lid.
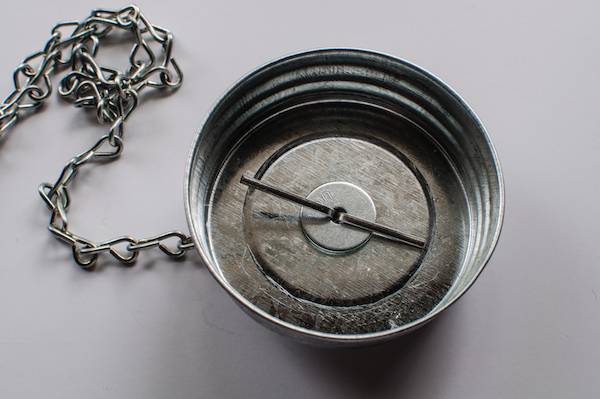
Slip the washer onto the cotter pin’s legs and bend them open.
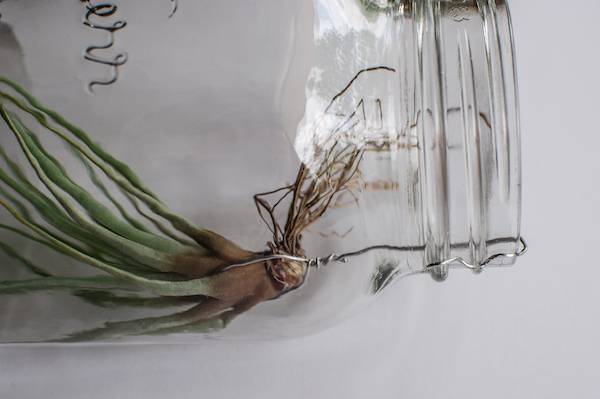
Using a length of 18-gauge wire, gently wire up the Tillandsia. Then, feed one end of the wire through the top of the jar and screw on the jar’s lid. Note that 18 gauge wire is small enough that the band will screw on.
When it’s time to water the Tillandsia, simply remove the lid and ease the plant out from the bottom of the jar. Just remember, after the plant’s soak, allow it to dry before re-inserting it into the jar.
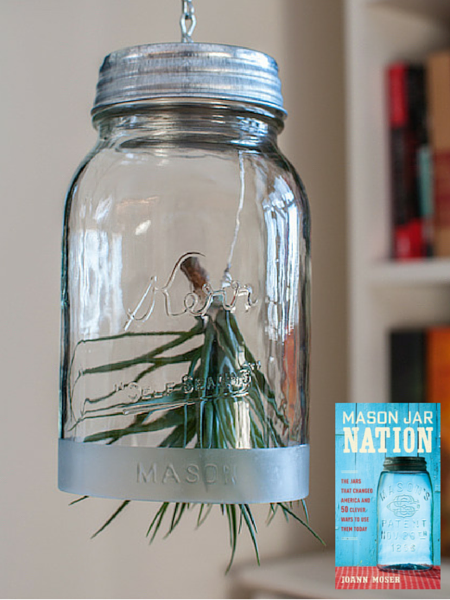
Feel free to share this tutorial from MASON JAR NATION on Pinterest!
If you love Mason jars, you just might want to see the other 49 more projects featured in MASON JAR NATION. You can order it today from Amazon or Barnes & Noble ($15). And to read more about my road to publication, check out this post right here on Curbly.

