I’ve been spring cleaning and noticed my bird feeders werent’ holding their seed any more. Ever notice there’s this little piece of plastic that fits inside the hole which keeps the seed from pouring out? I actually never noticed it until recently! The birds could still sit on the feeders to eat out of the ports, but the plastic pieces that kept the seed from spilling out were gone — except for one. I started looking at my local stores for the small plastic semi-round, slightly cone shaped gray piece, but could find nothing.
I googled “bird feeder replacement parts” and found replacement feeder ports that were metal and backordered and cost $1.92 each (and were not guarenteed to fit my feeder). I needed seven, so I started thinking about how I could fix my feeders and not toss them into the landfill since they are still in relatively good shape and have metal parts. I scoured my husband’s sprinkler repair box trying to find a piece of pvc to fit inside the port. I was making this too hard.
What I came up with might not ultimately be the most inventive or the most aesthetically pleasing, however it surely is upcycling at it’s finest!
Take your bird feeder down and empty it of all old seed and clean it with hot water and mild soap…or if you have a hand steamer give it a good hot steam (this is good to blast out old moldy seed hulls and gunk — just point away from your self and any other surface you don’t want splattered with dirty seed). The National Audobon Society recommends cleaning feeders once or twice a year anyway to keep our fine feathered friends healthy…so consider it maintenence!
Make a delicious french whole grain mustard vinagrette to use the last of your grainy mustard (like I did) or find an empty plastic container (any sturdy pliable plastic container will work). Wash it thoroghly.
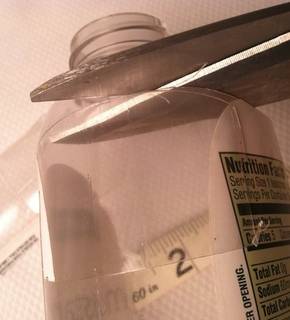
Measure the inside of your feeding port — include the curve — it should be about 1 1/2″ x 2″. Using sharp utility scissors, cut out a rectangle from the side of the bottle/container. See if it fits your port — it should slide right in there and sit pretty flush. Trim if necessary.
Use this as your template for the remaining ports OR freestyle it.
Slide your new “ports” in place and secure with a small amount of adhesive, silicone or other agent that will withstand weather (and squirrels). If you don’t have squirrels, you could probably just slide them in and leave them, however it’s probably best to secure them on the outside edge with a small amount of non-toxic adhesive. I’m not sure squirrels would actually chew these when offered sunflower seeds instead, however just their general “squirely-ness” would probably be enough to accidentally pull one of these out of place and result in a seed stampede.
Fill your feeder with seed and enjoy not spending money on new feeders!
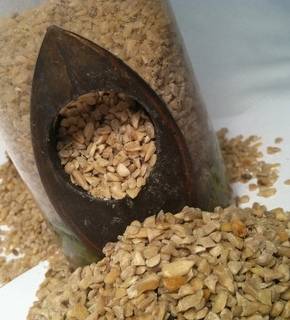
The problem: seed stampede!
The solution really cuts the mustard!
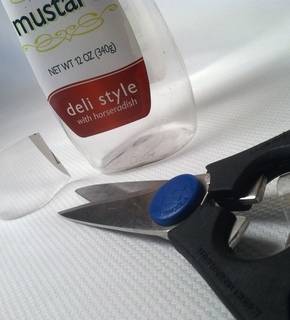
Feeding port with all parts:
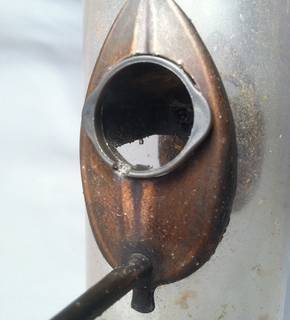
The missing piece:
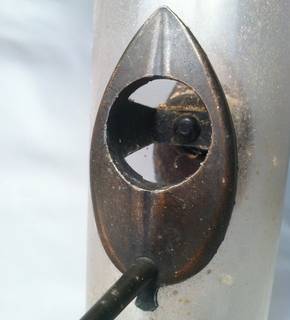
The solution might be in your recycling bin!
Cut a rectangle out of the plastic container to fit the port.
Insert to the middle of the inside of the port and trim to fit.
(don’t forget to wash your feeder)
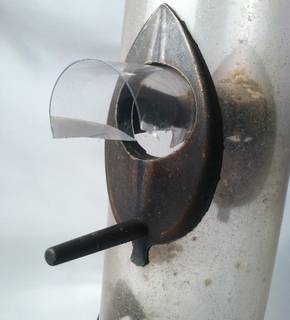
Cut out remaining pieces, if needed, and insert into feeding ports.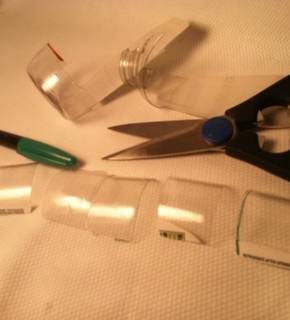
Affix edge with small amount of appropriate adhesive. When dry, re-fill with seed and re-hang.
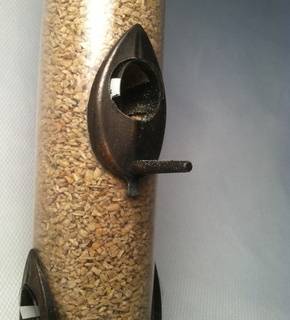
(I left the edge of this out intentionally so the piece could be seen. When correctly trimmed, it’s virtually invisible.
Has anyone else fixed their feeder with a different method? And, does anyone know what that small plastic part is called?
Happy Spring!
Betsy
I use the Press & Seal caps on the end of dispenser roll of the plastic wrap. Take a fine tooth craft saw and starting at the tip, carefully cut a groove to start. Use a glove for safety…..the saw is very sharp. Once you have a grove lined up… cut the cap in half, gently pull the saw blade towards yourself. The saw will quickly cut through the cap to the rim. Gently score the rim and withdraw the saw. Using both hands….bend the two ends back and forth to break apart. Wa la! You now have two feeder caps that are surprisingly similar to the originals. Use glue on the rim of the cap and press them in the feeder tube opening. I used Dap Weldwood contact cement.
mine are metal tubes and the Red headed Woodpeckers are knocking the plastic ports out, 6 ports, right across from each other, do you put the plastic all the way through?
Do you have a or can you make a drawing of what you did? I have 2 expensive squirrel-resistant feeders with damaged feeder ports. I tried to find replacement parts without any luck. I would appreciate any advice you could give to me.
Thanks so much!
Same thing happened to me, I knew I had seen somewhere something that would work as a replacement. Down to the workshop and found my package of garden hose washers.
Made by sun mate, rubber hose washers. They come together on a black plastic almost like a skewer that has them all on it. Behold at the end holding them all in place was the piece I remembered. Black plastic meant to pull on and off the skewer and hold the washers in place on the skewer until you need one. The plastic flange (I will call it) is open like the silicone piece with slits like on the original and fits in perfectly, a little glue to hold it in place and should be good to go. Have a look at your local hardware store and see what I mean. Also you have the hose washers as a bonus!