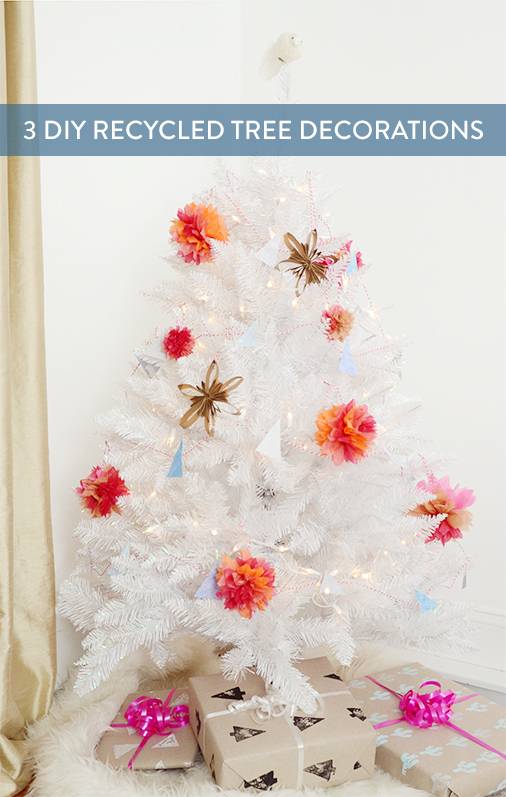
December is one of my favorite times of the year, but there is something about all of the spending and consequent waste (shipping boxes, gift wrap, etc.) that rubs me the wrong way. So I thought it would be fun to decorate a tree using recycled paper and cardboard, and I’m sharing three mini tutorials with you today. Click through to check it out.

The tree is colorful and festive… and aside from the lights, it cost next to nothing to decorate!
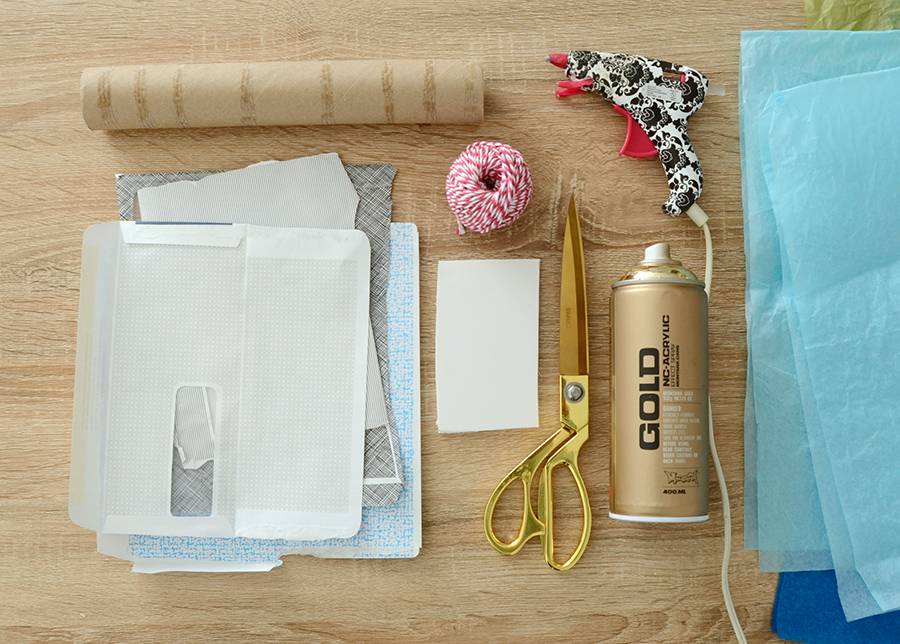
Here’s what you’ll need to create all three types of decorations:
- Paper towel or toilet paper rolls
- Security envelopes
- String, twine or yarn
- A small piece of cardboard or foam core
- Scissors
- Spray paint (optional)
- Hot glue gun
- Used tissue paper
1. Modern Tree Garland

For this first project, save a few security envelopes when you’re sorting through the mail. You’ll be surprised at how fun some of the patterns are!
Begin by drawing a tall triangle shape onto a piece of scrap cardboard or foam core board. Mine was about 3 inches tall and 2 inches wide. Cut it out and use it as a template to draw tons of triangles onto the inner patterned sides of your security envelopes. Cut them out just inside the lines.
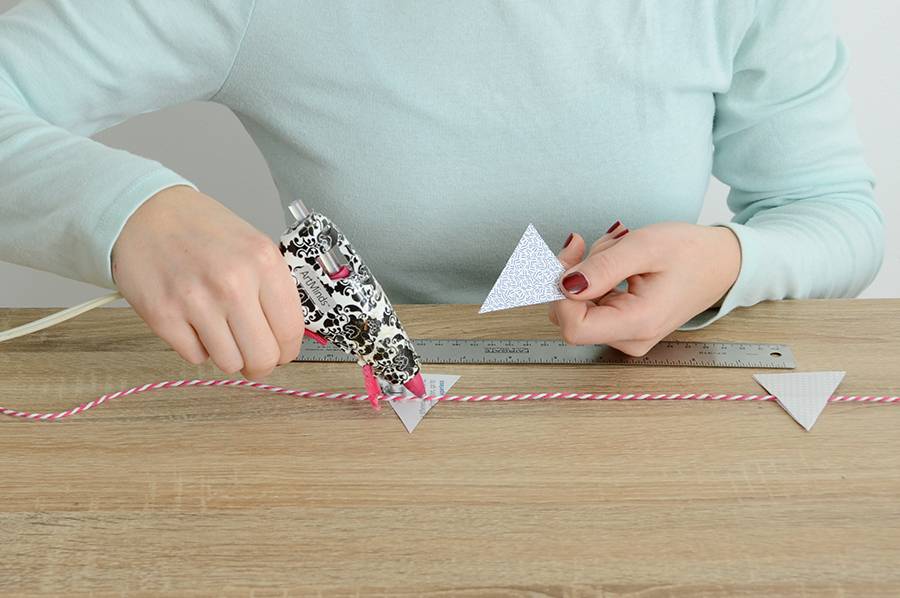
Grab some string, twine or yarn (whatever you have lying around) and fire up your glue gun. Place one triangle (patterned side down) on your work surface and glue the string to it just above the center point as shown above. Then place a thin line of glue all the way around the triangle and place another one on top with the pattern side up. Repeat the process every 8 inches.

Trim off any excess paper so all the edges match up perfectly, and you’re finished! So cute, right?
2. Snowflake Ornament

The next project is a cardboard snowflake made out of paper towel or toilet paper rolls. Just be sure to use one or the other, because they are slightly different sizes. Flatten out the roll and cut twelve slices, each a 1/2 inch wide. Set six aside, and fold the other six in half as shown above.
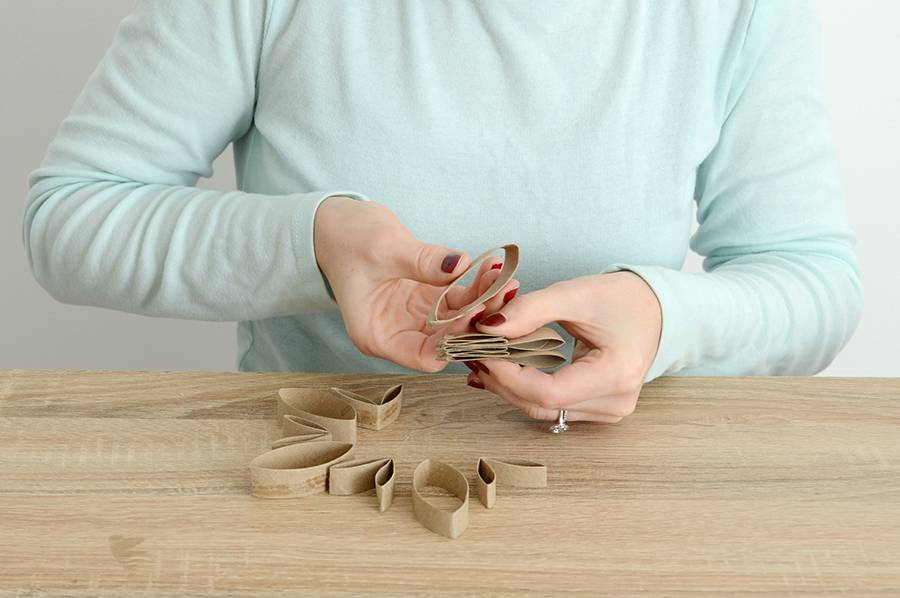
Arrange them in a circle, alternating folded pieces with non-folded pieces. Using a hot glue gun, put a dab of hot glue at the end of one piece and glue the next piece to it, then repeat all the way around until you have a snowflake shape. At this point, you can spray paint it if you like. I used a bit of gold on mine. Poke a hole in the top of one of the unfolded piece and thread a piece of string through to create a loop for hanging.

It’s really quite elegant, especially considering that it’s made from something as mundane as a paper towel roll! You can get creative with it too, using different paint colors, adding glitter or even drawing patterns on it.
3. Mini Pom Pom Ornaments
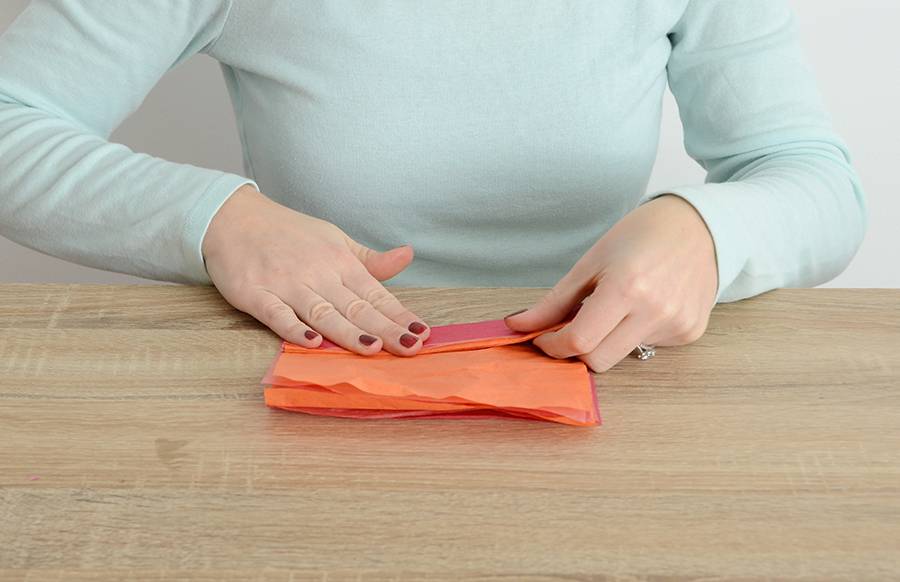
The third project is a play on those giant tissue pom poms that were so popular for a while… but for these we’ll use multiple tissue colors and they’ll be miniature versions. Begin by collecting a few pieces of used tissue… crumpled is okay, just smooth it out gently on a flat surface.
Cut three pieces of different colored tissue so they are approximately 6 x 18 inches. Lay them on top of one another and cut them in half, then put one half on top of the other half so you end up with six pieces of tissue in a pile, 6 x 9 inches each.

Fold them into an accordion shape, and cut two triangular notches into the center.
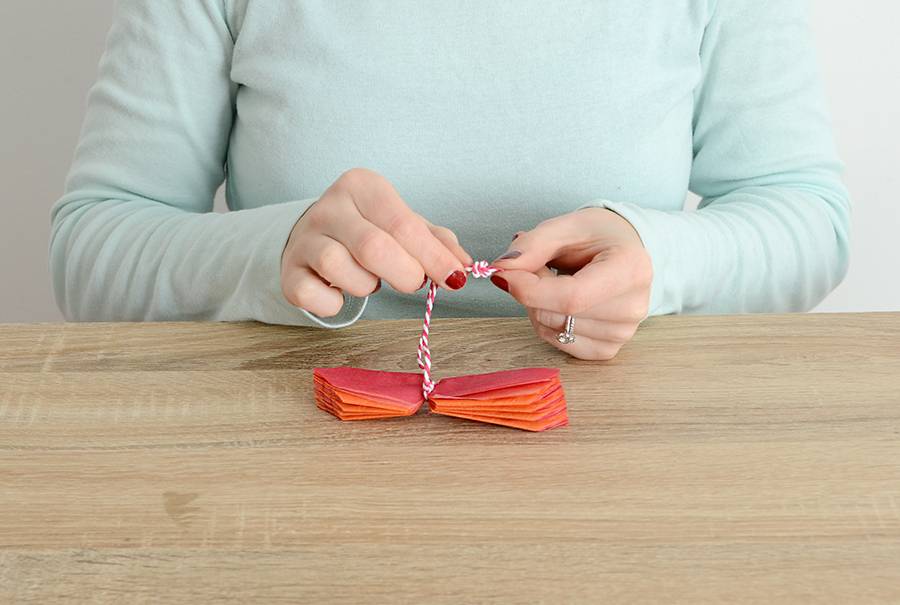
Trim one inch off of each end to make them even and then cut them into points. Tie a 12 inch piece of string around the center in a double knot, then knot it at the top to form a loop.
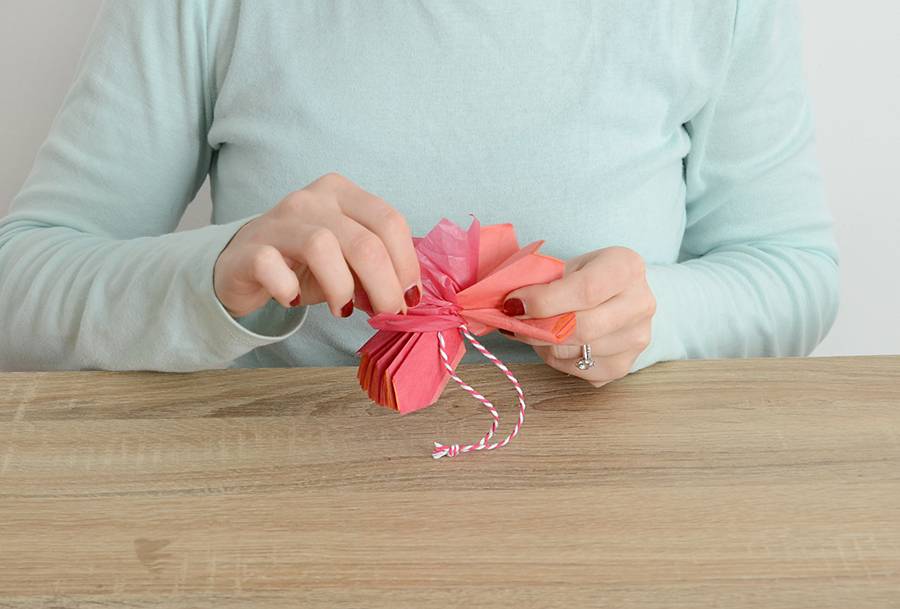
Gently pull each piece of tissue away from the next, until they are all separated. Fluff it up and trim any long points so that it forms a nice round shape.

I used bright oranges, peaches and pinks, but you can use any color you want for these. They are super light too, so they hang nicely on the tree branch.
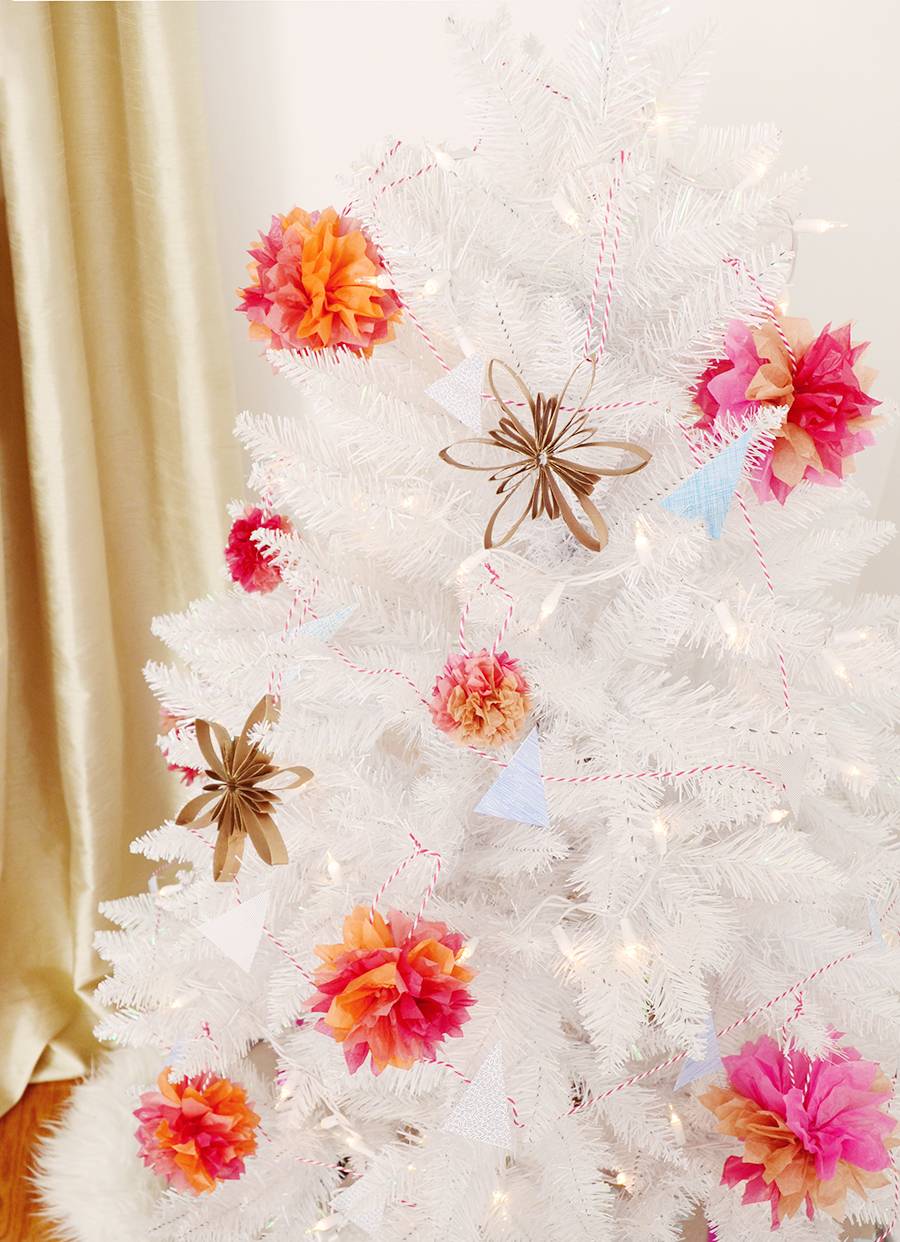
Here’s my tree all decorated… it’s quite festive, and it felt good to decorate without spending a fortune on store-bought ornaments. Do you have other ideas for recycled Christmas ornaments? Feel free to share in the comments section below!
