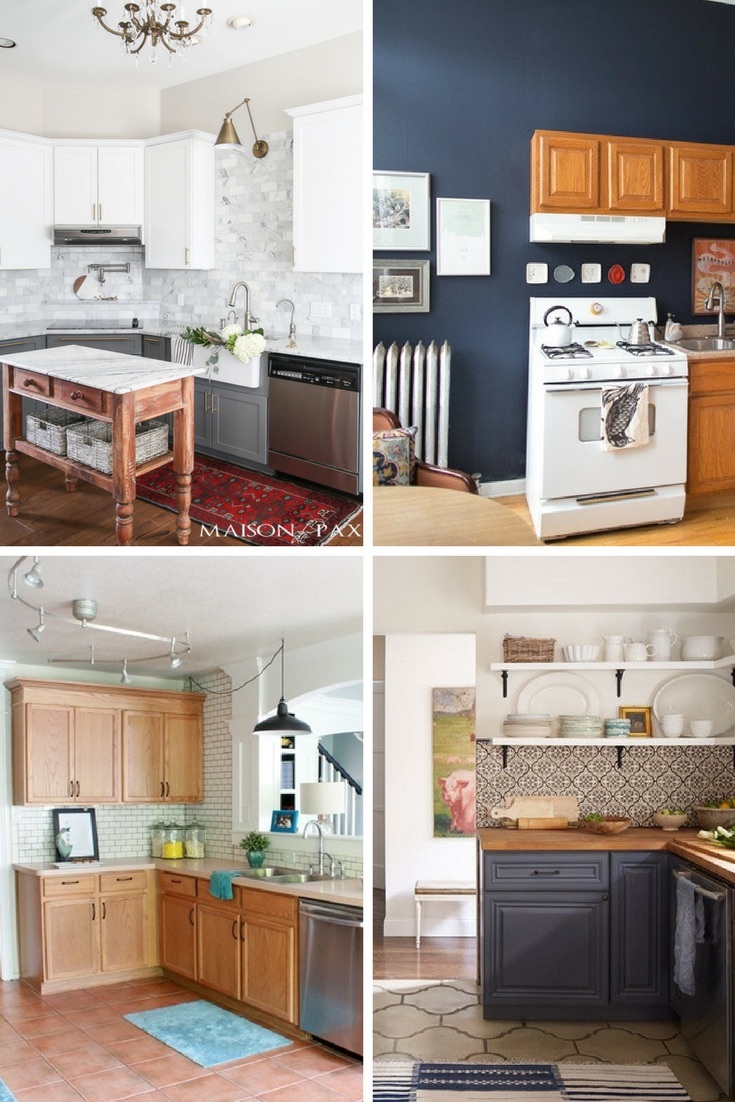
Do you want to upgrade your builder-grade kitchen? The good news is you have so many options to upgrade your kitchen without ripping out all of your cabinets and without breaking the bank.
You can use plenty of budget-friendly ideas to give your cabinets a stylish makeover. From painting and adding hardware to removing doors and upgrading countertops, there are many ways to update your builder-grade cabinets that won’t cost a fortune.
Here are thirteen ways to make a generic stock, builder-grade kitchen reflect your personality.
Keep reading to discover some great ideas for making your kitchen cabinets look like they belong in a magazine.
1. Paint Your Builder Grade Cabinets
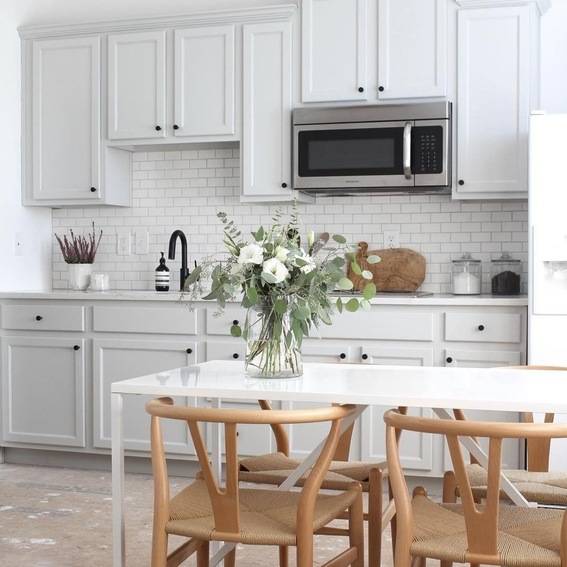
I know you’ve heard this one before, but there’s a reason… painting is the most transformative and cost effective way to change your builder-grade cabinets. Most of these types of cabinets are MDF covered in wood or laminate veneer, so you’re not destroying beautiful woodwork.
If you’re tired of your plain, boring builder-grade cabinets, painting them is a budget-friendly way to give them a fresh new look. Not only does it instantly update your kitchen, but it also adds personality and style to the space.
There are countless ways to update kitchen cabinets with paint. You can choose a classic white for a timeless look or opt for a bold color to add some personality.
If you’re feeling creative, consider adding a stencil design or pattern to your cabinets.
Another popular trend is two-toned cabinets.
This involves painting the upper and lower cabinets in different colors to create a contrast and add depth to the space. This works especially well if you have an open floor plan and want to break up the kitchen and dining areas.
One thing to keep in mind when choosing paint colors for your cabinets is to make sure they coordinate well with the rest of your kitchen decor. You don’t want to paint your cabinets a bright red if it clashes with your countertops or backsplash.
Painting your builder-grade cabinets is a simple and cost-effective way to update your kitchen. It’s a DIY project that can be done in a weekend and has a huge impact on the look and feel of your space.
Here’s an easy five-step process for updating kitchen cabinets of this type:
My trick to painting builder-grade cabinets in five easy steps:
1. Clean Cabinets with TSP cleaner.
2. Wipe the cabinets down with a deglosser. The deglosser takes off the shine and gloss of your cabinets so you don’t have to sand.
3. Prime the cabinets with a bonding primer and allow to dry the recommended time. Bonding primer hardens and adheres during drying making any surface ready to paint without sanding.
4. Paint your Cabinets with cabinet-grade paint such as Benjamin Moore Advance or Sherwin Williams Pro Classic with a mohair roller.
5. Allow allotted time for drying, change out your roller each coat and re-coat as many times needed!
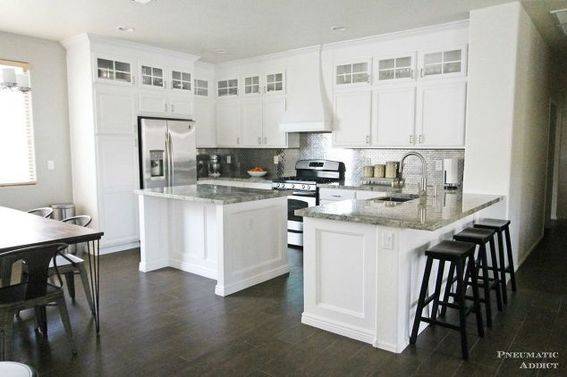
2. Add cabinets on top of the existing cabinets.
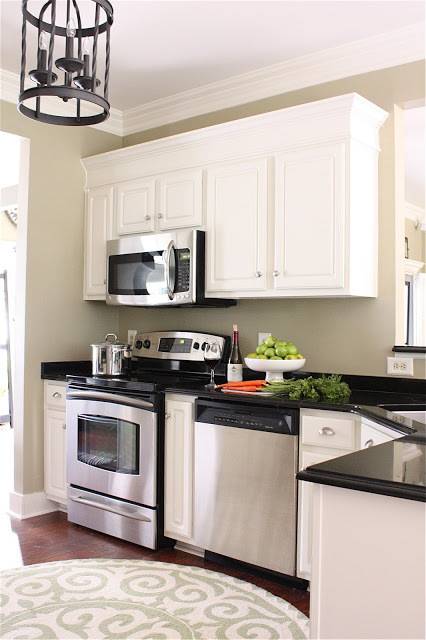
Builder-grade cabinets often are installed with space above the cabinets, like in Elisha’s Kitchen above.
Adding smaller cabinets above each existing cabinet to fill the space and make your kitchen look more custom.
When it comes to painting, it’s a simpler task since the finish of the surface doesn’t necessarily need to be identical.
If you want to increase kitchen storage space, adding cabinets on top of your existing ones can be a great option.
This is also an affordable way to give your kitchen a fresh new look without breaking the bank.
To get started, measure the space between the top of your current cabinets and the ceiling. Then, head to your local home improvement store and pick up pre-made cabinets or have them custom-made to fit the space. Once you have your cabinets, it’s time to install them.
Once your cabinets are installed, you can paint them to match your existing cabinets or give them a different color for a contrasting look. You can also add new hardware to tie the new cabinets in with the old ones.
Adding cabinets on top of your existing ones is a budget-friendly way to increase storage space and give your kitchen a stylish makeover. With a little bit of time and effort, you can transform your kitchen into the space of your dreams.
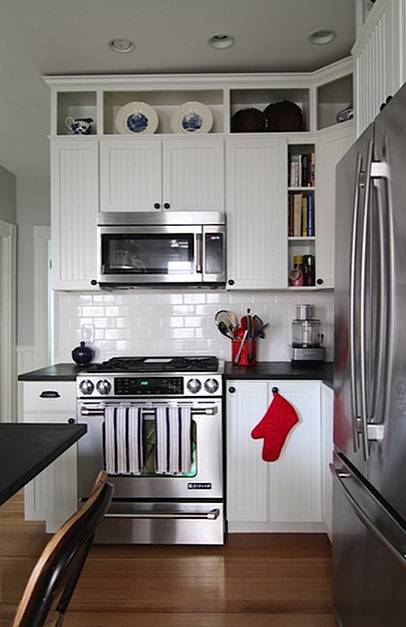
If you can’t find the door style (or don’t like the door style) then you can install (or build) boxes for open storage like the inspiration photo above.
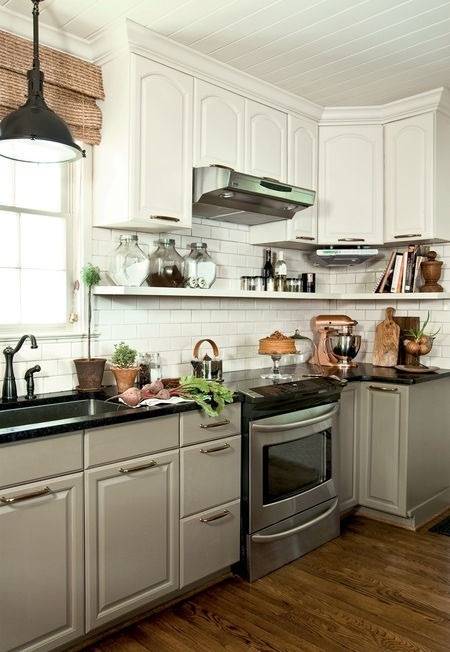
3. Re-hang your cabinets higher and add shelving underneath.
If your cabinets are functional but lack adequate storage space, you can add extra shelves to your cabinets by simply replacing cabinet shelving with new shelves that fit your needs.
Alternatively, you can also rehang your cabinets to increase storage space, giving your kitchen a more functional and practical feel.
While you’re upgrading your cabinets, it’s a good idea to add a kitchen backsplash. A backsplash will protect your walls from splatters and spills, and it can add a pop of color and personality to your kitchen.
To finish off the look of your upgraded cabinets, you can also consider adding molding. Adding molding to cabinets is an inexpensive way to make them look more high-end and elegant.
Molding can add a classic look to your kitchen, and it will help create a seamless transition between your cabinets and the ceiling.
4. Install New Hardware
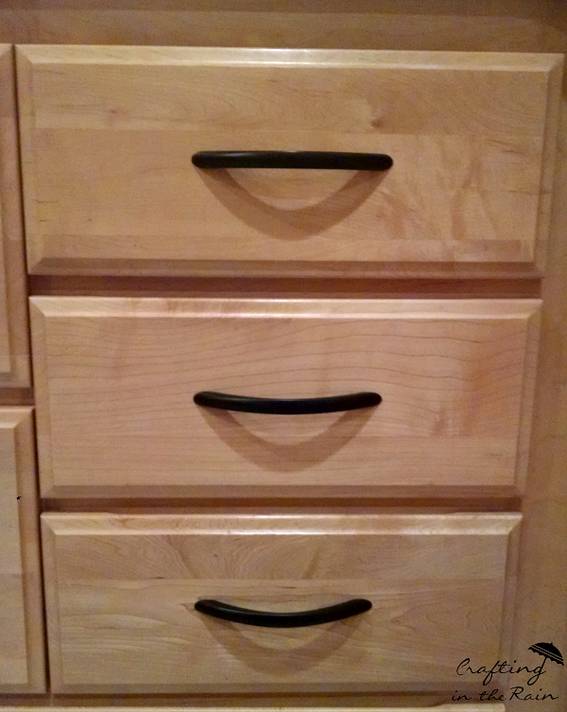
Often, these builder grade cabinets don’t originally come with hardware. Adding or replacing hardware is an easy way to make a dated kitchen look new.
Whether you choose to paint your cabinets to upgrade them or not, adding hardware is a simple and easy addition that adds a nice touch.
Hardware, such as knobs and pulls, can significantly impact the overall aesthetic of your cabinets. It’s a simple and cost-effective way to add a touch of elegance or a modern flair to your kitchen.
When choosing new hardware, consider your kitchen’s style and color scheme.
Opt for hardware that complements the other elements in the space, such as your appliances, faucet, and lighting fixtures.
You can choose from a variety of finishes, including brushed nickel, brass, chrome, or even glass.
You’ll need a few basic tools to install new hardware, such as a drill and a screwdriver.
Begin by removing the old hardware and filling in any holes with wood putty or filler. Then, position the new hardware in the desired location and mark where the screws will go. Pre-drill holes to prevent the wood from splitting, and then attach the hardware using the screws provided.
In addition to installing new hardware, now might also be a good time to consider adding a kitchen backsplash. A backsplash protects your walls from splatters and spills and can also add a pop of color and personality to your kitchen.
This small upgrade can make a big impact and help create a cohesive and stylish look in your kitchen.
5. Add a backsplash
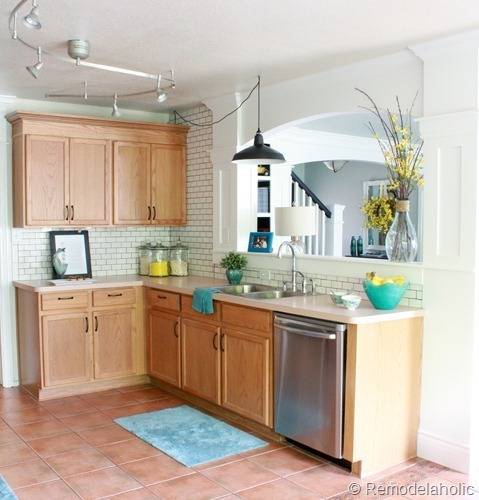
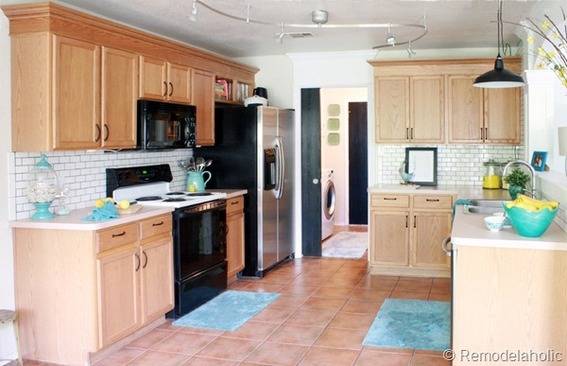
A nice crisp white backsplash is a “timeless” and inexpensive way to dress up your builder grade cabinets. I love how Cassity from Remodelaholic used dark grout for a little more interest. It really helped give her kitchen a little more of a custom vibe.
Adding a kitchen backsplash is one of the most effective ways to give your kitchen a fresh new look.
It’s a stylish addition and practical, as it protects the walls from splatters and spills.
There are countless options when it comes to choosing the perfect backsplash for your kitchen. You can choose classic ceramic or porcelain tiles, trendy subway tiles, or even a natural stone option.
The key is to select a material that complements your kitchen’s color scheme and style.
When it comes to installation, you can either hire a professional or make it a DIY project.
Installing a backsplash requires some skill and patience, but it’s a manageable task for the average homeowner. Just make sure to take accurate measurements, prepare the surface properly, and use the right adhesive.
Upgrading your kitchen cabinets and giving your kitchen a fresh look can be achieved by adding a simple kitchen backsplash. With various materials, colors, and styles available, you can easily find a backsplash that matches your style and preferences.
One of the advantages of adding a kitchen backsplash is that it can enhance the appearance of your builder-grade cabinets. This affordable upgrade can make them look more sophisticated and unique.
Moreover, a kitchen backsplash can reflect light, which can make your kitchen look more spacious and brighter.
When selecting a color and pattern for your backsplash, it’s essential to consider the overall style of your kitchen. For instance, a minimalist white subway tile may be suitable for a modern kitchen with stainless steel appliances, while a vintage-inspired patterned tile may be more fitting for a farmhouse-style kitchen.
It’s essential to note that adding a kitchen backsplash doesn’t have to be costly. Peel-and-stick tiles are an affordable option that can be effortlessly installed without any special tools or skills.
Another alternative is a DIY painted backsplash that uses stencils or tape to create a unique pattern. By adding a kitchen backsplash, you can achieve a stylish makeover for your cabinets in a simple yet effective way.
6. Paint your kitchen walls a dark neutral color.
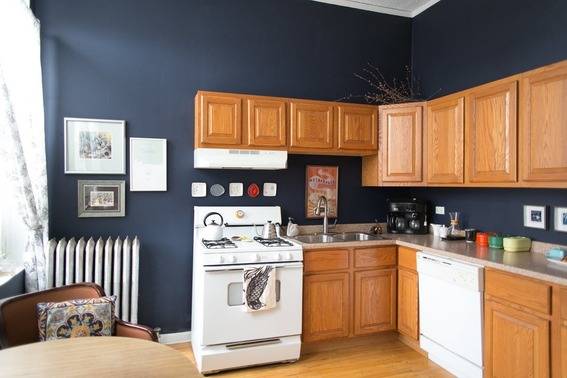
Can’t paint your oak builder cabinets…. or someone in your family doesn’t want to? Try a dark color in your kitchen such as black, navy, or dark (almost black) grey.
In the picture above, the dark walls help distract my eye from focusing on the “orangey” cabinets while also toning the color of the cabinets down. It’s unexpected, yet all three of those colors can bring the best out of the color of the oak and keeps them from being the only focal point in the kitchen.
Just imagine if the above homeowners/renters could add a white backsplash with dark grout or…
I love Cassity’s bright kitchen but imagine if she added black or navy paint paired with her stylish dark grouted backsplash…
A great way to give your kitchen cabinets a fresh look is by painting the walls with a dark neutral color, such as gray, navy, or black.
This simple yet effective upgrade adds sophistication to your kitchen and makes your cabinets stand out. Additionally, it creates an illusion of a larger space and adds depth and dimension to the room.
When deciding on the right color for your walls, it’s important to consider the color of your cabinets.
If your cabinets are light, a dark neutral color will complement them beautifully. On the other hand, if your cabinets are already dark, opting for lighter wall colors can create balance and harmony in the space.
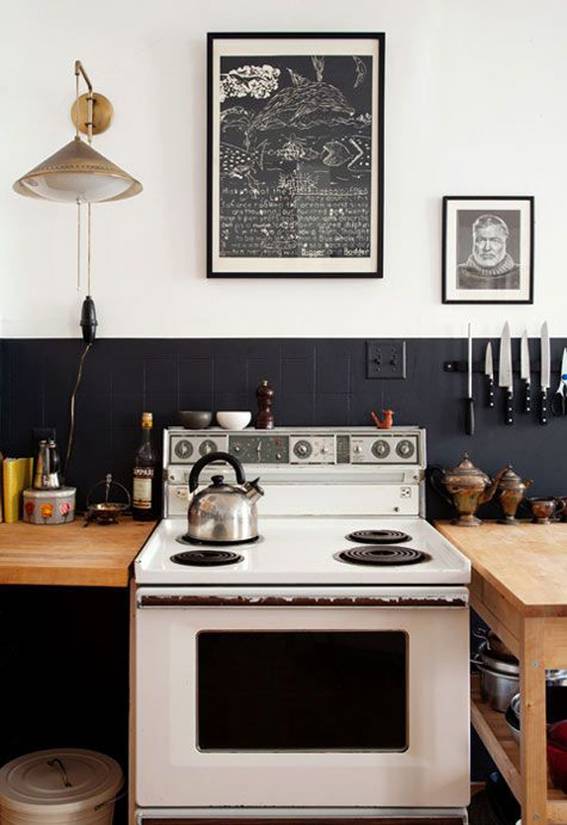
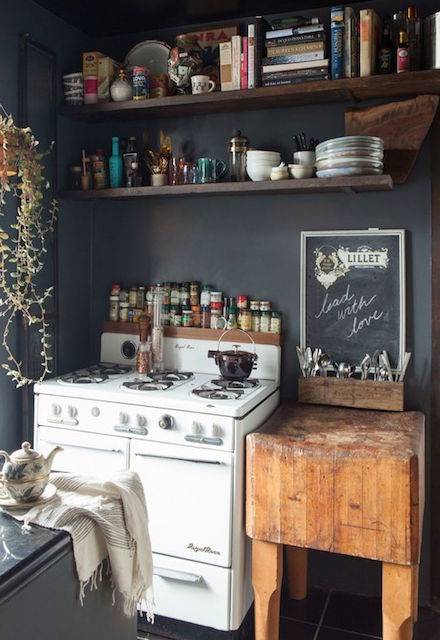
Not convinced? Look at these black walled interiors… my favorite thing about them is how the “wood tones” look with the black walls. A dark bold color might make you actually like your oak cabinets. [Left Photo: Homeedit; Right Photo: Gravity Home
7. Take the doors off your upper cabinets.
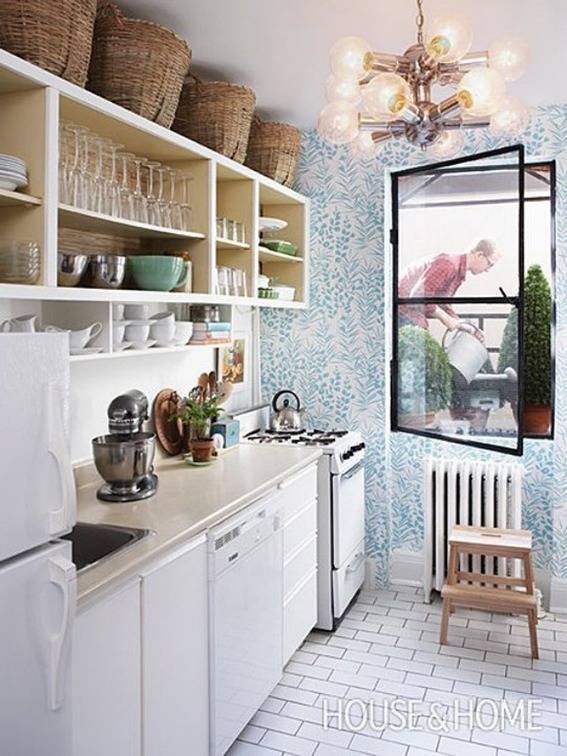
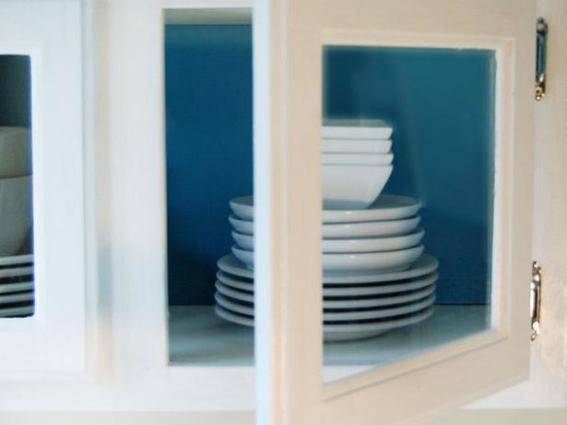
Create instant open shelving by removing your upper cabinet doors. You can easily add color by adding some wallpaper or contact paper on the back wall of the cabinet.
A simple and affordable way to enhance your builder-grade cabinets is by eliminating the doors.
This will create an open and airy atmosphere in your kitchen, and enable you to display your exquisite dishes, glassware, and serving pieces.
By removing the cabinet doors, you can update your kitchen without spending too much money.
Additionally, it provides an excellent chance to declutter and eliminate unnecessary items, resulting in a more organized and cleaner space.
8. Take all your upper cabinets down and replace them with all open shelving
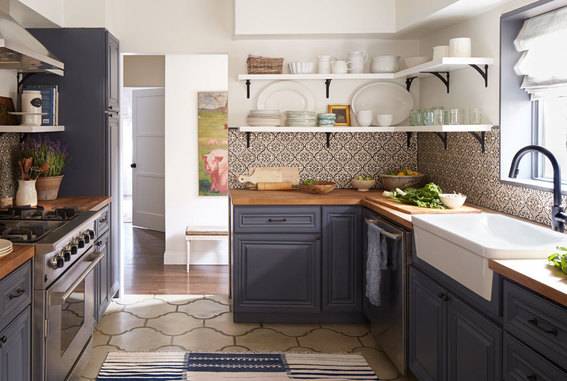
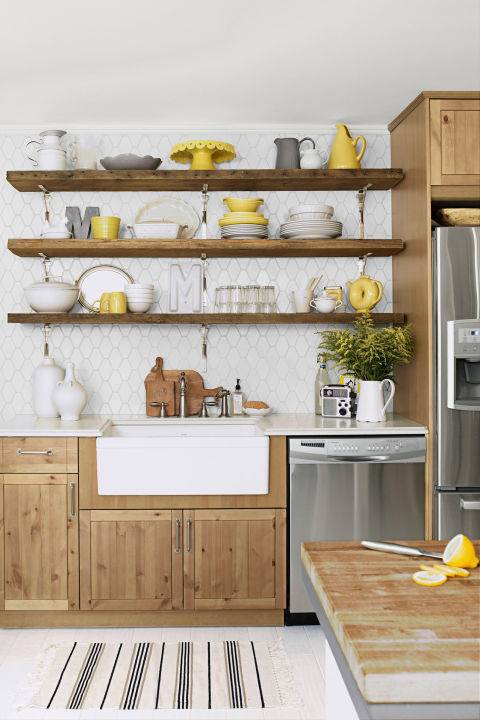
Open shelving is stylish and inexpensive. Take down all your uppers and replace them with open shelving. This kitchen proves that you can keep existing soffits that are often above kitchen cabinets. Paint them the same color as the wall and they will fade away into the background.
If you’re looking to update your builder-grade cabinets and create a more open and spacious feel in your kitchen, consider removing the cabinet doors and replacing them with shelving.
This simple and cost-effective update gives your cabinets a fresh new look and allows you to display your favorite dishes, glassware, and other kitchen items.
When it comes to choosing the right material for your shelves, consider the style and aesthetic of your kitchen. Floating wood shelves create a warm and rustic look, while glass or acrylic shelves provide a modern and sleek touch. You can also add decorative brackets or corbels for added support and visual interest.
An open shelving concept adds storage and display space and allows you to showcase your personal style and kitchen decor.
Replacing cabinet shelving with open shelves is a great way to update your builder-grade cabinets without the need for a full renovation.
It’s a budget-friendly project that can be completed in a weekend and instantly transforms your kitchen into a more stylish and functional space.
9. Upgrade your countertops
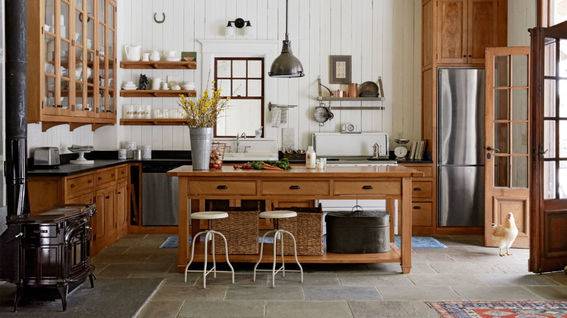
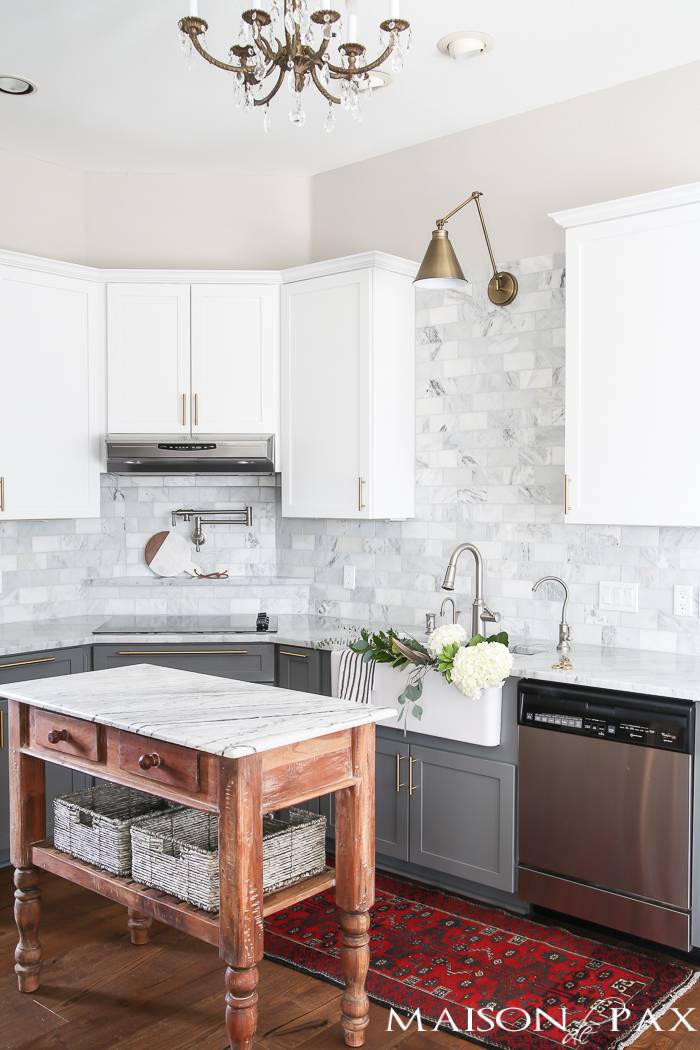
The above inspiration photo shows how light-colored countertops, such as light gray or marble looked countertops, can look great with oak or wood-toned kitchen cabinets. Don’t forget that laminate countertops have some pretty amazing options, such as this marble option from Formica.
Updating your kitchen countertops can have a big impact on the overall look of your kitchen, but it can also be quite costly. However, there are ways to refresh your countertops without breaking the bank.
One option is to use a special paint designed for countertops. It’s a cost-effective way to update your existing countertops.
If you’re willing to spend a bit more, laminate countertops are a great option.
They’re durable and come in a variety of styles, including ones that mimic more expensive materials like granite or quartz.
For a more natural feel, butcher block or wood countertops are a great choice.
They provide a warm and rustic look, but require regular maintenance and can be damaged by water. However, they can be sanded and refinished when needed.
No matter what option you choose, upgrading your countertops can make a significant difference in the appearance of your kitchen.
Black countertops can also look nice with oak colored or wood-toned kitchen cabinets.
10. Add glass fronts to your kitchen doors.
Looking to add a touch of elegance to your builder-grade cabinets? Consider installing glass fronts on the doors. This simple upgrade can instantly elevate the look of your cabinets and create an open and airy feel in your kitchen.
When choosing the type of glass, you have a few options. Clear glass will showcase your dishes and glassware, while frosted or textured glass can add privacy and visual interest. You can also choose decorative glass with unique patterns or designs.
Adding glass fronts is a budget-friendly way to give your cabinets a high-end look. It allows you to display your favorite items while keeping them protected from dust and grease. With this simple upgrade, you can transform your builder-grade cabinets into a stylish and sophisticated focal point in your kitchen.
Glass front cabinets are very custom and HGTV gives this simple tutorial on how to make it happen in your kitchen.
11. Replace your kitchen doors.
If you’re looking for a more dramatic transformation for your builder-grade cabinets, replacing the doors can give them a whole new look. This option allows you to completely change the style and feel of your kitchen without the need for a full renovation.
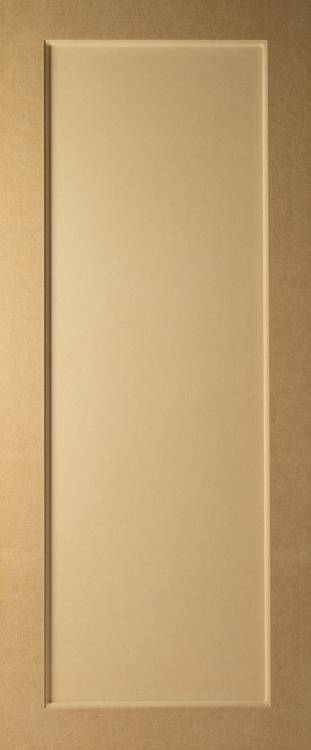

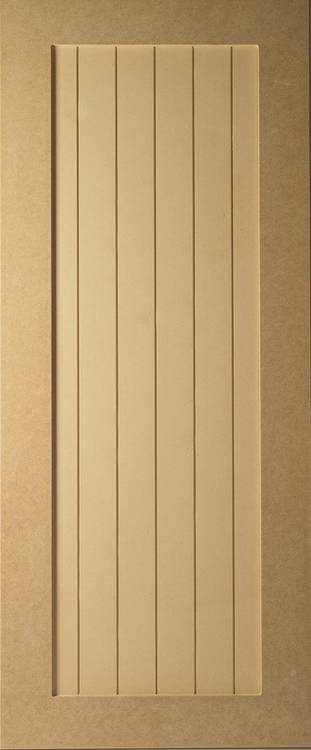
When it comes to replacing cabinet doors, you have a variety of options to choose from. You can opt for sleek and modern doors with a minimalist design or go for more traditional and ornate doors for a classic look. You can also choose different materials, such as solid wood, glass, or even metal.
Replacing cabinet doors is a more involved project compared to other updates, but it can completely transform the look of your cabinets and give your kitchen a fresh new feel.
It is actually not crazy hard or crazy expensive to replace your kitchen cabinet doors. If you don’t like the look of your doors but like your kitchen layout, order unfinished MDF doors from a company like this one. They will make your doors fit exactly the size of your cabinet.
This is most cost effective if you chose to paint your kitchen cabinets because you can order the MDF versions. I actually have done this in a kitchen. For a little less than $1000 we had changed builder basic kitchen cabinets into a more custom look with shaker doors. The people at KitchenCabinetDoors.com gave us great tips at measuring and getting them right. We painted them gray and they looked amazing!
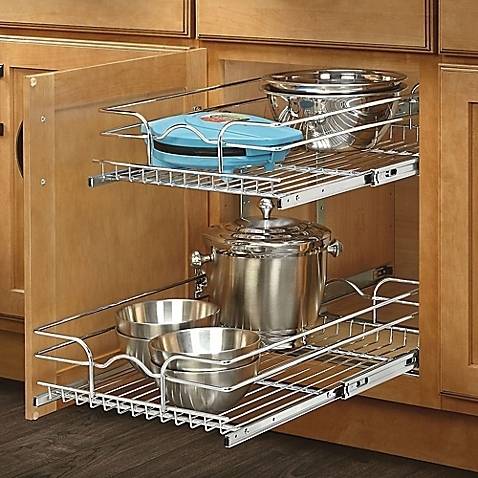
12. Add interior fittings to your cabinets.
Let’s be honest. Sometimes builder-grade cabinets look just fine from the outside.
Sometimes all that is lacking in these cabinets is function. Add some much-needed interior fittings, and you will start to love using your cabinets.
A great way to utilize the space inside your builder-grade cabinets while making them look neat and tidy is by adding interior fittings.
You can easily install pull-out shelves, lazy susans, drawer organizers, or roll-out trays to make it easier and more convenient to access your items. You can even add spice racks or wine racks for extra storage space.
For smaller kitchens, adding interior fittings is especially helpful since it maximizes every inch of space. With pull-out shelves or lazy susans, you can access the hard-to-reach corners of your cabinets and increase storage capacity without compromising accessibility.
Drawer organizers are also great for keeping your utensils, cutlery, and other small items in place, making it easy to find what you need.
You have the option to install interior fittings yourself or hire a professional. Either way, it’s important to measure the dimensions of your cabinets accurately to ensure a perfect fit.
Once installed, you’ll appreciate the convenience and organization that interior fittings provide for your kitchen.
13. Add Molding
If you are painting your cabinets, adding molding can help your builder-grade cabinets have a little bit more presence. Check out how Sarah from Yellow Cape Cod added molding to her builder-grade kitchen seen above.
Adding molding to your builder-grade cabinets is a simple yet impactful way to give them a more high-end and sophisticated look.
Molding can add depth and architectural interest to your cabinets, making them look custom-built and expensive.
There are several options when it comes to adding molding to your cabinets. Crown molding is a popular choice for top cabinets, as it creates a seamless transition between the cabinets and the ceiling.
For a more modern and streamlined look, choose simpler and sleeker molding.
Adding molding to your builder-grade cabinets is a relatively simple DIY project that can be done with basic tools and materials.
It can instantly elevate the look of your cabinets and make them look more custom and high-end.
With the addition of molding, your cabinets will become a focal point in your kitchen and add a touch of elegance and sophistication to the space.
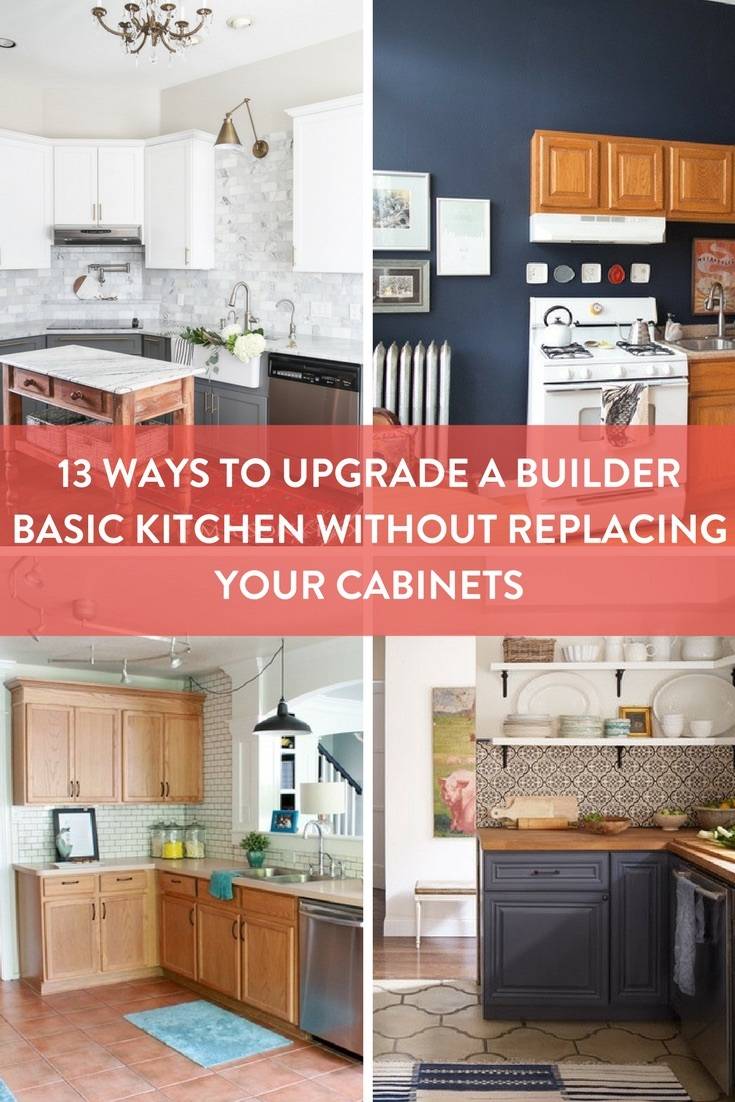
Hopefully you now feel empowered with ideas to make your kitchen more custom? Maybe you can even use these photos as examples to help a hesitant partner finally grab a paint brush. Looking for more ideas to spruce up your kitchen? Check out some of our favorite kitchen flooring ideas!
