Faith Towers
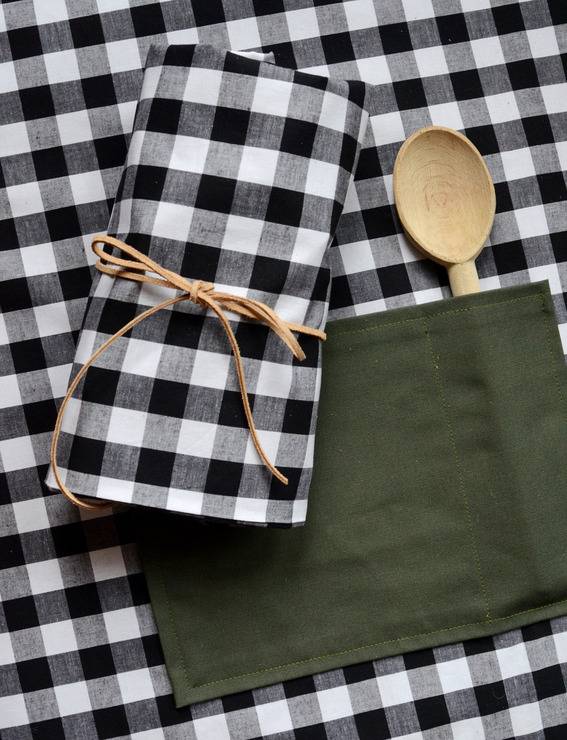
Today I wanted to share my latest project with you… an adjustable apron made of cotton gingham and canvas, and a coordinating bar tool pouch. These are both super easy projects, and won’t cost much to make either! Click through for the full tutorial.
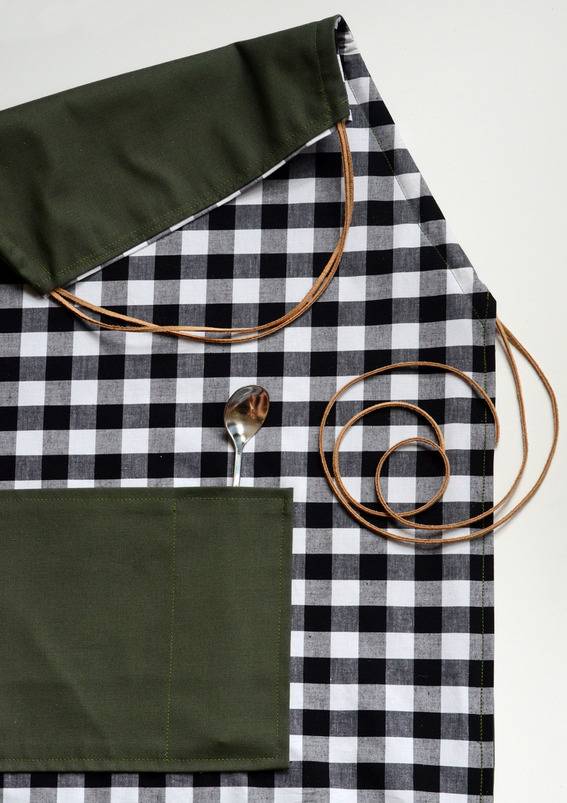
Here’s my favorite part… the apron is reversible! And the suede ties run up one side of the apron, around the neck and then down the other side – so you can adjust the tightness of the neck if need be.
And you can keep your bar tools organized by making the coordinating bar tool pouch shown below:
But back to the apron for a minute. The process is really very simple. Here’s what you’ll need for your apron:
– 1 yard of canvas fabric
– 1 yard of contrasting cotton fabric
– Matching thread
– 4 yards of suede cord, cut in half (sometimes referred to as “suede lace”)
– Pins
– A safety pin
– Scissors
– Iron
– Sewing machine or needle and thread
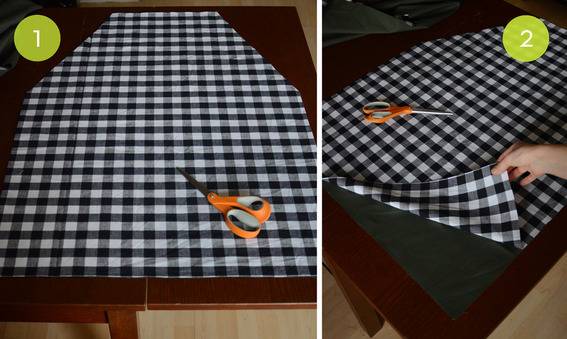
1. Begin by cutting out the main cotton piece of the apron. It should be 24″ wide by 32″ tall. The short edge at the top (the neckline) should be 13″ wide. The spot where the diagonal edge meets the side of the apron (shown on the left side of image 1) should be approximately a 130 degree angle.
2. Cut a piece the exact same size and shape out of the canvas fabric as well.
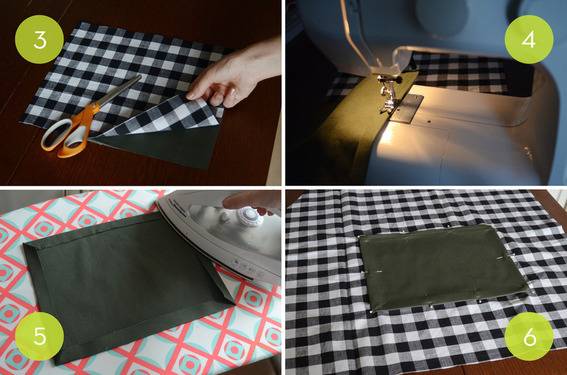
3. Next, cut the pocket pieces. They should both be 12″x9.”
4. Hem one of the long edges of the canvas fabric with a half inch seam allowance. You will use a half inch seam allowance from now on, unless otherwise noted.
5. Now iron the other three edges using the same allowance. Fold the corners in as shown above to keep them from peaking out at the edges.
6. Center the canvas pocket piece on the bottom portion of the cotton apron front piece, ensuring that the hemmed edge is at the top. Pin in place.
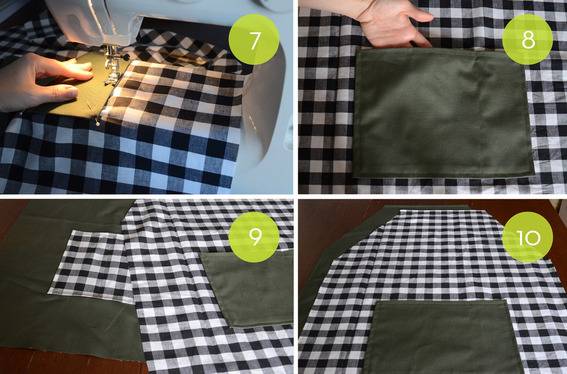
7. Now sew along the three remaining edges, leaving the top one open (this will be the opening of your pocket).
8. Add a seam 2″ from the right side of the pocket to create two compartments.
9. Now repeat this exact same process for the canvas apron front piece and the cotton pocket piece.
10. Next, hem along the top and two side edges of both pieces. The edges that should not be hemmed are the diagonal edges and the bottom ones.
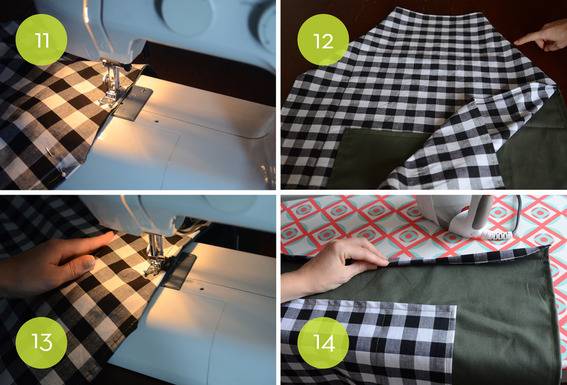
11. Now, with right sides together, sew the diagonal edges of one apron front piece to the other.
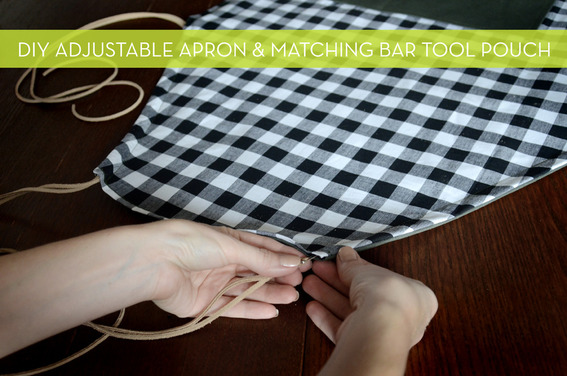
12. Now you will flip everything right side out and create a casing for the suede ties along those same diagonal edges. Sew along that edge (with right sides still out) using a 3/4″ seam allowance. Do the same on the other diagonal edge.
13. Sew the top and two sides together, being careful not to sew all the way to the edges (otherwise you will sew the casing shut on the diagonal sides, and you won’t be able to thread the suede ties through).
14. On the only remaining raw edge, the bottom, fold both pieces over twice and iron in place. Pin and sew along this line.
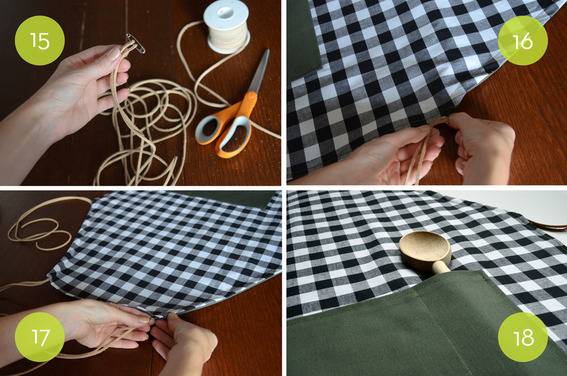
15. Next, attach a safety pin to the ends of the two pieces of suede.
16. Thread it up through the casing you created, beginning where the side of the apron meets the diagonal edge.
17. Continue up and around and down through the other diagonal edge casing.
18. Trim the ends of the suede ties if they’re too long. And your apron is complete!
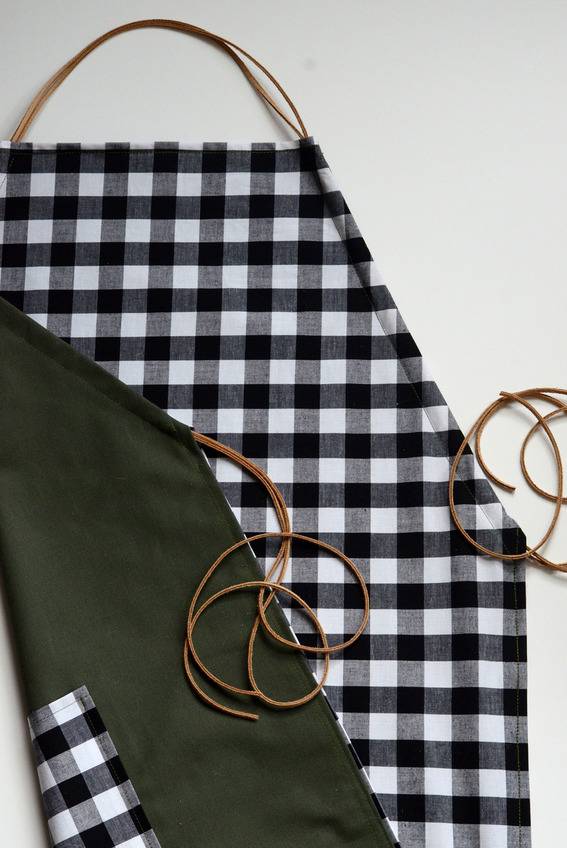
Fun, right? The great thing is that you can really customize this any way you like. Grab some floral fabric and satin cord for a more feminine feel, or denim and leather if you’re going for the mixologist look.
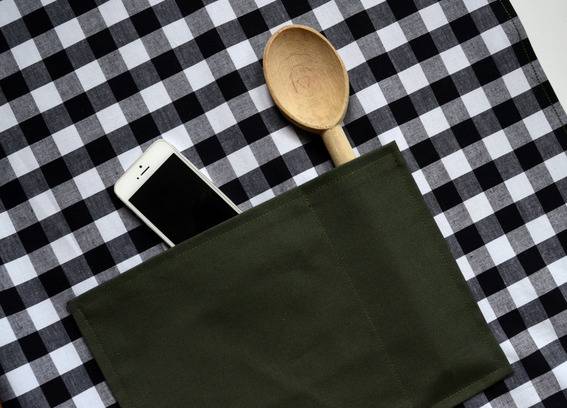
I like to have a spot for my phone, because usually if I’m wearing an apron that means I have friends coming over. But you can customize the pocket the way you want it… if you’d rather have one big pocket, skip that extra seam. Prefer more compartments? Add 2 or 3 seams.
Now, onto the coordinating bar tool pouch.
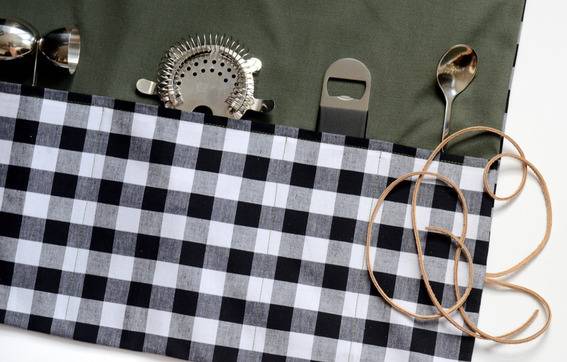
Here’s what you’ll need for this portion of the project:
– 1/2 yard of canvas fabric
– 1/2 yard of contrasting cotton fabric
– Matching thread
– 1 yard of suede cord, cut in half
– Pins
– Iron
– Scissors
– Sewing machine or needle and thread
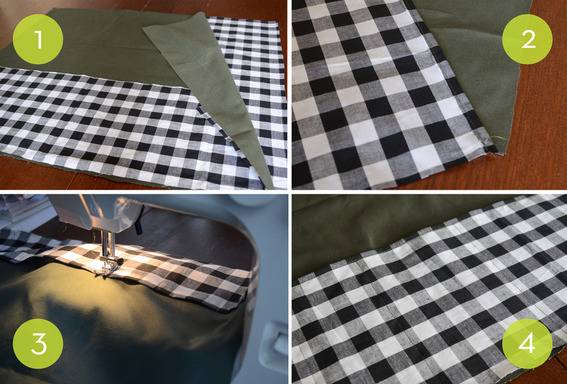
1. Begin by cutting out the three pieces of fabric that you’ll need for the bar tool pouch. Cut one piece of cotton fabric that is 22″x26″ and one that is 9″x26″. Then cut one piece of canvas that is also 22″x26″.
2. Hem one of the long edges of the smaller piece of cotton fabric.
3. With right sides both facing up, place the small piece of cotton fabric on top of the larger piece of canvas (positioning it along the bottom of the canvas). Sew vertical seams every couple of inches. These will create the pockets for your bar tools. Feel free to vary the sizes of each compartment depending on what bar tools you will be putting inside.
4. It should now look like this.
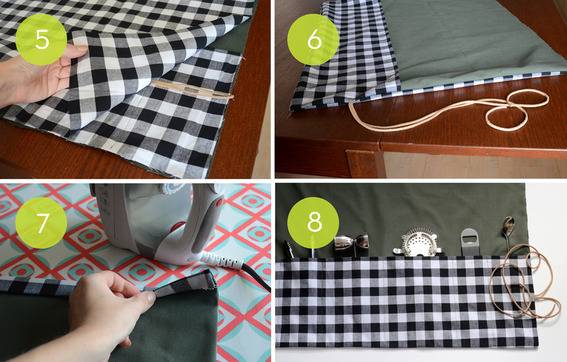
5. Next, place the two ends of the suede cord at one edge as shown above and place the remaining unused piece of cotton fabric on top. Right sides should be together. Sew the two sides and bottom together, leaving just the top edge open.
6. Flip it right side out and it should look like this.
7. Now use an iron to fold the raw top edge down twice. Sew in place.
8. And now your bar tool pouch is finished too!
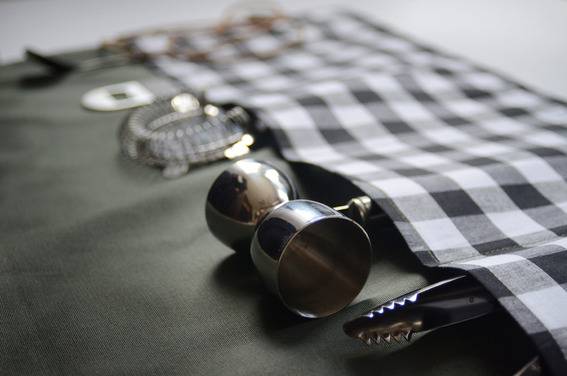
Place your tools in the pockets and fold the top half of the pouch down over the tools. Roll it up, tie the cords around it… and now your tools will stay safe until the next time you’re playing bartender.
Now go mix up a cocktail… and don’t forget to wear your new apron!

Yes! I love the fabric choices on this project. Great job, Faith.
Thanks Chris, happy to hear that you like it!