Are you looking for a fun and creative way to add some color to your glassware? In this blog post, we will explore two unique methods on how to dye glass using Vitrail paint.
Whether you want to achieve a lava lamp effect or full coverage, these techniques will help you create beautiful and vibrant pieces to brighten up your home decor.

Materials Needed For Glass Dyeing
When you’re ready to color glass, you’ll need a few specific items to make sure your project turns out vibrant and beautiful.
Glass
First, grab some clear glass items like mason jars or glass bottles. Their see-through quality will let the Vitrail paint shine through, filling your space with color.
Plastic straws
Plastic straws are needed too, as they work great for applying paint to the glass without touching the sides, thanks to them being flexible and narrow. I was able to grab these from the local dollar store.
Vitral Glass Paint
The Main item needed for this project is the Vitrail glass paint, available in various colors to match any decor or theme you have in mind.
Its rich color and compatibility with glass make it perfect for this kind of craft.
Acetone
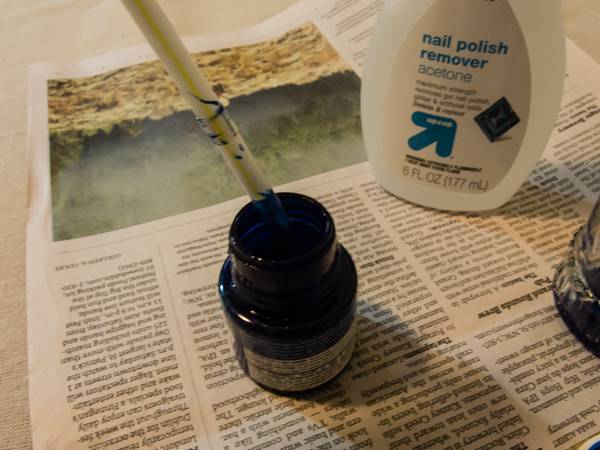
You’ll also need acetone, which is commonly found in nail polish remover. I was able to find some at my local beauty supply store, but can also be found at drug stores or your local Walmart.
This will help create a mesmerizing lava lamp effect by thinning the paint and allowing it to swirl more freely inside the glass.
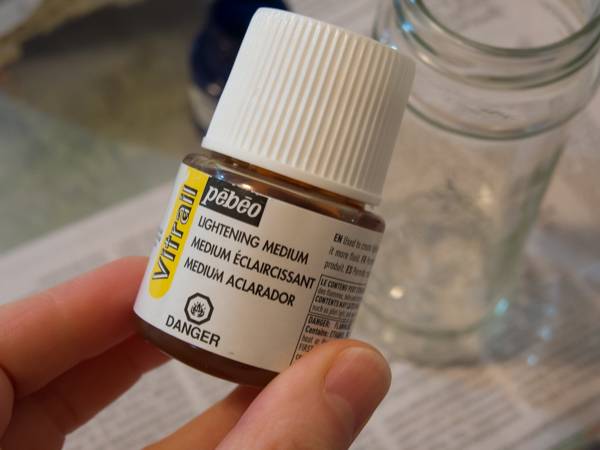
Vitrail Lightening Medium
Lastly, the Vitrail Lightening Medium is essential for a more opaque finish, diluting the paint’s intensity and providing a lighter tint and more even coverage inside the glass.
These materials together form the toolkit for turning plain glass into extraordinary, colorful pieces.
Each one plays a key part in the dyeing process, from getting ready to the final reveal.
Preparing Your Glass for Dyeing
If you’re getting into glass dyeing, the first and most important step is to make sure your glass items are ready for painting.
This prep phase is super important because any dust, fingerprints, or residues can mess up how the paint sticks to the glass, making the color look uneven.
Start by giving your chosen glass items—like mason jars, bottles, or any clear glass vessels—a good wash with gentle dish soap.
Rinse them with warm water to get rid of any soap and dirt.
It’s crucial to make sure the glass is totally dry inside and out, so dry them with a lint-free towel or let them air dry completely.
To be extra thorough, wipe the glass with a soft cloth dampened with acetone or alcohol to make sure there are no oils or residues left.
This not only makes the glass nice and clean but also helps the paint stick better.
Once your glassware is sparkling clean and totally dry, you’re all set to start dyeing your glass.
Getting the glass ready like this lays the groundwork for making sure the Vitrail paint’s bright colors really shine and stick smoothly to the inside of your glass items.
Method 1 | Dying Glass For The Lava Lamp Effect
To create the lava lamp effect, start by using Vitrail paint and some acetone to make a cool swirl inside your glass jars.
Take a plastic straw and dip it into the Vitrail paint, making sure you have enough to work with.
Drip the paint from the straw to the bottom of your jar, avoiding the sides to get the swirling effect you want.
Next, grab another clean straw and some acetone.
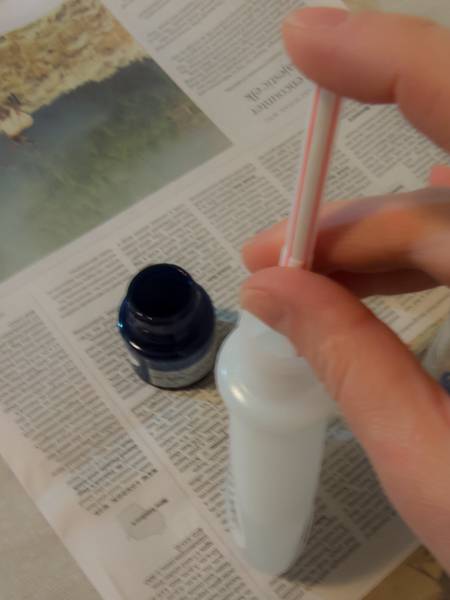
Use the same technique to draw up some acetone and carefully release it into the jar, aiming to mix it with the paint at the bottom.
This step is where the magic starts to happen as the acetone thins the paint, creating our desired effect.
As the paint’s consistency changes, use another straw to thoroughly stir the mixture at the bottom of the jar.
This is important for creating the fluid, dynamic look we’re going for.
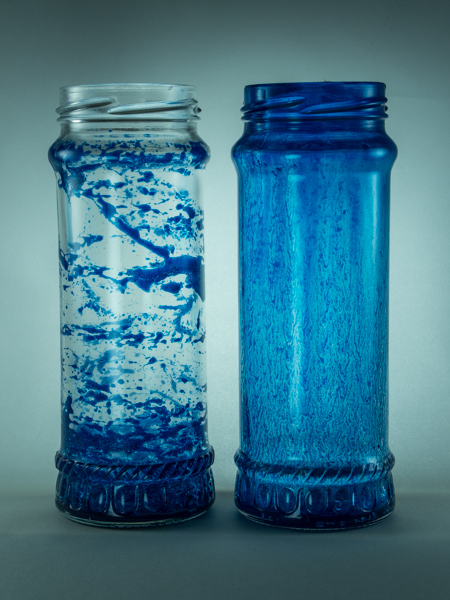
Finally, gently rotate the jar on its side to bring the lava lamp effect to life, allowing the thinned paint to swirl and coat the interior.
This will create those enchanting, free-flowing patterns that mimic the iconic lava lamp aesthetic.
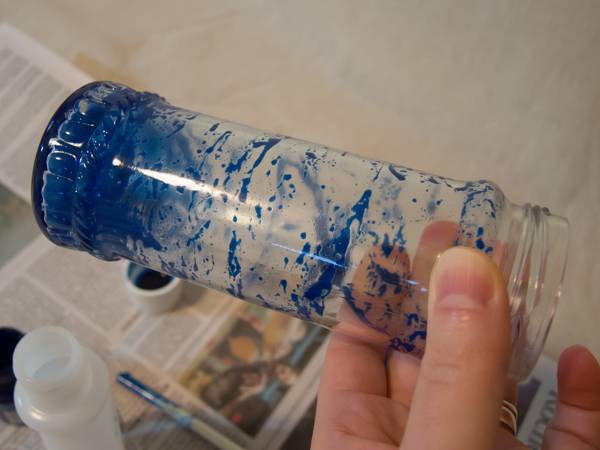
As you turn the jar, the colors and shapes will blend and move, making a unique piece of art with every turn.
Method 2 | Achieving Full Coverage
If you want to give your glass items a more consistent color, you can try the full coverage method.
With this technique, you mix Vitrail paint and Lightening Medium to coat the inside of the jar with a smooth, even color.
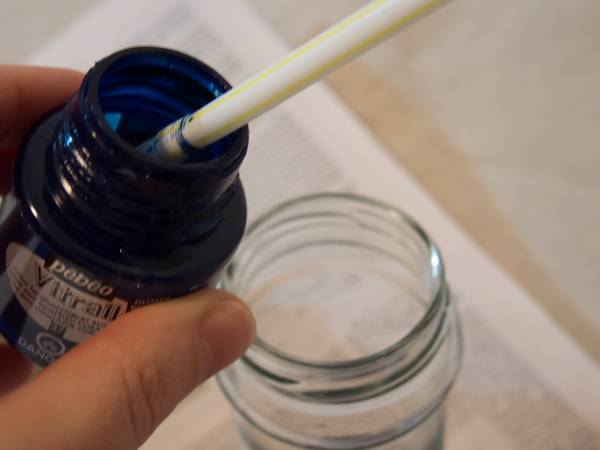
Start by carefully applying Vitrail paint to the bottom of your jar. Then, use a clean straw to mix in the Lightening Medium, creating a lighter, more flexible paint.
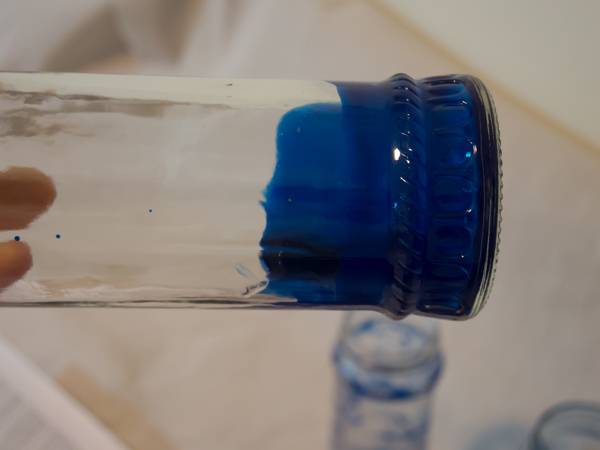
Once mixed, rotate the jar to make sure the paint covers all sides of the jar, giving it a uniform tint.
This method turns regular glassware into beautiful works of art, adding a pop of color to any collection or décor.
The Finishing Touches
After dyeing your glass items using the methods described, make sure to let the paint dry completely to ensure the colors set well.
The drying time depends on factors like humidity and temperature, so be patient to preserve the vibrant hues and intricate patterns.
Once dry, you can protect your artwork by applying a clear sealant or specialized glass varnish.
This protective layer extends the life of your colored glassware and makes it more resistant to handling and cleaning, ensuring the colors remain vivid.
This step is highly recommended for those who want to use or display their glass items regularly, as it locks in the beauty of your craft, allowing you to enjoy it worry-free.
Creative Ideas and Uses for Your Dyed Glass
Get ready to take your newly colored glass pieces to the next level by using them in your home or as gifts.
These colorful jars and bottles can be turned into stylish vases for flowers, or used as candle holders to create a warm, glowing atmosphere.
You can also repurpose them as organizers for your desk or kitchen, or use them as eye-catching centerpieces for gatherings.
Additionally, they make thoughtful, personalized gifts when filled with homemade treats or bath salts.
The possibilities are endless, so let your creativity run wild and have fun experimenting with different colors and dyeing techniques to create a collection that suits your home or makes the perfect handmade gift for any occasion.
@Vikki I have seen this video before, and the lady in the video painted the glass on the OUTSIDE. On this site they are trying to tint on the inside. One of those paints cannot be baked due to its flammable properties; I can’t remember which one.
Pebeo Vitrail should not be shaken, it needs to be stirred gently & thoroughly. It is highly pigmented which is why you mix it with the Lightening fluid made for adjusting the color and acting as an extender. There is another Pebeo product called Porcelaine which comes in opaque & transparent colors which can be baked for permanence. You don’t bake Vitrail because it is oil based & lightening fluid is a solvent.
@Des, you have to be careful, the vitrail is for decorating. Once bake it becomes somewhat resistant. Vitrae is actually more resistant, even washable. They are both from Level.
Sorry but both of these look just awful. There’s got to be a better way to do that without so many discouraging results.